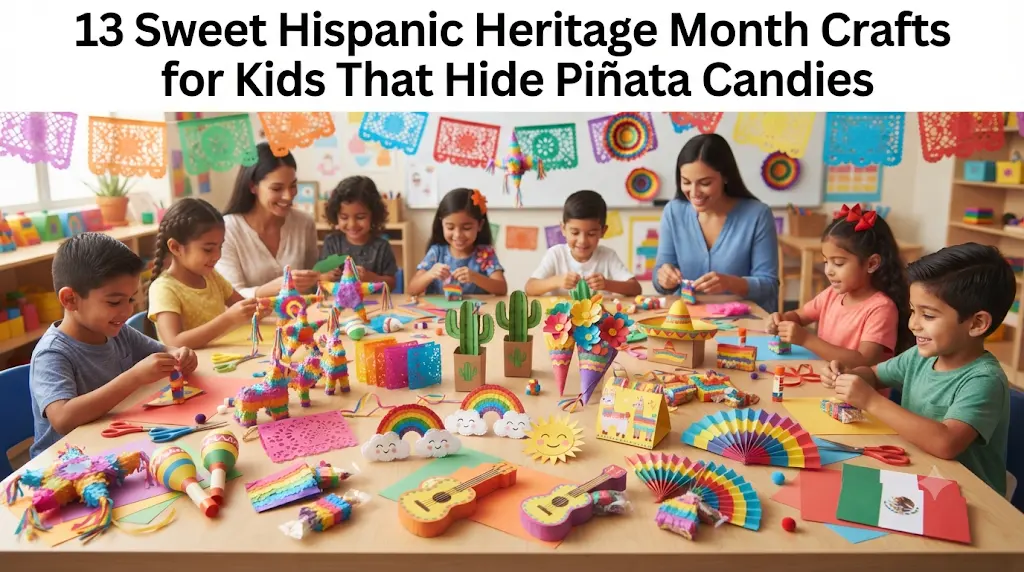
Hispanic Heritage Month is one of my favourite times of the year because it gives children a chance to learn through bright colours, music, storytelling, and hands-on creativity. When my preschool class starts pulling out tissue paper and glue sticks instead of tablets, the room quickly fills with excited chatter, giggles, and plenty of imagination. Adding a tiny candy surprise inside each craft makes the experience even more memorable.
You don’t need fancy supplies to make these projects special. Most of these crafts use inexpensive materials you probably already have at home or in the classroom. There will be scraps of paper on the floor and a few sticky fingers along the way, but that’s part of preschool crafting. Some of our favourite creations have come from beautifully messy afternoons where every child proudly held up something completely unique.
Safety First
These activities are designed for young children, but adult supervision is always necessary. Help children use child-safe scissors, choose non-toxic glue and washable art supplies, and supervise closely whenever small decorations or wrapped candies are involved. If you’re crafting with toddlers or mixed-age groups, consider replacing small embellishments with drawn details to reduce choking risks.
1. Mini Tissue Paper Piñata Star
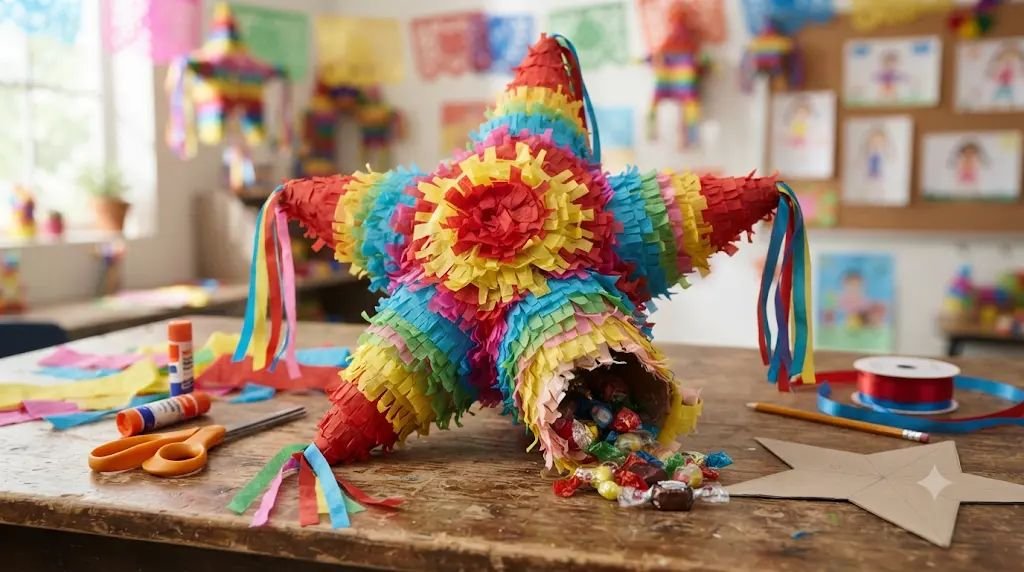
Nothing gets preschoolers more excited than discovering their colorful star hides a tiny candy surprise inside. This simple craft introduces children to the look of a traditional piñata while giving them plenty of opportunities to practice tearing, gluing, and decorating.
Skill Developed: Fine motor skills, hand-eye coordination, color recognition, and patience.
Materials Needed:
- 2 star shapes cut from cardstock
- Bright tissue paper
- Glue stick
- White craft glue
- Wrapped piñata candies
- Ribbon or yarn
- Hole punch
- Child-safe scissors
Step-by-Step Instructions
- Decorate one cardstock star. Tear the tissue paper into small squares and glue them across the front of one star. Encourage children to overlap colors for a fluffy piñata texture. Preschoolers love choosing their own color combinations, and every finished star looks different.
- Build the candy pocket. Apply white craft glue around the edges of the second star, leaving a small opening near one point. Press the decorated star on top and gently hold the edges together for a minute.
- Hide the candy. Once the glue has started to set, slide two or three wrapped candies into the opening. Keep the treats lightweight so the star holds its shape.
- Seal the final edge. Add glue to the remaining opening and press it closed. Wipe away any extra glue with a damp paper towel before it dries.
- Add a hanger. Punch a hole near the top point of the star and thread ribbon or yarn through it. Tie a simple knot so children can proudly hang their creation.
- Fluff the tissue paper. Gently lift some of the tissue paper pieces to give the star a fuller, textured look. This little finishing touch makes the craft resemble a miniature piñata.
Pro-Tip / Teacher’s Note: If you’re working with younger preschoolers, cut the stars ahead of time. They’ll enjoy decorating much more than waiting for help with tricky cutting.
2. Fiesta Paper Cup Maracas with Hidden Candy
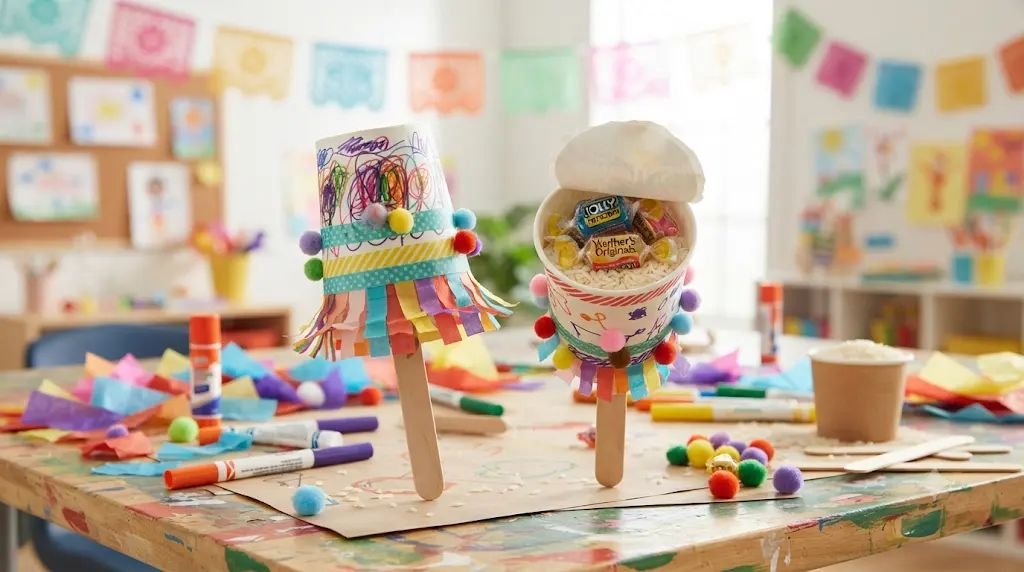
These cheerful maracas quickly become the soundtrack to any Hispanic Heritage Month celebration. Kids love decorating them, shaking them during music time, and finding the hidden candy after the festivities are over.
Skill Developed: Rhythm, listening skills, bilateral coordination, and fine motor development.
Materials Needed:
- 2 paper cups
- Rice or dried beans
- 1 wrapped piñata candy
- Craft stick
- Glue
- Colorful markers
- Washi tape or masking tape
- Pom-poms or tissue paper
Step-by-Step Instructions
- Decorate both cups. Invite children to cover the cups with colorful patterns using markers, tissue paper, or stickers. Bright stripes and dots always remind my students of a fiesta.
- Fill the maraca. Place a small spoonful of rice or dried beans into one cup, then tuck one wrapped candy inside. The candy stays hidden until the craft is opened later.
- Seal the cups together. Spread glue around the rim and press the second cup firmly on top. Wrap colorful tape around the seam to make it stronger.
- Attach the handle. Glue a craft stick securely along one side and let it dry completely before children begin shaking it.
- Test the sound. Once everything is dry, encourage children to gently shake their maracas while singing or clapping along to festive classroom music.
- Save the surprise. Let children know the hidden candy is their reward after the celebration or classroom performance.
Pro-Tip / Teacher’s Note: A little rice goes a long way. Overfilling the cups makes the maracas heavy and harder for small hands to shake comfortably.
3. Rainbow Donkey Candy Pouch
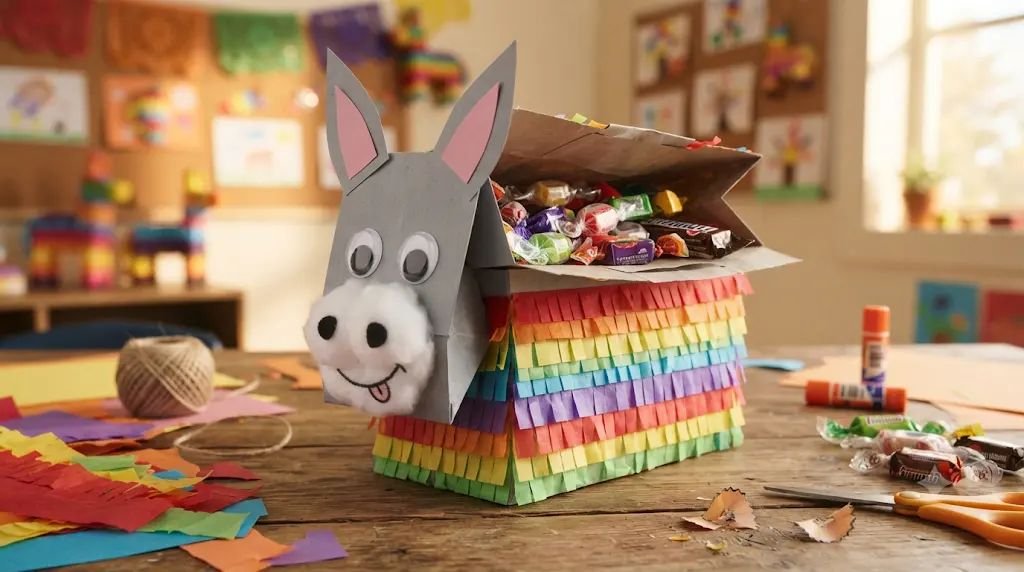
This cheerful donkey combines imaginative play with a sweet surprise tucked safely inside. Every year, I notice children giving their donkeys funny names before proudly displaying them on the classroom wall.
Skill Developed: Shape recognition, scissor practice, fine motor control, and creativity.
Materials Needed:
- Small paper lunch bag
- Gray construction paper
- Colored tissue paper
- Glue stick
- Black marker
- Googly eyes (optional)
- Wrapped piñata candies
- Cotton ball
Step-by-Step Instructions
- Create the donkey body. Glue pieces of gray construction paper onto the front of the paper bag to make the head, ears, legs, and tail. Younger children can work with pre-cut pieces.
- Decorate the face. Add googly eyes or simply draw friendly eyes with a marker. Glue on a cotton ball for the nose and draw a smiling mouth.
- Add colorful fringe. Tear strips of tissue paper and glue them around the donkey’s back and tail. The bright fringe gives it the playful look of a real piñata.
- Hide the treats. Place three or four wrapped candies inside the paper bag before folding the top closed.
- Seal and decorate. Close the bag with a sticker or ribbon, then let children personalize the back with their names or small drawings.
- Display together. Line the finished donkeys across a shelf or bulletin board until it’s time for children to enjoy the hidden treats.
Pro-Tip / Teacher’s Note: Some children prefer drawing expressive faces instead of using googly eyes. Those handmade smiles often become the cutest part of the entire project.
4. Papel Picado Candy Envelope
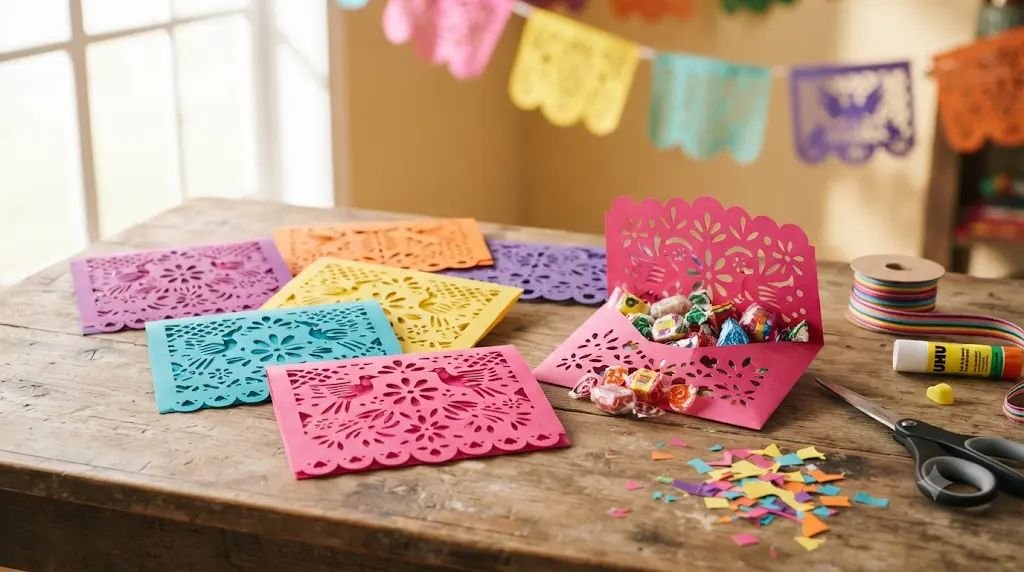
Traditional papel picado decorations inspire this easy craft that doubles as a tiny candy holder. Children are always amazed when folded paper opens into beautiful patterns, making this activity feel a little like magic.
Skill Developed: Cutting skills, pattern recognition, concentration, and hand strength.
Materials Needed:
- Bright construction paper
- Child-safe scissors
- Glue stick
- Wrapped piñata candies
- Ribbon
- Markers or crayons
- Decorative stickers
Step-by-Step Instructions
- Fold the paper. Fold a sheet of construction paper into a small rectangle, then fold it once more to create layers that are easy for children to cut.
- Cut decorative shapes. Help children snip small triangles, half circles, or tiny squares along the folded edges. Remind them not to cut all the way through the paper.
- Unfold the design. Carefully open the paper to reveal the repeating cutout pattern. This is usually the moment when the classroom fills with excited “Wow!” reactions.
- Make the envelope. Fold the bottom and sides inward, glue the edges together, and leave the top flap open. Once dry, slip one or two wrapped candies inside.
- Finish the decoration. Close the flap with a sticker or ribbon, then let children add colorful drawings before hanging the envelopes as festive classroom decorations.
Pro-Tip / Teacher’s Note: If little hands struggle with folding, prepare the folds ahead of time so children can focus on cutting and decorating instead of getting frustrated.
5. Cardboard Cactus Candy Holder
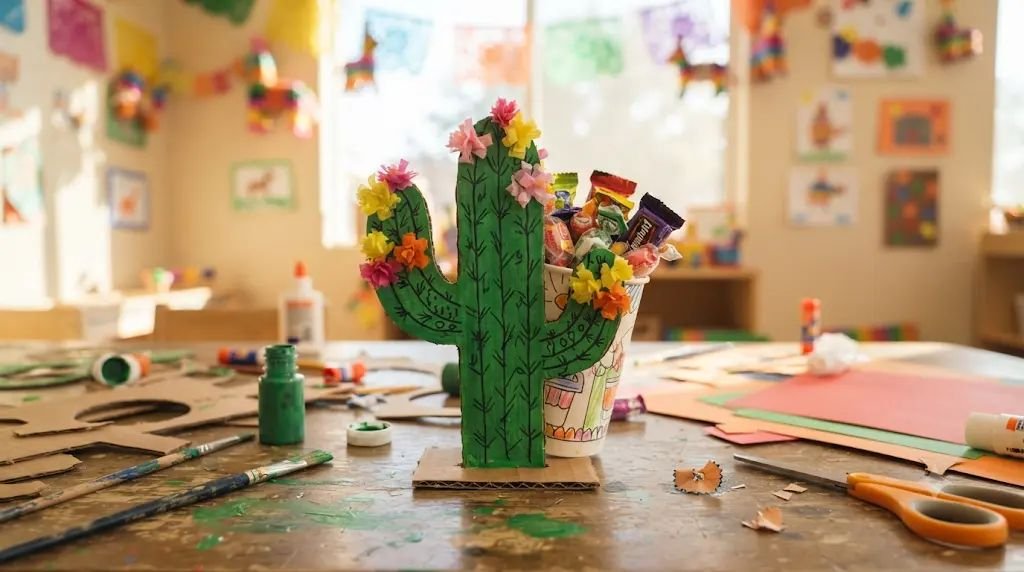
A bright green cactus might not seem like it could hide candy, but preschoolers absolutely love discovering the little surprise tucked inside. This craft also makes a cheerful decoration that stands up on a desk or classroom shelf.
Skill Developed: Fine motor skills, painting, hand-eye coordination, and creative problem-solving.
Materials Needed:
- Cardboard from a cereal box
- Green craft paint or green construction paper
- Paintbrush
- Glue
- Child-safe scissors
- Small paper cup
- Wrapped piñata candies
- Pink or yellow tissue paper
- Black marker
Step-by-Step Instructions
- Make the cactus shape. Draw a simple cactus with two side arms onto cardboard and carefully cut it out. Older preschoolers can help trace the outline while adults handle thicker cardboard if needed.
- Color the cactus. Paint the entire cactus green or cover it with green construction paper. Set it aside until completely dry before moving on.
- Decorate the cactus. Draw tiny black dots to represent cactus spines. Add small tissue paper flowers along the top for a cheerful pop of color.
- Create the hidden candy holder. Glue a small paper cup to the back of the cactus. Once the glue has dried, place two or three wrapped candies inside the cup.
- Help it stand up. Cut a small cardboard base with a slit in the center. Slide the cactus into the slit so it stands upright on a table.
- Display your creation. Place several finished cacti together to create a colorful “desert garden” before children discover the hidden treats.
Pro-Tip / Teacher’s Note: If you’re making these with a large class, prepare the cardboard cactus shapes ahead of time. That leaves more time for painting and decorating, which are usually the children’s favorite parts.
6. Fiesta Flower Candy Cone
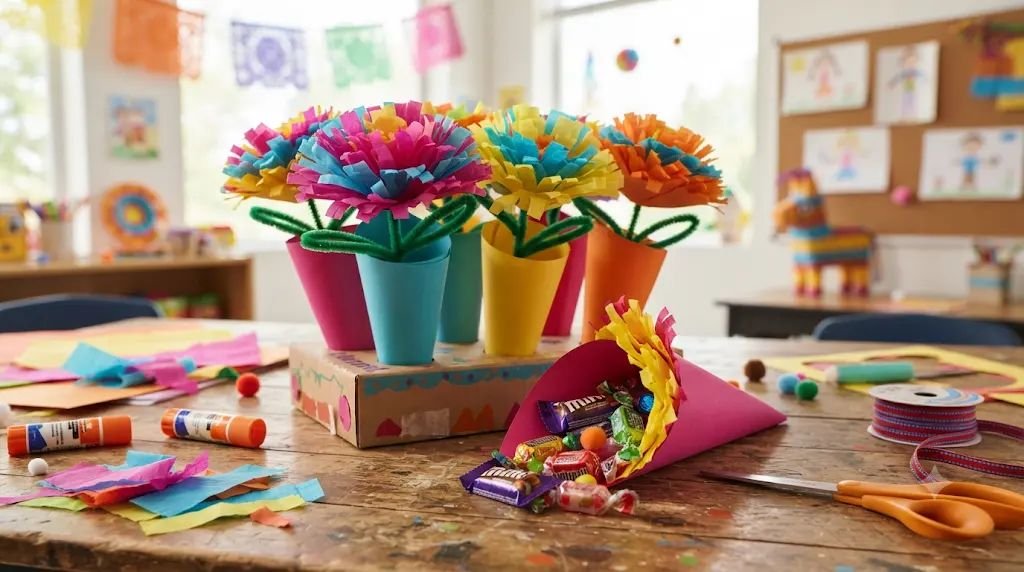
These vibrant paper flowers brighten any classroom and secretly hold a small candy surprise inside. They’re simple enough for preschoolers but still look beautiful hanging around a celebration table.
Skill Developed: Fine motor skills, color matching, folding, and creativity.
Materials Needed:
- Colored construction paper
- Tissue paper
- Glue stick
- Child-safe scissors
- Wrapped piñata candies
- Ribbon
- Green pipe cleaner
Step-by-Step Instructions
- Make the flower cone. Roll a piece of colorful construction paper into a cone shape and glue the edge securely. Leave the top open.
- Decorate with petals. Cut simple flower petals from tissue paper and glue them around the opening of the cone. Children can mix bright colors to create unique flowers.
- Add the stem. Twist a green pipe cleaner around the bottom of the cone to create a sturdy flower stem.
- Hide the candy. Place two wrapped candies inside the cone before gently covering the opening with extra tissue paper petals.
- Finish with ribbon. Tie a small ribbon around the stem for a festive finishing touch.
Pro-Tip / Teacher’s Note: Let children choose their own flower colors instead of copying an example. The variety always makes the finished display look much more vibrant.
7. Sombrero Treat Box
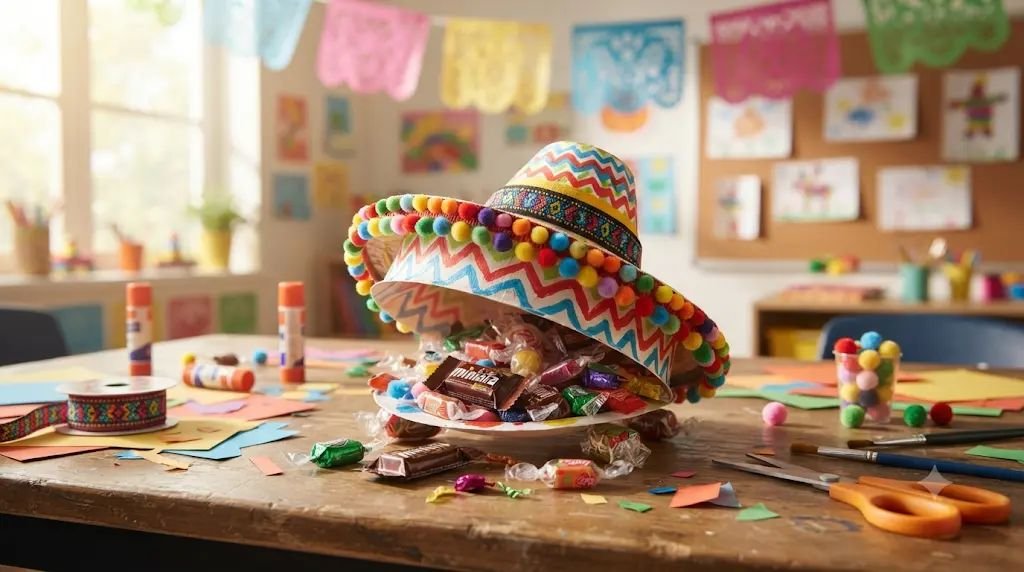
This colorful sombrero opens to reveal a tiny candy surprise hidden underneath. It takes a little more assembly than the previous crafts, making it a fun project for older preschoolers or kindergarten classes.
Skill Developed: Following directions, fine motor skills, spatial awareness, and creative thinking.
Materials Needed:
- Paper bowl
- Cardstock
- Paint or markers
- Glue
- Wrapped piñata candies
- Ribbon
- Pom-poms
- Child-safe scissors
Step-by-Step Instructions
- Create the brim. Trace the paper bowl onto cardstock and draw a larger circle around it. Cut out the large circle and remove the center so the bowl fits snugly inside.
- Decorate both pieces. Paint or color the bowl and brim using bright patterns. Encourage children to add stripes, dots, or zigzags inspired by festive celebrations.
- Attach the sombrero. Glue the bowl into the center opening of the brim and allow it to dry completely before continuing.
- Add decorations. Glue ribbon around the edge of the bowl and attach small pom-poms for extra color and texture.
- Hide the candy. Turn the sombrero upside down and place three or four wrapped candies underneath the bowl.
- Cover the surprise. Carefully place the sombrero back onto the table so the candies stay hidden beneath it.
- Reveal during celebration. Children can lift their sombreros at the end of the activity to find the hidden treats waiting underneath.
Pro-Tip / Teacher’s Note: Washable tempera paint works beautifully for this craft and dries with bright, cheerful colors that children love.
8. Rainbow Piñata Cloud
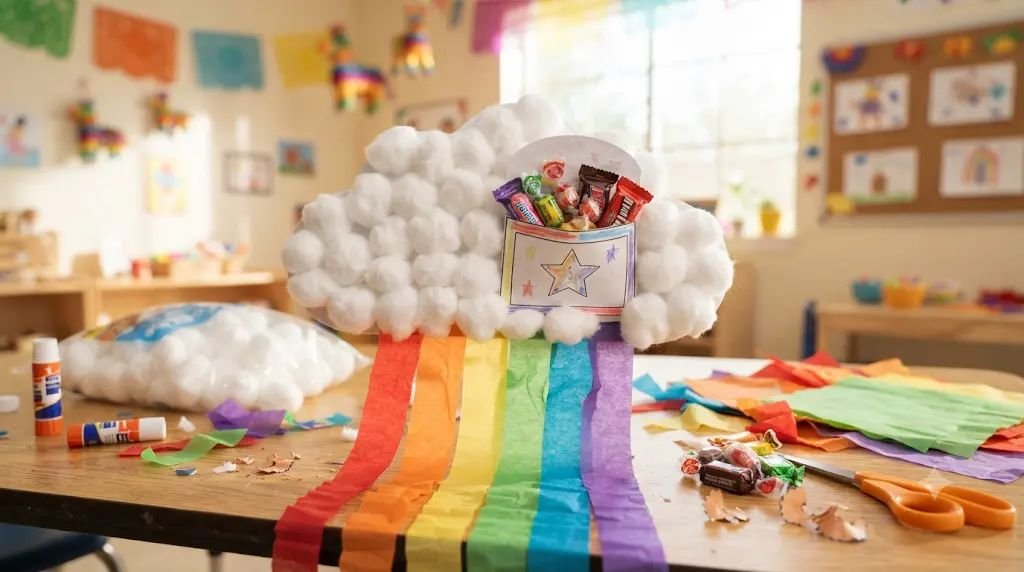
This fluffy cloud with colorful streamers becomes even more exciting when children discover the candy tucked behind it. It’s one of those crafts that always makes a bulletin board look festive.
Skill Developed: Color recognition, hand strength, fine motor skills, and creative expression.
Materials Needed:
- White cardstock
- Cotton balls
- Glue
- Rainbow tissue paper strips
- Wrapped piñata candies
- Tape
- String
Step-by-Step Instructions
- Prepare the cloud. Cut a large cloud shape from white cardstock.
- Add fluffy texture. Glue cotton balls across the front until the cloud is completely covered. Children usually enjoy stretching the cotton balls before gluing them down.
- Attach the rainbow. Glue colorful tissue paper strips along the bottom edge so they hang freely like a rainbow.
- Create the candy pocket. Tape a small folded paper pocket to the back of the cloud and place two wrapped candies inside.
- Hang the decoration. Attach string to the top and display the clouds around the classroom until it’s time for the candy surprise.
- Celebrate together. Let children carefully open the pocket after everyone has admired each other’s creations.
Pro-Tip / Teacher’s Note: Cotton balls tend to roll everywhere. I usually place them in small bowls at each table to keep cleanup much easier.
9. Llama Candy Pocket
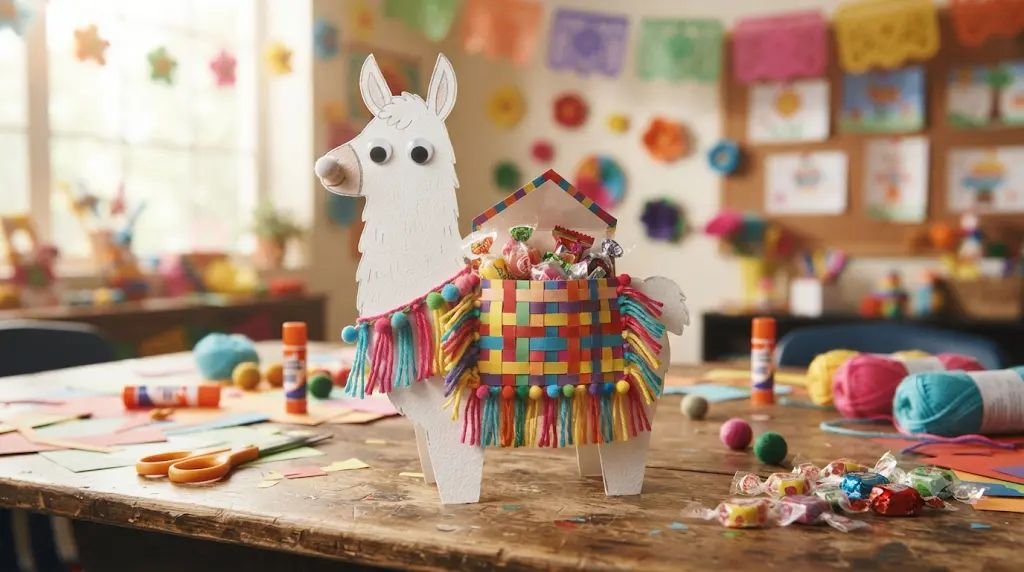
Llamas are always a classroom favorite, and this cheerful paper llama doubles as a tiny candy holder. Every year I make these with preschoolers, at least one child gives their llama a funny name before we’re even finished decorating it.
Skill Developed: Fine motor skills, shape recognition, creativity, and hand-eye coordination.
Materials Needed:
- White or brown cardstock
- Colored construction paper
- Glue stick
- Child-safe scissors
- Black marker
- Small googly eyes (optional)
- Yarn scraps
- Wrapped piñata candies
Step-by-Step Instructions
- Cut out the llama pieces. Create a simple llama body, legs, neck, and head from cardstock. Younger children can work with pre-cut templates while older kids practice cutting along bold outlines.
- Assemble the llama. Glue the pieces together and allow them to dry for a minute before adding decorations.
- Decorate the blanket. Cut a small rectangle from colorful construction paper and glue it onto the llama’s back. Add short pieces of yarn along the edges to create a playful fringe.
- Add the face. Draw kind eyes and a smiling mouth with a marker or glue on googly eyes if you’re working with children who are old enough to use small embellishments safely.
- Make the hidden pocket. Glue a folded cardstock pocket to the back of the llama, leaving the top open.
- Hide the candy. Slip two or three wrapped candies into the pocket and gently fold the opening closed with a small sticker if you’d like an extra surprise.
- Show off the herd. Display everyone’s llamas together before inviting children to discover the treats hidden inside.
Pro-Tip / Teacher’s Note: Let children choose their own blanket colors. The bright mix of patterns makes the finished llama display look lively and unique.
10. Sunshine Candy Ornament
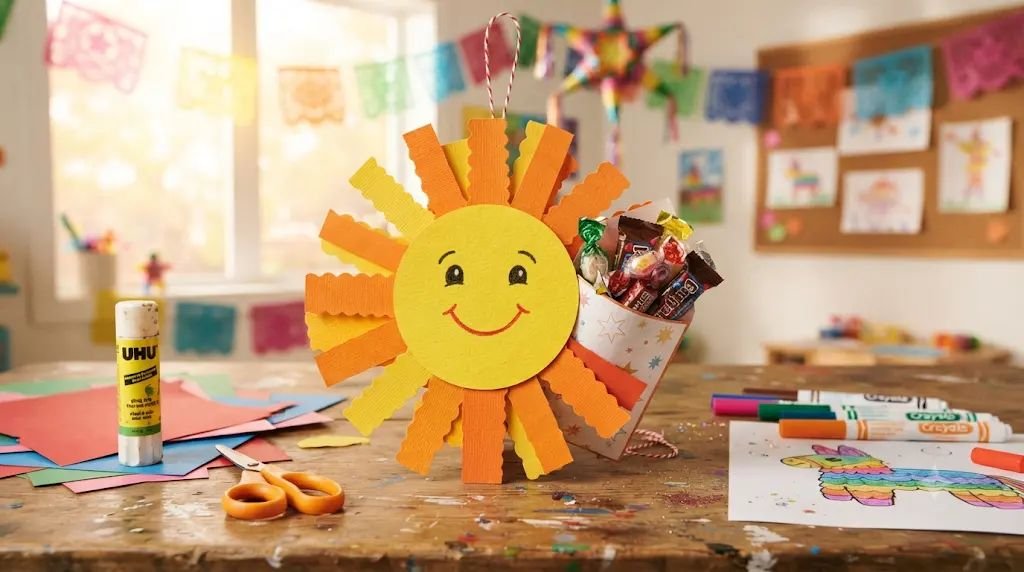
This happy sunshine is quick to make, making it perfect for busy afternoons when attention spans are getting shorter. It also brightens classroom windows with cheerful colors.
Skill Developed: Color recognition, gluing practice, and fine motor development.
Materials Needed:
- Yellow construction paper
- Orange and yellow tissue paper
- Glue stick
- Child-safe scissors
- Ribbon
- Wrapped piñata candies
- Black marker
Step-by-Step Instructions
- Create the sun. Cut a large circle from yellow construction paper and glue strips of orange and yellow paper around the edges to form sun rays.
- Decorate the face. Draw a smiling face with a black marker. Children often enjoy adding rosy cheeks or funny eyelashes.
- Attach the candy holder. Glue a small folded paper pocket to the back of the sun once the front decorations are finished.
- Add the surprise. Place one or two wrapped candies inside the pocket and fold the flap down.
- Hang your sunshine. Punch a hole near the top, thread ribbon through it, and display the ornaments around the classroom until celebration time.
Pro-Tip / Teacher’s Note: These ornaments also look beautiful hanging from a classroom reading corner or across a window where children can admire them all month long.
11. Paper Guitar Treat Holder
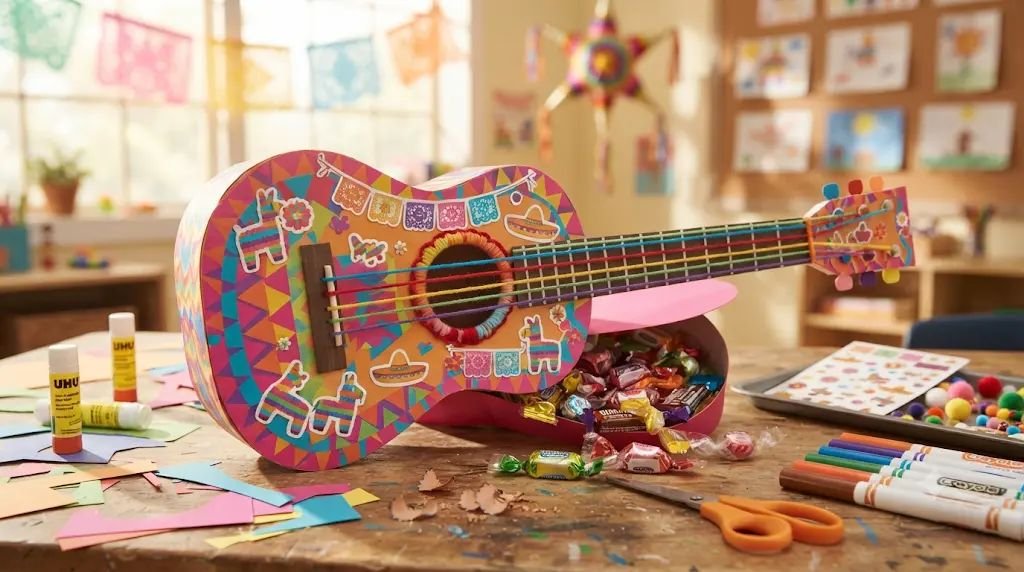
Music plays such an important role in many Hispanic celebrations, making this paper guitar a wonderful addition to your craft table. It takes a little extra time, but children love pretending to perform with their finished creations.
Skill Developed: Fine motor skills, sequencing, creativity, and imaginative play.
Materials Needed:
- Brown cardstock
- Colored paper
- Glue
- Child-safe scissors
- Yarn
- Wrapped piñata candies
- Black marker
- Ribbon or stickers
Step-by-Step Instructions
- Cut the guitar shape. Draw a simple guitar outline on brown cardstock and carefully cut it out. Cut a matching second piece to create the back.
- Decorate the front. Add colorful paper shapes, stickers, or drawn patterns around the guitar body. Encourage children to make every instrument unique.
- Add the strings. Glue short pieces of yarn across the center to represent guitar strings. Press them down gently until the glue holds.
- Create the treat pocket. Glue the front and back pieces together around the edges, leaving a small opening near the neck.
- Insert the candy. Place two wrapped candies inside the guitar before sealing the final edge.
- Finish with details. Draw tuning pegs, add ribbon accents, or decorate with extra paper designs.
- Pretend to perform. Invite children to hold their guitars during music time before opening them later to find the hidden treats.
Pro-Tip / Teacher’s Note: Yarn strings don’t have to be perfectly straight. Preschoolers usually care much more about pretending to play than making everything perfectly lined up.
12. Colorful Fiesta Fan with Candy Pocket
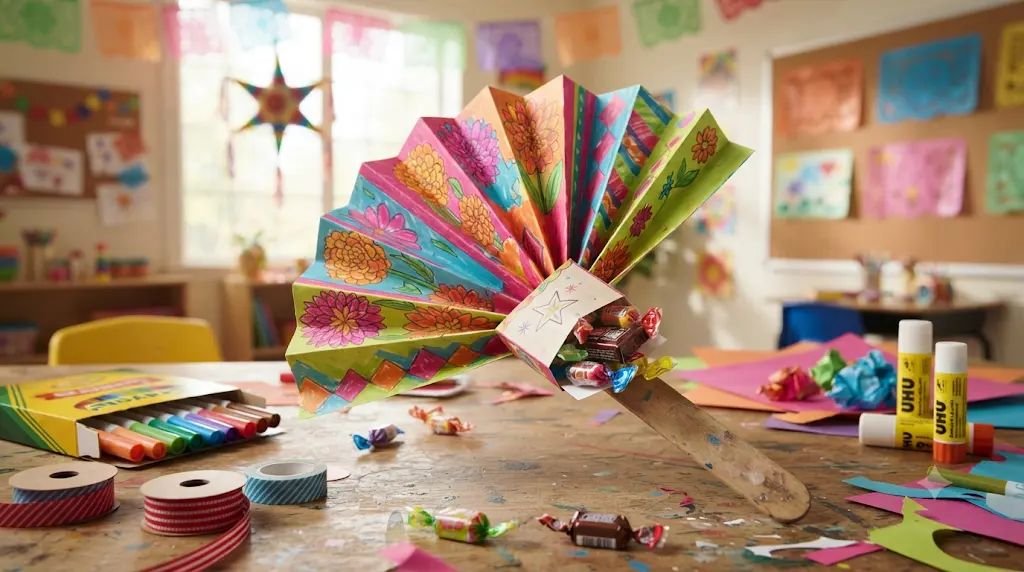
Paper fans are fun to wave during pretend celebrations, and this version includes a hidden candy compartment that children won’t notice until the end of the activity.
Skill Developed: Folding skills, hand strength, coordination, and pattern recognition.
Materials Needed:
- Bright construction paper
- Markers
- Glue
- Craft stick
- Ribbon
- Wrapped piñata candies
- Tape
Step-by-Step Instructions
- Decorate the paper. Invite children to cover both sides of a sheet of construction paper with colorful lines, dots, flowers, or simple geometric designs.
- Fold accordion-style. Help children make even back-and-forth folds from one end of the paper to the other.
- Secure the base. Pinch one end together and tape or glue it tightly before attaching a craft stick as the handle.
- Add the candy pocket. Tape a small folded paper pouch to the back of the fan near the handle and tuck one or two wrapped candies inside.
- Open the fan. Spread the folds gently to create the classic fan shape.
- Celebrate together. Use the fans during music or story time before children discover the hidden treats tucked away in the pocket.
Pro-Tip / Teacher’s Note: If accordion folding is new for your class, demonstrate one fold at a time. After the first few folds, most preschoolers quickly understand the pattern.
13. Mexican Flag Candy Pocket
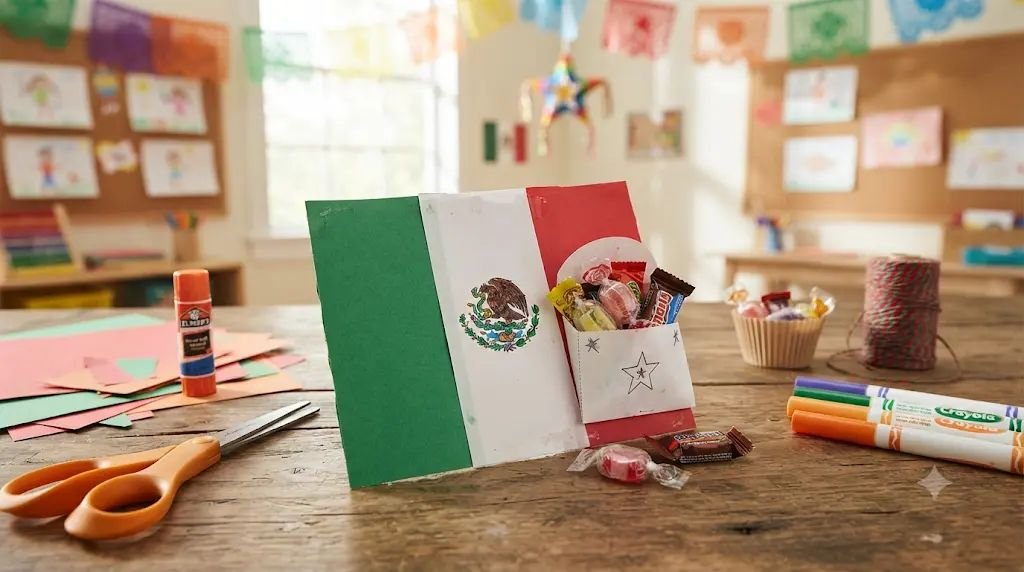
This simple paper craft introduces children to one of the many symbols they may see while learning about Hispanic cultures. It’s also an easy project for the final day of your celebration.
Skill Developed: Color recognition, fine motor skills, cultural awareness, and gluing practice.
Materials Needed:
- White cardstock
- Green construction paper
- Red construction paper
- Glue stick
- Child-safe scissors
- Wrapped piñata candies
- Markers
Step-by-Step Instructions
- Create the flag. Glue green and red construction paper strips onto each side of a white cardstock rectangle, leaving the center white.
- Add simple details. Invite children to draw a small flower, heart, or festive design in the middle rather than trying to recreate intricate artwork.
- Make the pocket. Fold another piece of cardstock into a small pouch and glue it to the back of the flag.
- Hide the candy. Place one or two wrapped candies inside the pocket and fold the top closed.
- Share and celebrate. Display the finished flags together before letting children open the hidden candy pockets at the end of your Hispanic Heritage Month celebration.
Pro-Tip / Teacher’s Note: This craft creates a wonderful opportunity to talk about respecting different cultures and appreciating traditions from around the world in an age-appropriate way.
Conclusion
Hispanic Heritage Month is a wonderful opportunity to help children learn through creativity, conversation, and play. These crafts don’t just keep little hands busy—they encourage curiosity, strengthen important preschool skills, and create joyful memories that children often talk about long after the celebration ends.
Don’t worry if every project looks a little different. Some tissue paper will wrinkle, glue might end up on a few fingers, and decorations may not be perfectly straight. That’s the magic of crafting with young children. When each child proudly holds up a colourful creation and discovers the tiny candy surprise hidden inside, you’ll know the smiles were worth every bit of the beautiful mess.