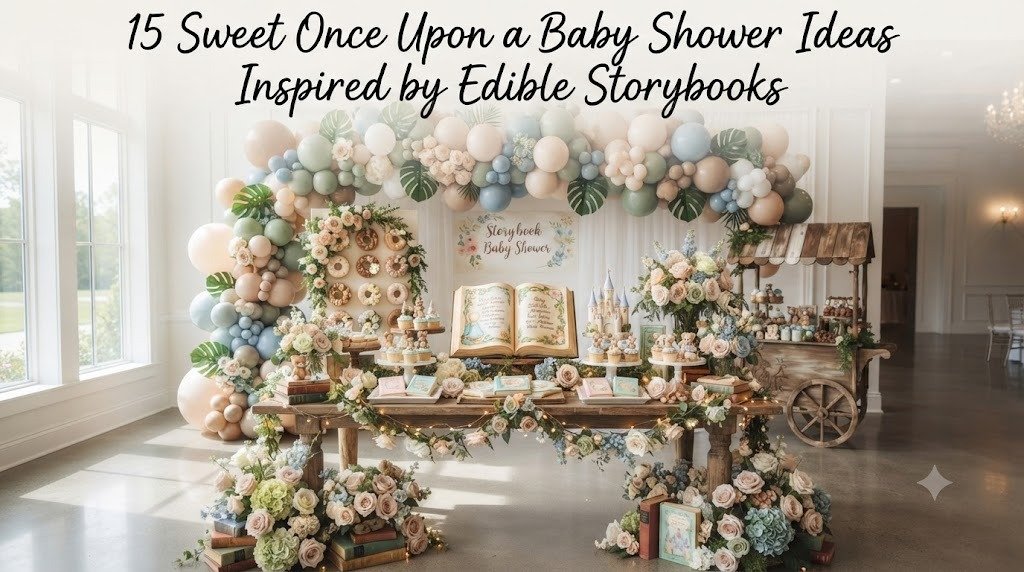
There is something magical about combining storybooks with baby showers. Every time I see a table filled with tiny storybook details, fairytale treats, and handmade decorations, it instantly reminds me of childhood bedtime stories. Adding edible storybook elements makes the celebration feel even more personal because guests aren’t just looking at the decorations—they get to enjoy them too.
I planned a storybook-themed shower for a close friend a while back, and it quickly became one of my favorite party themes. We mixed homemade desserts, simple DIY crafts, and classic children’s books to create a warm, welcoming atmosphere without spending a fortune. These ideas are easy to personalize whether you’re hosting a baby girl, baby boy, or gender-neutral celebration.
1. Storybook Cookie Cover Favors
The Concept:
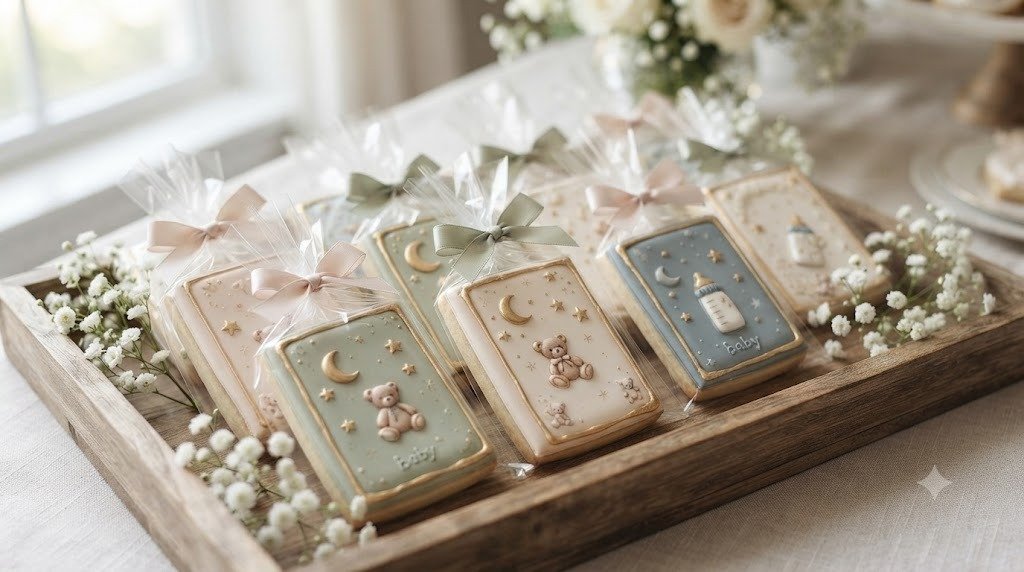
Instead of ordinary party favors, create cookies that look like miniature storybook covers. I love this idea because guests can admire the beautiful designs before enjoying a delicious treat on their way home.
Estimated Budget: Low – $25–$45
Materials Needed:
- Rectangle sugar cookies
- Royal icing
- Food coloring
- Fine decorating brushes
- Edible food markers
- Gold edible dust (optional)
- Cellophane treat bags
- Ribbon
- Small favor tags
Step-by-Step Setup Summary:
- Bake rectangle-shaped sugar cookies a day before the shower so they have plenty of time to cool completely. Fresh cookies decorated too early can crack the icing.
- Prepare royal icing in several colors. I usually choose soft pastel blue, blush pink, sage green, cream, and lavender because they resemble vintage children’s books.
- Cover each cookie with a smooth layer of icing. Let the base dry completely before adding decorative details.
- Use edible markers or thin brushes to draw simple book elements like tiny stars, moons, baby bottles, teddy bears, woodland animals, or little crowns.
- Add a decorative border around each cookie to imitate an old-fashioned hardcover book. A thin gold edge gives them an extra storybook feel without making them look too fancy.
- Pipe a short title onto each cookie such as “Once Upon a Baby,” “Baby’s First Chapter,” or “A Little Story Begins.”
- Allow the cookies to dry overnight so the decorations stay intact during packaging.
- Place each cookie inside a clear treat bag, tie it with ribbon, and attach a thank-you tag. Arrange them in a wooden crate or vintage basket near the exit so every guest leaves with an edible keepsake.
2. Edible Book Stack Centerpieces
The Concept:
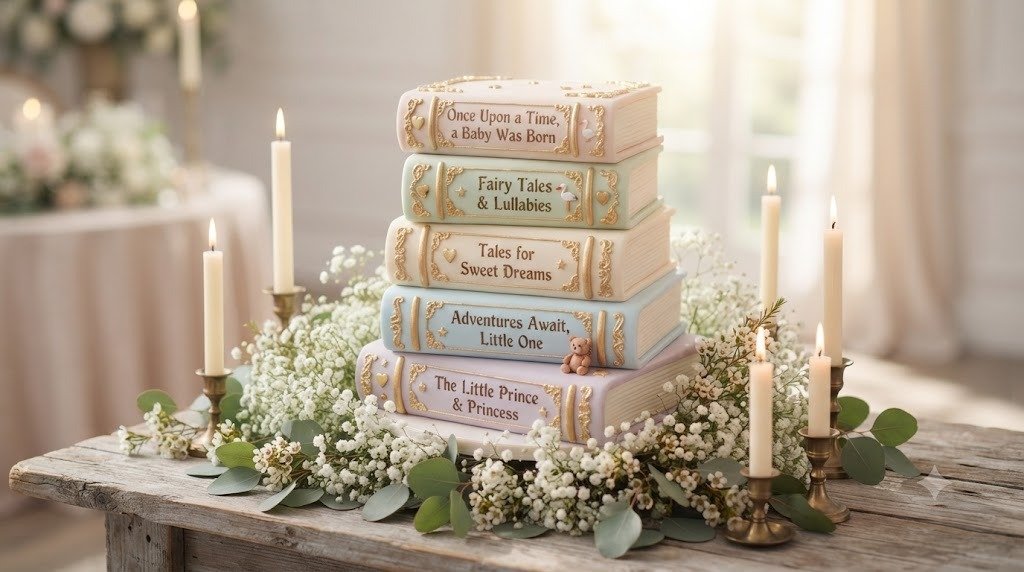
This centerpiece became everyone’s favorite decoration at one shower I hosted. Instead of stacking real books on every table, create edible versions using decorated rice cereal treats or small cake layers.
Estimated Budget: Medium – $40–$75
Materials Needed:
- Rice cereal treats or loaf cakes
- Buttercream frosting
- Fondant
- Food coloring
- Rolling pin
- Small alphabet cutters
- Cake boards
- Fresh flowers (optional)
- Artificial greenery
Step-by-Step Setup Summary:
- Prepare rectangular rice cereal treats or bake small loaf cakes several hours ahead.
- Cover each one with a thin layer of buttercream to create a smooth surface for the fondant.
- Roll fondant into thin sheets and carefully wrap each treat until it resembles a hardcover book.
- Use different pastel colors so every edible “book” looks unique.
- Add fondant strips around the edges to imitate book bindings.
- Press alphabet cutters into small fondant pieces to create cute titles like “Dream Big,” “Baby Adventures,” or “Little Explorer.”
- Stack two or three edible books on each cake board, making sure they’re stable before moving them onto the tables.
- Tuck small sprigs of greenery, baby’s breath, or silk flowers around the base to soften the display.
- Place one finished stack in the center of every guest table. They instantly become conversation starters while doubling as dessert later in the party.
3. Fairytale Cupcake Library Display
The Concept:
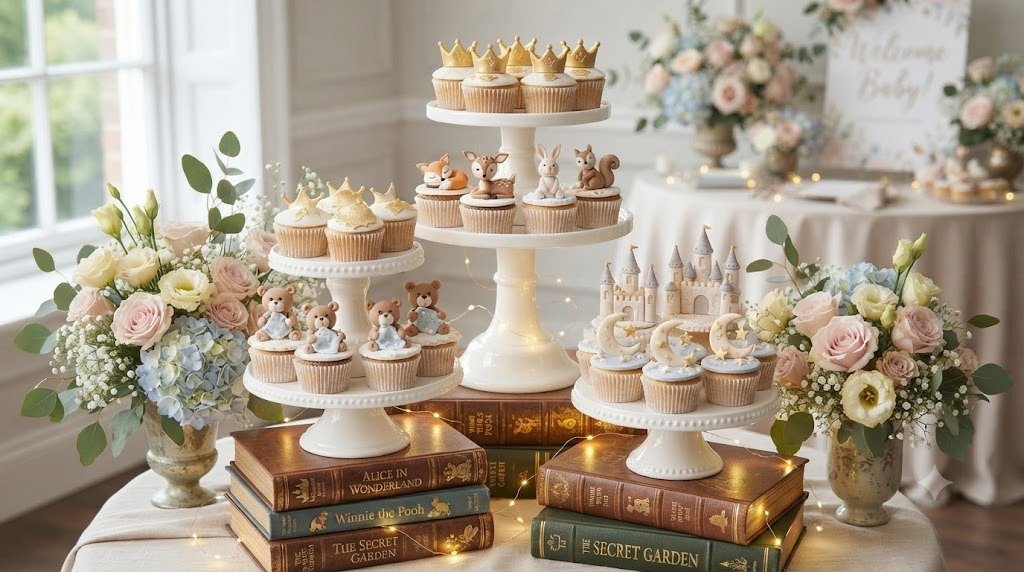
I always like dessert tables that encourage guests to walk around and admire every detail. Decorating cupcakes as tiny storybook characters creates a display that feels playful without requiring advanced cake decorating skills.
Estimated Budget: Low – $30–$60
Materials Needed:
- Cupcakes
- Buttercream frosting
- Food coloring
- Fondant
- Cupcake toppers
- Cake stand
- Wooden crates
- Decorative moss
- Mini faux books
Step-by-Step Setup Summary:
- Bake your favorite cupcakes the day before the shower and let them cool completely.
- Divide buttercream into several bowls and tint each one in soft storybook colors.
- Frost every cupcake with a piping tip that creates a neat swirl.
- Decorate each cupcake differently. Some can feature tiny crowns, others woodland animals, little castles, stars, moons, baby blocks, or sleeping bears.
- Arrange wooden crates upside down to create different display heights on your dessert table.
- Place the cupcakes on cake stands and trays at varying levels so the table feels full without looking crowded.
- Fill empty spaces with miniature decorative books, faux vines, and battery-operated fairy lights.
- Add small labels beside each group of cupcakes with playful names like “Princess Garden,” “Woodland Friends,” or “Dreamland Treats.”
- Keep extra cupcakes in the kitchen so you can refill the display as guests help themselves.
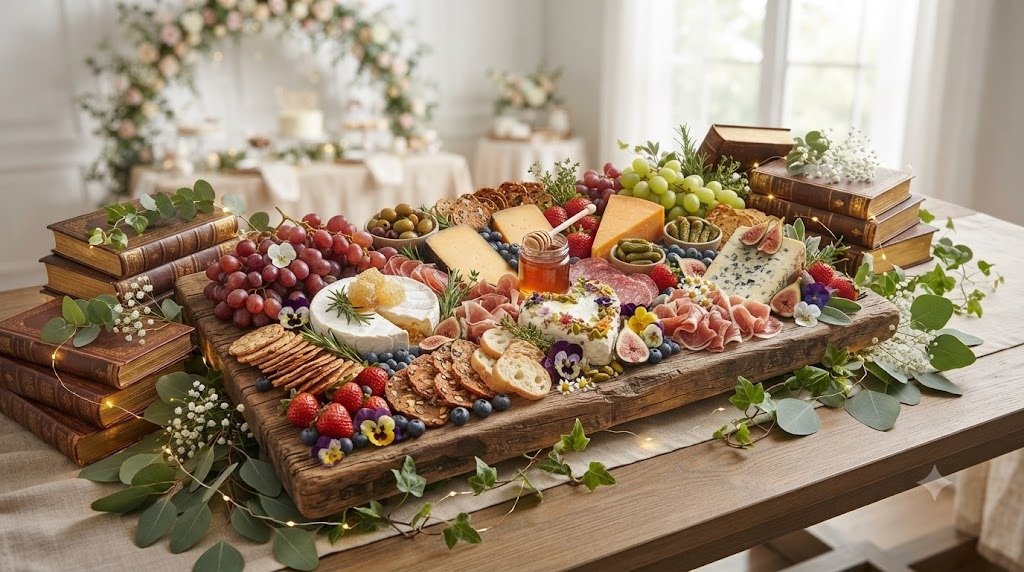
4. Storybook Snack Board
The Concept:
Not every edible decoration needs to be sweet. A large grazing board inspired by classic storybooks gives guests plenty to nibble on while tying perfectly into the theme.
Estimated Budget: Medium – $50–$90
Materials Needed:
- Large wooden serving board
- Assorted cheeses
- Crackers
- Grapes
- Strawberries
- Blueberries
- Mixed nuts
- Pretzels
- Honey
- Jam
- Fresh herbs
- Small bowls
- Decorative food picks
Step-by-Step Setup Summary:
- Choose the largest serving board you have so the arrangement doesn’t feel crowded.
- Place small bowls of honey, jam, nuts, and dips first. They act as anchors for the rest of the display.
- Arrange cheeses around the bowls, mixing different shapes and colors for visual variety.
- Fan crackers into small overlapping rows instead of stacking them flat. It looks fuller and makes them easier to grab.
- Fill the remaining spaces with clusters of grapes, berries, sliced fruit, and pretzels.
- Add fresh rosemary or mint around the edges to create the feeling of a woodland picnic from a storybook.
- Label sections with whimsical signs like “Forest Feast,” “Royal Cheese Collection,” or “Little Explorer Snacks.”
- Refill the board throughout the shower instead of overloading it at the beginning. Freshly replenished boards always look more inviting.
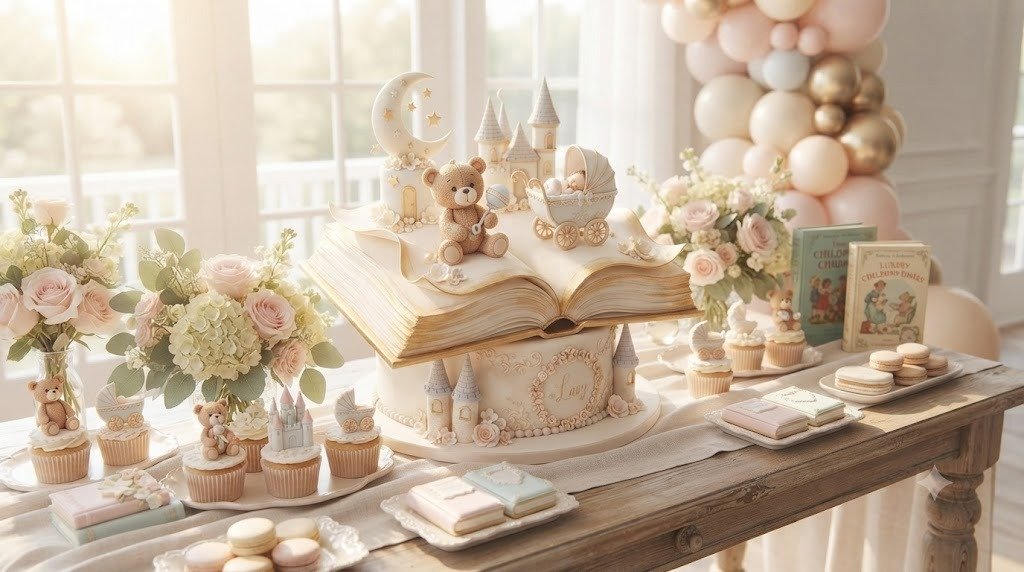
5. Once Upon a Baby Cake with Edible Pages
The Concept:
The cake naturally becomes the centerpiece of the entire shower. I love decorating it with edible “pages” flowing from an open storybook because it immediately captures the fairytale theme without needing elaborate sculpting.
Estimated Budget: High – $90–$180
Materials Needed:
- Two or three-layer cake
- Buttercream
- White fondant
- Gum paste
- Rolling pin
- Edible gold paint
- Food-safe brushes
- Letter stamps
- Cake stand
- Cake dowels (if needed)
Step-by-Step Setup Summary:
- Bake and cool the cake layers completely before assembling. Chill them briefly after adding the crumb coat so decorating is much easier.
- Frost the entire cake with a smooth layer of buttercream. Soft ivory or cream works beautifully with the vintage storybook look.
- Roll gum paste very thin and cut several long rectangles that resemble delicate book pages.
- Let the gum paste rest over curved rolling pins or folded parchment paper for a few hours so each page dries with a gentle wave instead of lying flat.
- Stamp short phrases onto some of the pages such as “Once Upon a Baby,” “A New Adventure Begins,” or “Happily Ever After Starts Here.” Keep the wording simple so it remains easy to read.
- Attach the dried pages carefully to the top and side of the cake using a small amount of edible glue or buttercream. Layer them so they appear to be turning in the breeze.
- Brush the page edges lightly with edible gold paint for a vintage storybook finish. I always use a light touch because too much gold can overpower the soft baby shower colors.
- Place a small fondant baby carriage, teddy bear, moon, or tiny crown near the top of the cake to tie everything together without overcrowding the design.
- Set the finished cake on a raised cake stand in the center of the dessert table. Surround it with candles, fresh flowers, or matching cupcakes so it becomes the first thing guests notice when they walk into the room.
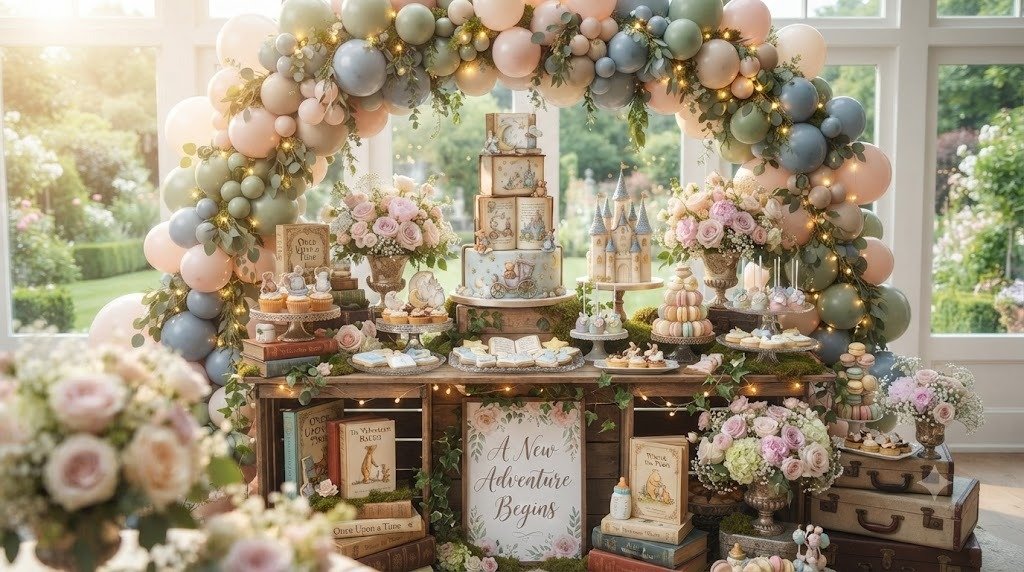
6. Enchanted Storybook Dessert Table
The Concept:
Whenever I want guests to stop and say “Wow!” as soon as they walk into the room, I focus on the dessert table. Turning it into an enchanted storybook display with edible details creates the perfect backdrop for photos while keeping the sweets easy to reach.
Estimated Budget: Medium–High – $75–$150
Materials Needed:
- Dessert table
- Tablecloth in cream or pastel colors
- Cake stand
- Cupcake stands
- Cookies
- Cake pops
- Macarons
- Mini tarts
- Artificial moss
- Faux books
- Battery-operated fairy lights
- Wooden crates
- Small printable storybook signs
- Fresh flowers or greenery
Step-by-Step Setup Summary:
- Cover the dessert table with a neutral-colored tablecloth that lets the colorful desserts stand out. I usually stick with ivory, dusty blue, sage, or blush because they fit almost any baby shower palette.
- Use wooden crates or sturdy boxes beneath the tablecloth to create different display heights. This keeps every dessert visible instead of everything sitting on one flat surface.
- Place the largest dessert, usually the cake, right in the center at the tallest point. Arrange cupcakes, cookies, and smaller treats around it to naturally draw the eye inward.
- Fill gaps with stacks of decorative books, artificial moss, fairy lights, and small flower arrangements. These little details help the table feel like a page from a fairytale instead of just another dessert display.
- Add printable signs with names such as “Fairy Forest Cookies,” “Little Prince Pops,” or “Happily Ever After Macarons.” Guests always smile when desserts have playful names.
- Scatter edible gold stars or pearl sprinkles across serving trays for extra sparkle without making the setup feel overdone.
- Before guests arrive, step back and look at the table from several angles. I almost always move one or two items until the arrangement feels balanced.
- Keep backup desserts in the kitchen so you can quietly refill trays during the party without making the table look empty later in the afternoon.
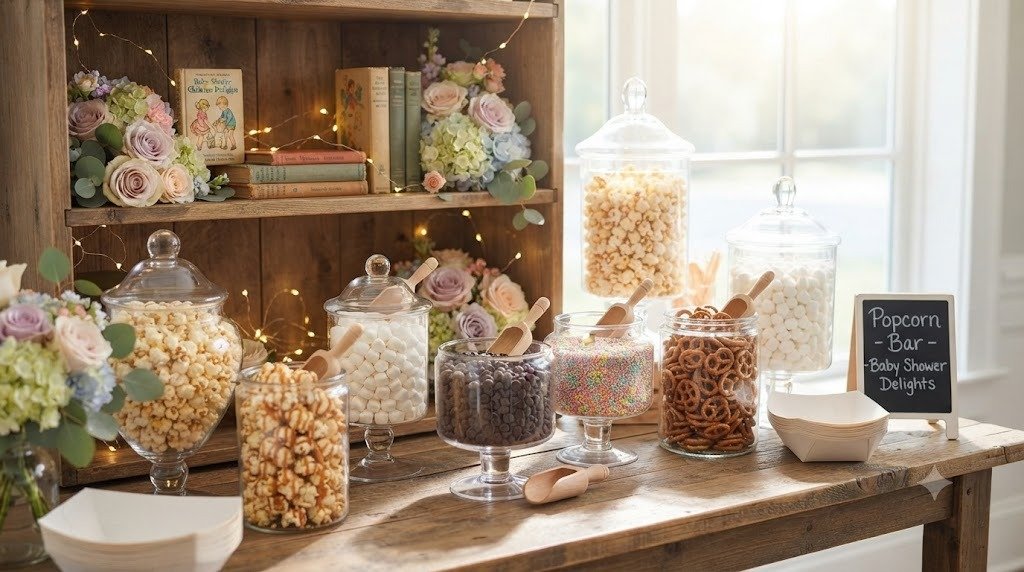
7. DIY Storybook Popcorn Bar
The Concept:
A popcorn bar is one of the easiest interactive food stations to create. Instead of plain popcorn bowls, turn the station into a “storybook snack shop” where guests build their own sweet and salty mix.
Estimated Budget: Low–Medium – $30–$65
Materials Needed:
- Fresh popcorn
- Large glass jars
- Mini marshmallows
- Chocolate chips
- Pretzels
- Caramel drizzle
- White chocolate drizzle
- Sprinkles
- Paper treat bags
- Scoops
- Small labels
- Ribbon
Step-by-Step Setup Summary:
- Pop fresh popcorn shortly before guests arrive so it stays crisp.
- Fill separate jars with popcorn, marshmallows, pretzels, candies, chocolate chips, sprinkles, and other toppings.
- Arrange the jars from tallest to shortest so everyone can easily see every option.
- Label each topping with fun names like “Pixie Dust Sprinkles,” “Magic Marshmallows,” or “Dragon Chocolate Chips.”
- Place paper treat bags beside the station along with small scoops for every topping to keep things tidy.
- Include bottles of caramel and white chocolate drizzle so guests can finish their personalized popcorn mix.
- Tie completed popcorn bags with ribbon if guests want to save them for the ride home.
8. Baby’s First Library Sugar Cookie Decorating Station
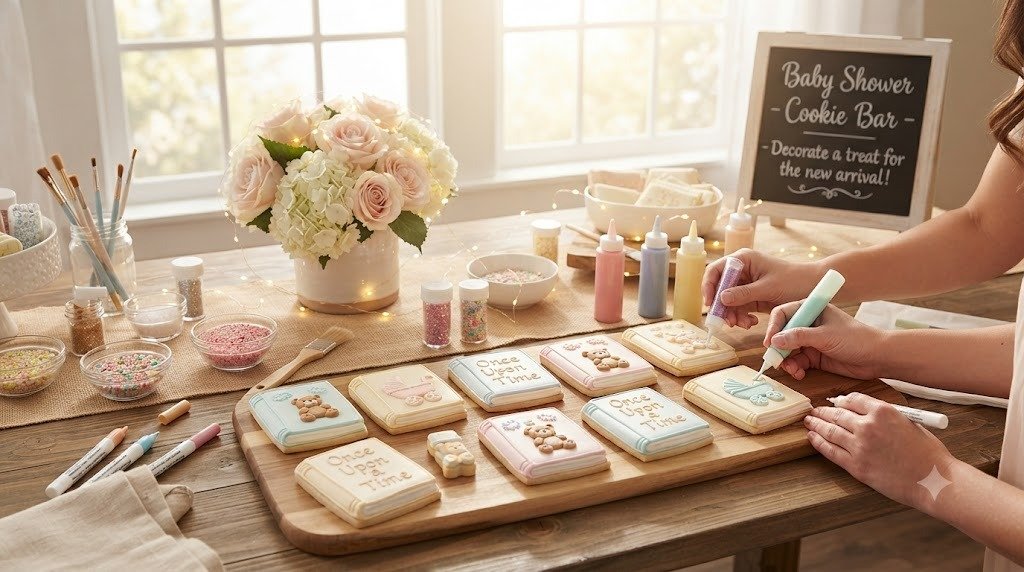
The Concept:
This activity gives guests something creative to do while also adding to the dessert table. Everyone decorates their own edible storybook cookie, and no artistic experience is required.
Estimated Budget: Medium – $45–$80
Materials Needed:
- Plain sugar cookies
- Royal icing
- Decorating bags
- Sprinkles
- Edible glitter
- Edible markers
- Disposable gloves
- Table covering
- Wet wipes
- Display trays
Step-by-Step Setup Summary:
- Bake sugar cookies shaped like books, stars, clouds, teddy bears, moons, or baby bottles the day before.
- Prepare several bowls of royal icing in pastel colors and transfer them into piping bags.
- Cover the decorating table with disposable paper so cleanup takes only a few minutes.
- Place decorating supplies into small containers rather than leaving everything in one large bowl. Guests can quickly find what they want without reaching across the table.
- Set one cookie, one napkin, and one small decorating plate at each seat before everyone begins.
- Demonstrate one simple cookie design first. I find that people become much more confident after seeing an easy example.
- Allow guests to decorate at their own pace while chatting and enjoying snacks.
- Once the icing dries, display everyone’s cookies together on decorative trays. It’s always fun seeing how different each design turns out.
- Package leftover cookies in clear bags so guests can take their edible creations home.
9. Fairytale Fruit Wand Display
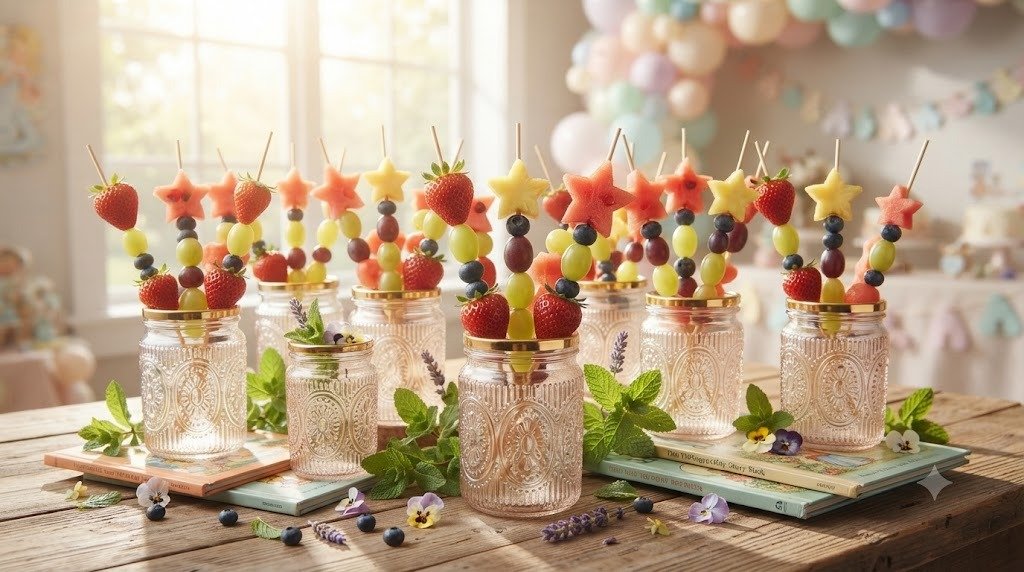
The Concept:
Not every party treat has to be loaded with frosting. Fruit wands add fresh color to the table while fitting beautifully into a magical storybook theme.
Estimated Budget: Low – $20–$40
Materials Needed:
- Strawberries
- Grapes
- Blueberries
- Pineapple
- Watermelon
- Wooden skewers
- Star cookie cutter
- Mint leaves
- Decorative serving platter
Step-by-Step Setup Summary:
- Wash and dry all fruit thoroughly before assembling. Dry fruit stays securely on the skewers and looks much fresher.
- Use a small star-shaped cutter to cut pineapple or melon into magical wand tops.
- Alternate colorful fruit pieces on each skewer to create bright, cheerful patterns.
- Finish every skewer with a fruit star at the top so each one resembles a fairytale wand.
- Arrange the finished fruit wands upright inside decorative jars filled with sugar or decorative beads to keep them standing.
- Garnish the display with fresh mint leaves and a few edible flowers for an extra storybook touch.
- Refill the jars as needed during the shower since fresh fruit tends to disappear quickly.
10. Once Upon a Baby Hot Cocoa & Tea Corner
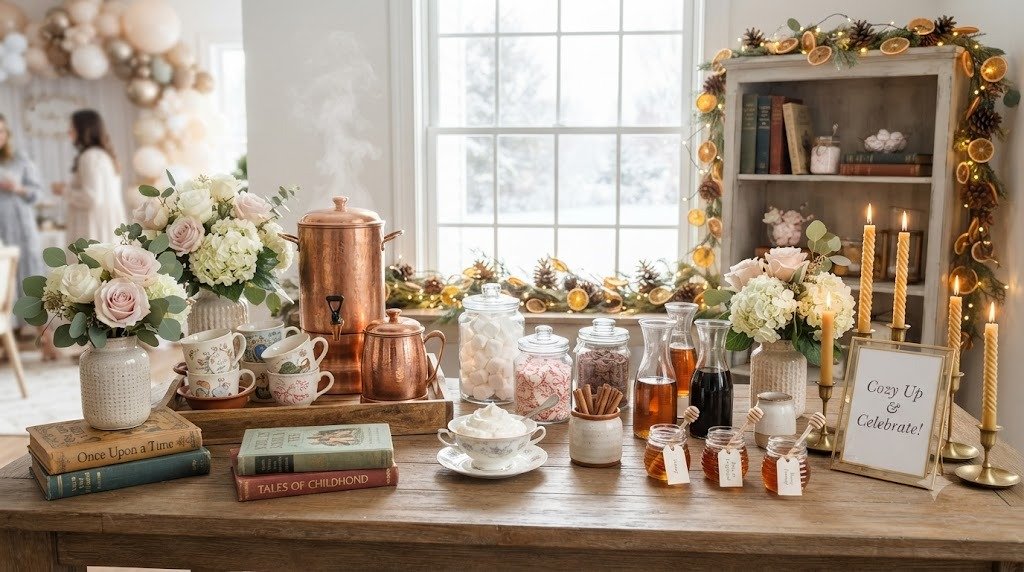
The Concept:
If you’re hosting a fall or winter baby shower, a warm drink station instantly makes the celebration feel cozy. Guests can relax, sip their favorite drink, and enjoy conversations while surrounded by storybook-inspired decorations.
Estimated Budget: Medium – $40–$75
Materials Needed:
- Hot cocoa
- Assorted tea bags
- Electric kettle or beverage dispenser
- Mugs
- Mini marshmallows
- Cinnamon sticks
- Whipped cream
- Honey
- Sugar cubes
- Stir sticks
- Decorative signs
- Faux books
- Small flowers
Step-by-Step Setup Summary:
- Set up the beverage station near an electrical outlet so hot drinks remain warm throughout the event.
- Arrange mugs in neat rows with stir sticks, napkins, and spoons placed within easy reach.
- Fill separate bowls with marshmallows, whipped cream, cinnamon sticks, chocolate shavings, honey, and sugar cubes so guests can customize their drinks.
- Decorate the station with stacked vintage books, battery-operated candles, and a small floral arrangement. These little touches help the drink station blend naturally with the overall storybook theme.
- Add a framed sign reading something like “Warm Stories & Sweet Sips” or “Chapter One Café” to make the station feel intentional rather than simply functional.
- Keep extra hot water and cocoa mix nearby so refills are quick and guests never have to wait.
- Before everyone leaves, offer small paper cups with lids for anyone who would like to take a warm drink home after the celebration.
11. Storybook Donut Wall with Fairytale Titles
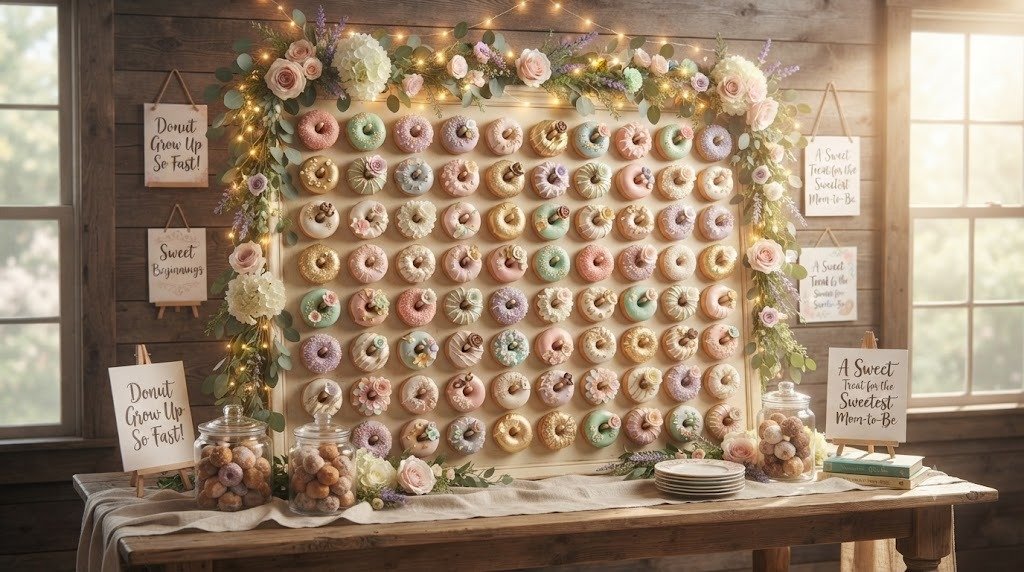
The Concept:
A donut wall is always a crowd-pleaser, and giving it a storybook twist makes it feel even more special. I like assigning playful “book titles” to different donut flavors because it encourages guests to try more than one while adding personality to the dessert area.
Estimated Budget: Medium – $45–$85
Materials Needed:
- Wooden donut wall or peg board
- Assorted donuts
- Printable labels
- Ribbon
- Faux greenery
- Fresh flowers
- Mini storybook decorations
- Battery-operated fairy lights
Step-by-Step Setup Summary:
- Assemble the donut wall the evening before or several hours before guests arrive, making sure it stands securely on a flat surface.
- Decorate the frame with soft greenery, ribbon, and a few small flowers. I like keeping the decorations around the edges so the donuts remain the main attraction.
- Hang donuts by flavor instead of mixing them randomly. This makes it easier for guests to find their favorites.
- Create whimsical labels like “The Sprinkle Kingdom,” “Chocolate Castle,” “Maple Adventure,” or “Once Upon a Glaze.”
- Wrap a strand of battery-operated fairy lights around the outer frame for a soft glow, especially if the shower continues into the evening.
- Leave a little open space on the wall so you can refill it throughout the party instead of placing every donut out at once.
- Keep extra napkins nearby and position the wall close to the beverage station for convenience.
12. DIY Edible Storybook S’mores Station
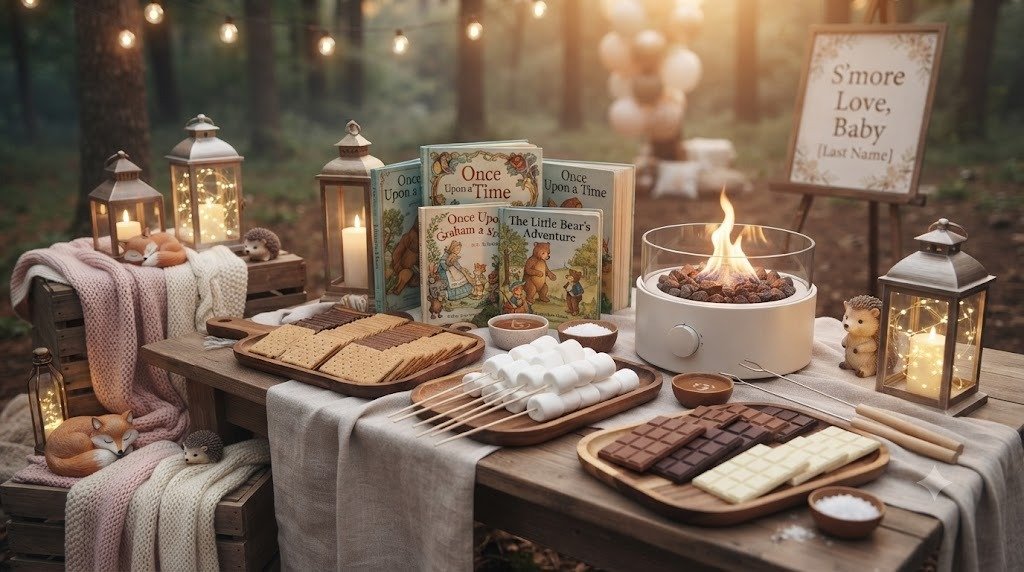
The Concept:
Whenever I host an outdoor baby shower or one with a cozy cottage feel, a s’mores station becomes an instant favorite. Guests love building their own treats, and it naturally brings people together.
Estimated Budget: Medium – $50–$95
Materials Needed:
- Graham crackers
- Marshmallows
- Chocolate bars
- Mini burner or tabletop s’mores maker
- Heat-safe trays
- Long roasting sticks
- Decorative baskets
- Small plates
- Napkins
- Printable instruction sign
Step-by-Step Setup Summary:
- Place the roasting station in a safe area with plenty of room for guests to gather comfortably.
- Arrange crackers, marshmallows, and chocolate bars in separate baskets so each ingredient is easy to grab.
- Add a printed sign with simple roasting instructions for guests who have never made s’mores before.
- Keep extra roasting sticks available so guests don’t have to wait for someone else to finish.
- Encourage everyone to customize their treats by offering white chocolate, peanut butter cups, caramel squares, or flavored marshmallows.
- Assign someone to monitor the burner throughout the event, especially if children are nearby.
- Refill ingredients regularly and wipe the serving area as needed to keep everything looking fresh and inviting.
- Place finished s’mores on decorative paper plates featuring storybook-inspired designs for an extra charming touch.
13. Fairy Forest Candy Cart
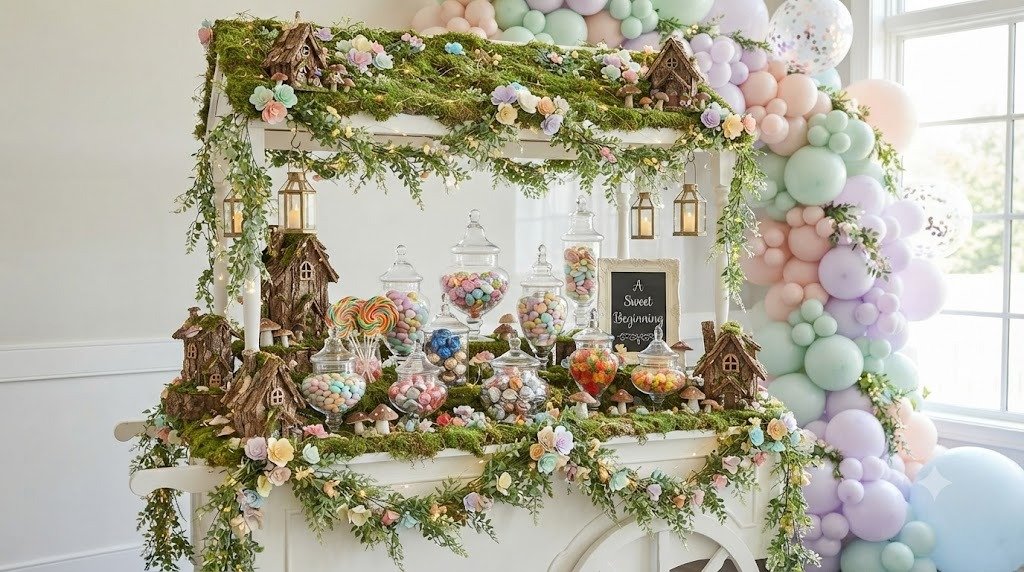
The Concept:
A candy cart decorated like a magical forest feels as though it came straight from the pages of a children’s book. I love using a mix of colorful sweets and natural decorations to create a display that appeals to both kids and adults.
Estimated Budget: Medium–High – $70–$130
Materials Needed:
- Rolling cart or dessert cart
- Glass candy jars
- Assorted candies
- Lollipops
- Chocolate treats
- Artificial moss
- Faux mushrooms
- Mini lanterns
- Greenery garland
- Scoops
- Paper treat bags
Step-by-Step Setup Summary:
- Cover the shelves of the cart with artificial moss or green fabric to create a woodland base.
- Arrange glass jars by height, placing taller jars toward the back and shorter containers near the front.
- Fill the jars with colorful candies, gummies, chocolate treats, and pastel sweets that match the baby shower palette.
- Add whimsical decorations such as faux mushrooms, tiny woodland animals, lanterns, or miniature fairy houses around the jars.
- Provide paper treat bags and small scoops so guests can build their own candy mix.
- Refill popular candies before the jars become half empty to keep the display looking abundant throughout the celebration.
- Finish the cart with a wooden sign reading “Sweet Storybook Treats” or “The Fairy Forest Candy Shop.”
14. Baby Storybook Picnic Boxes
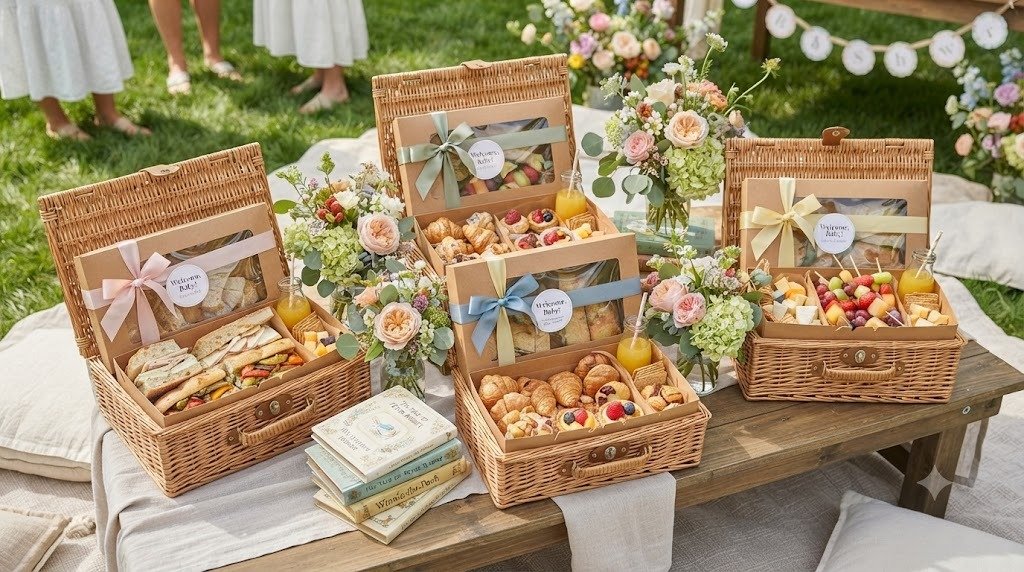
The Concept:
Individual picnic boxes are one of my favorite ideas because they look adorable, reduce serving lines, and give every guest their own beautifully arranged meal. They’re especially useful for outdoor showers.
Estimated Budget: Medium – $60–$110
Materials Needed:
- Kraft picnic boxes
- Sandwiches
- Mini pastries
- Fresh fruit
- Cheese cubes
- Crackers
- Juice bottles
- Personalized stickers
- Ribbon
- Napkins
Step-by-Step Setup Summary:
- Assemble the food shortly before guests arrive to keep everything fresh.
- Place sandwiches at the bottom of each box since they’re the largest item.
- Add fruit, cheese, crackers, and a small pastry in separate paper liners to keep flavors from mixing.
- Include a mini juice bottle or bottled water beside each picnic box.
- Seal every box with a personalized sticker featuring the baby shower theme or the parents-to-be’s names.
- Tie each box with ribbon if you’re serving them as individual gifts rather than placing them on a buffet.
- Arrange the finished boxes in wooden crates or wicker baskets so guests can simply pick one up when they’re ready to eat.
15. Once Upon a Baby Dessert Book Buffet
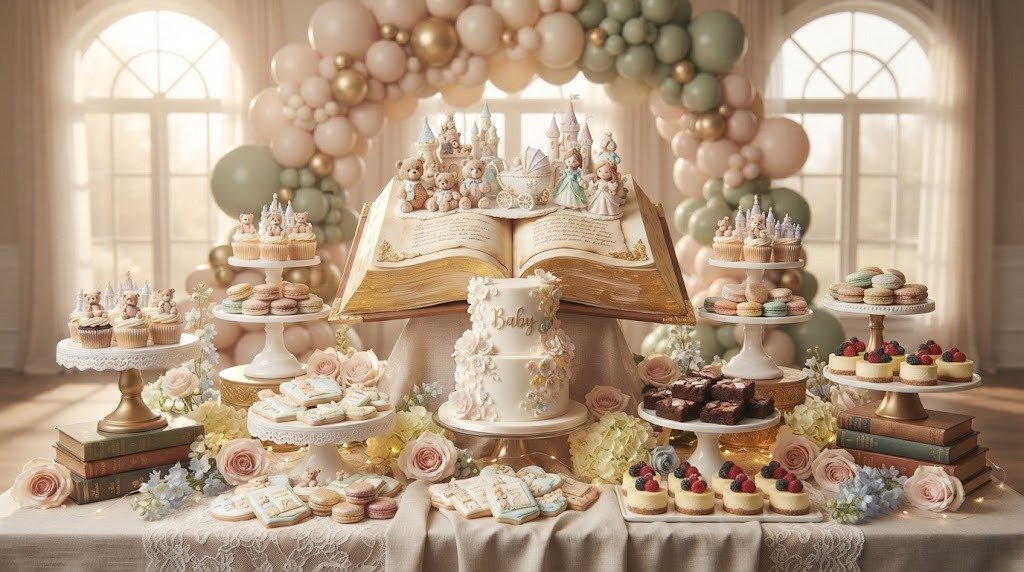
The Concept:
I saved this idea for last because it combines nearly every storybook element into one unforgettable display. Instead of serving desserts from ordinary trays, arrange them to resemble the pages of an open fairytale where every section tells a sweet little story.
Estimated Budget: High – $120–$220
Materials Needed:
- Long buffet table
- Cake
- Cupcakes
- Cookies
- Macarons
- Brownies
- Mini cheesecakes
- Cake stands
- Wooden risers
- Decorative books
- Flowers
- Fairy lights
- Printed menu cards
- Table runner
Step-by-Step Setup Summary:
- Cover the buffet table with a neutral runner that allows the desserts to become the focal point.
- Divide the table into themed “chapters.” For example, one section can feature cookies, another cupcakes, another pastries, and another fresh fruit.
- Place the tallest dessert displays toward the center and gradually reduce the height toward each end. This creates a balanced look that photographs beautifully.
- Decorate every chapter with matching signs like “The Sweet Beginning,” “The Candy Kingdom,” or “The Happy Ending.”
- Tuck fairy lights beneath cake stands and around decorative books to create a soft evening glow without overwhelming the desserts.
- Fill small empty spaces with fresh flowers, greenery, or tiny baby-themed decorations rather than crowding in extra desserts.
- Walk around the buffet before guests arrive to check that every item is easy to reach. If someone has to stretch over another dessert, rearrange the layout slightly.
- During the shower, quietly refill desserts from the kitchen instead of bringing out large backup trays all at once. The buffet will stay neat, fresh, and inviting until the very end of the celebration.
Conclusion
Planning a Once Upon a Baby shower doesn’t have to mean spending a fortune or hiring a professional event planner. In my experience, the most memorable celebrations are the ones filled with thoughtful handmade touches, delicious food, and little details that make guests smile. A few creative decorations, a handful of edible storybook treats, and a cozy atmosphere can turn an ordinary gathering into a celebration everyone remembers long after the last cupcake is gone.
I hope these ideas inspire you to create a baby shower that feels warm, welcoming, and full of storybook magic. Feel free to mix and match your favorite ideas, adjust them to fit your budget, and add personal touches that celebrate the growing family. After all, every new baby begins a wonderful new chapter, and that’s a story worth celebrating.