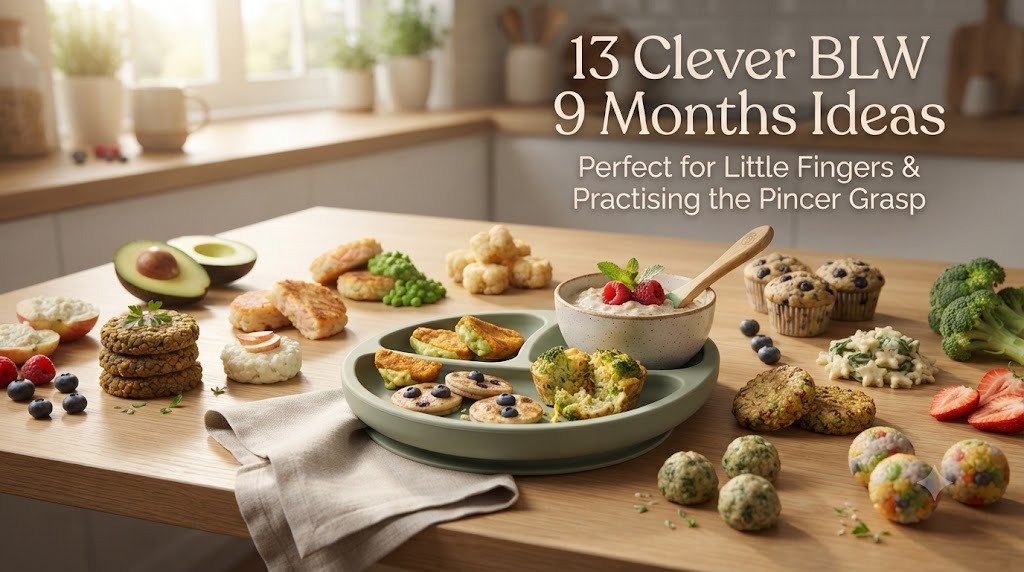
By around 9 months, mealtimes start looking completely different. This is the stage when many babies become curious little explorers, pinching tiny pieces of food between their thumb and forefinger, dropping them on the tray, and proudly trying again. I remember how exciting it was to watch those first successful bites—it felt like a small milestone every single day. Offering the right finger foods can help build confidence while making mealtimes fun instead of stressful.
At this age, babies are usually ready for a wider variety of soft finger foods alongside breast milk or formula, as long as they’re sitting upright, eating with supervision, and showing signs they’re ready for Baby-Led Weaning. The goal isn’t to finish a big meal. It’s giving your baby plenty of chances to practice chewing, grasping, and exploring different textures safely. I always focus on foods that are soft enough to mash between my fingers while still being easy for little hands to pick up.
1. Sweet Potato & Avocado Soft Bites
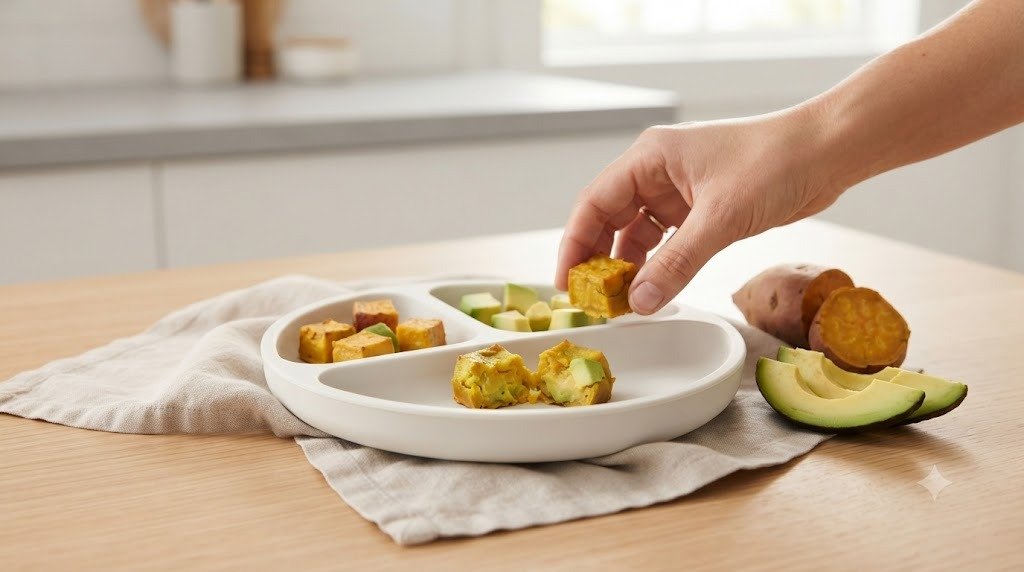
These little bites were one of my favorite foods to keep in the fridge because they come together with just a few ingredients and stay wonderfully soft. The creamy avocado and naturally sweet potato make them easy for babies to gum while giving plenty of opportunities to practice that developing pincer grasp. They’re ideal from around 9 months when your baby is confidently picking up small pieces.
Health Benefits
Sweet potatoes provide vitamin A, vitamin C, and fiber to support healthy growth and digestion. Avocado adds healthy fats that help support brain development, while the egg helps bind everything together and contributes protein and important nutrients like choline.
Ingredients
- 1 medium sweet potato (about 250 g)
- ½ ripe avocado
- 1 large egg
- 2 tablespoons oat flour
- 1 tablespoon finely chopped parsley (optional)
Step-by-Step Recipe
- Peel the sweet potato and cut it into large chunks. Steam for about 15–18 minutes until very soft when pierced with a fork.
- Let the sweet potato cool for about 10 minutes so the mixture doesn’t become too runny.
- Scoop the avocado into a mixing bowl and mash until smooth.
- Add the cooked sweet potato and mash everything together until no large lumps remain.
- Stir in the egg, oat flour, and parsley until you have a thick mixture that can hold its shape.
- Line a baking tray with parchment paper and lightly grease it if needed.
- Scoop small teaspoon-sized portions onto the tray, leaving a little space between each one.
- Bake at 375°F (190°C) for 15–18 minutes until lightly set. They should stay soft rather than crispy.
- Cool completely before serving. Break larger bites into pea-sized pieces if your baby is practicing a neat pincer grasp.
BLW Serving Tips
Serve 4–6 small bites alongside plain yogurt or soft banana slices. I often pair these with steamed broccoli florets for a colorful lunch. Keep the pieces soft enough to squash easily between your fingers.
Storage Tips
Store in an airtight container in the refrigerator for up to 3 days. Freeze for up to 2 months. Reheat gently in the microwave or oven until just warm, then cool before serving.
2. Mini Banana Oat Pancake Pieces
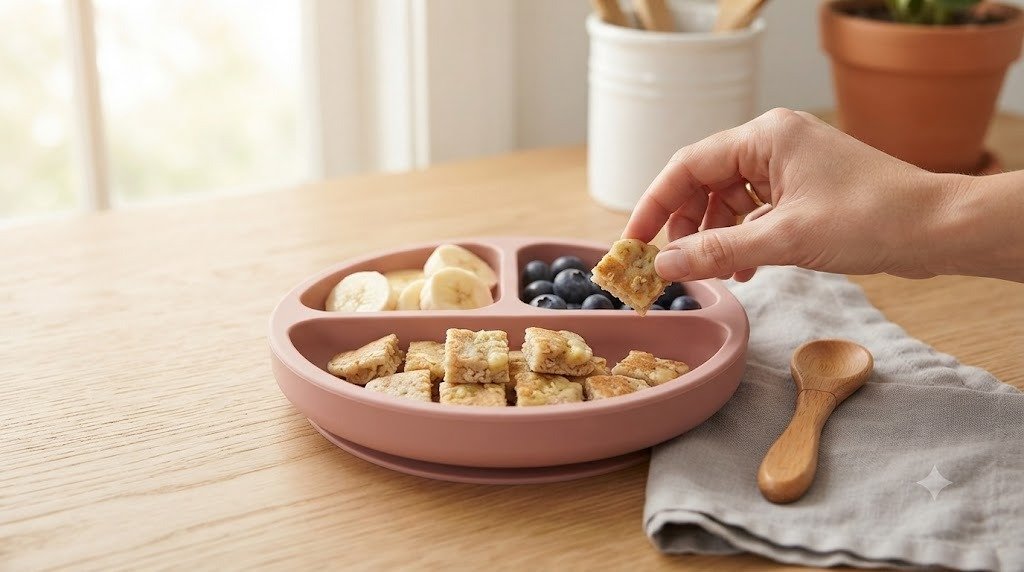
These naturally sweet pancakes have saved many busy mornings in our house. They’re soft, easy to hold, and simple to cut into tiny squares that encourage babies to practice picking them up one at a time.
Health Benefits
Bananas provide potassium and natural sweetness without added sugar. Oats offer fiber and slow-releasing carbohydrates, while eggs add protein to help keep little tummies satisfied.
Ingredients
- 1 ripe banana
- 1 large egg
- ¼ cup rolled oats
- 2 tablespoons whole milk or breast milk (optional)
- ¼ teaspoon cinnamon (optional)
Step-by-Step Recipe
- Blend the oats into a fine flour or use ready-made oat flour.
- Mash the banana until smooth with very few lumps.
- Beat in the egg until fully combined.
- Stir in the oat flour and milk until you have a thick pancake batter.
- Heat a lightly greased non-stick skillet over low heat.
- Spoon small circles of batter into the pan.
- Cook for about 2 minutes before carefully flipping.
- Cook another 1–2 minutes until fully set in the center.
- Allow the pancakes to cool completely.
- Cut into tiny squares or narrow strips depending on your baby’s eating stage.
BLW Serving Tips
These are lovely served with mashed berries, plain Greek yogurt, or a few slices of soft pear. They’re also easy to pack for outings.
Storage Tips
Refrigerate for up to 3 days or freeze between layers of parchment paper for up to 2 months.
3. Broccoli Cheese Egg Muffin Cups
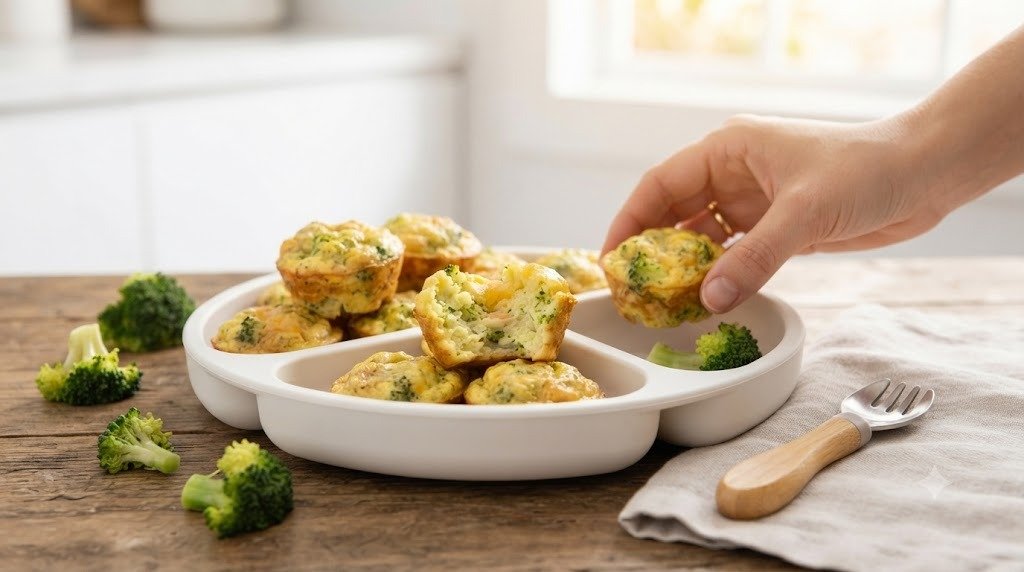
Whenever I wanted an easy grab-and-go breakfast, these muffin cups were always in the freezer. They’re soft, packed with vegetables, and easy to crumble into bite-sized pieces.
Health Benefits
Broccoli supplies vitamin C, vitamin K, and fiber. Eggs provide protein and healthy fats, while cheese contributes calcium for growing bones and teeth.
Ingredients
- 3 large eggs
- ½ cup finely chopped steamed broccoli
- ¼ cup shredded cheddar cheese
- 2 tablespoons milk
- Pinch of garlic powder (optional)
Step-by-Step Recipe
- Steam the broccoli until very soft, about 8 minutes.
- Chop it into tiny pieces so they’re easy for babies to chew.
- Whisk together the eggs and milk until smooth.
- Stir in the broccoli and cheese.
- Grease a mini muffin tin well.
- Fill each cup about three-quarters full.
- Bake at 350°F (175°C) for 15–18 minutes until just set.
- Let the muffins cool in the pan for several minutes.
- Remove carefully and allow them to cool completely.
- Tear into baby-sized pieces before serving.
BLW Serving Tips
Serve one or two mini muffins with sliced avocado or soft roasted tomatoes. I usually avoid serving them too warm because babies tend to grab food quickly.
Storage Tips
Keep refrigerated for 4 days. Freeze for up to 2 months and thaw overnight before gently reheating.
4. Soft Lentil Veggie Patties
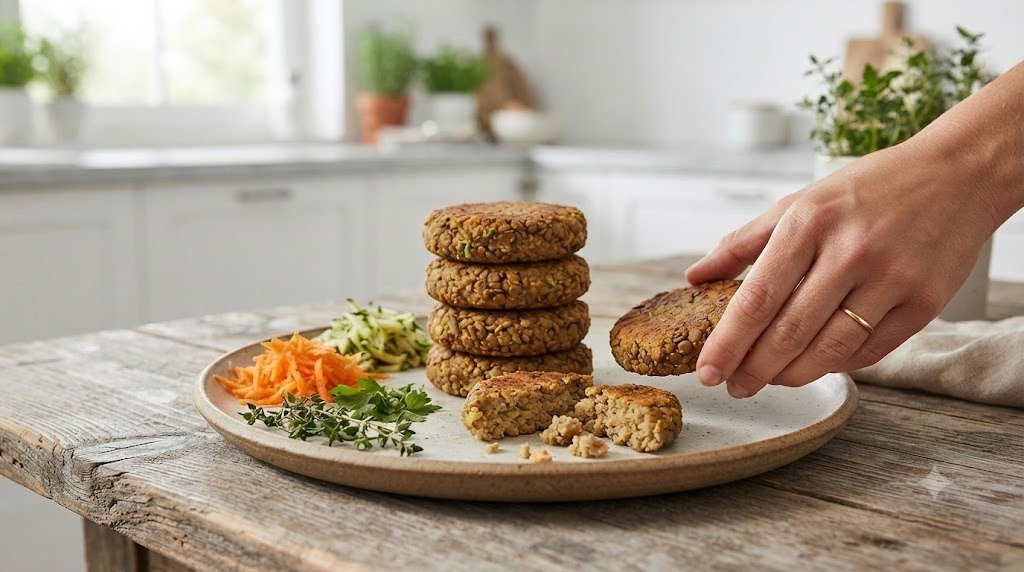
These patties are wonderfully soft inside and hold together surprisingly well. They’re a nice way to introduce lentils without making soup, and my little one enjoyed breaking them apart before eating every bite.
Health Benefits
Lentils are naturally rich in iron, plant protein, and fiber. The vegetables add vitamins while oats help create a soft texture that’s perfect for Baby-Led Weaning.
Ingredients
- 1 cup cooked red lentils
- ½ cup finely grated carrot
- ¼ cup grated zucchini (squeezed dry)
- ¼ cup oat flour
- 1 egg
- 1 tablespoon olive oil
Step-by-Step Recipe
- Cook the lentils until very soft and drain any extra liquid.
- Grate the carrot and zucchini finely.
- Squeeze the zucchini with a clean towel to remove excess moisture.
- Mix all ingredients in a large bowl until well combined.
- Let the mixture rest for 10 minutes so the oats absorb moisture.
- Form small patties using damp hands.
- Place them on a parchment-lined baking tray.
- Brush lightly with olive oil.
- Bake at 375°F (190°C) for about 18–20 minutes, flipping halfway through.
- Cool thoroughly before cutting into manageable pieces.
BLW Serving Tips
Serve with plain yogurt for dipping or alongside soft cucumber spears. Smaller broken pieces work especially well for babies practicing their pincer grasp.
Storage Tips
Store in the refrigerator for up to 4 days or freeze for up to 3 months.
5. Apple Cinnamon Cottage Cheese Bites
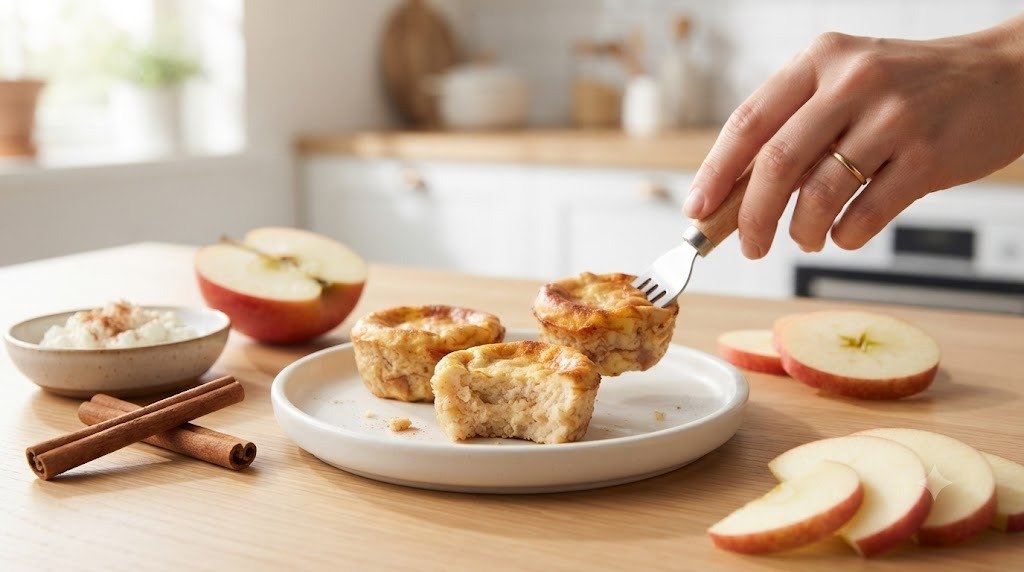
These little baked bites feel almost like mini muffins, but they’re much softer inside. They’re naturally sweet from apples and make a lovely afternoon snack or quick breakfast.
Health Benefits
Apples provide fiber and vitamin C, while cottage cheese adds calcium and protein. Oats help create a soft texture that’s easy for little mouths to manage.
Ingredients
- 1 cup finely grated apple
- ½ cup cottage cheese
- 1 egg
- ⅓ cup oat flour
- ¼ teaspoon cinnamon
Step-by-Step Recipe
- Grate the apple finely and gently squeeze out a little excess juice.
- Blend the cottage cheese briefly if you prefer a smoother texture.
- Beat the egg in a mixing bowl.
- Stir in the cottage cheese, grated apple, cinnamon, and oat flour.
- Mix until evenly combined.
- Spoon into a lightly greased mini muffin pan.
- Bake at 350°F (175°C) for 15–18 minutes until lightly golden around the edges.
- Let the bites cool in the pan for 5 minutes.
- Transfer to a cooling rack until completely cool.
- Cut larger muffins into smaller pieces if needed before serving.
BLW Serving Tips
These pair nicely with soft peach slices or mashed berries. I usually offer two or three bites at snack time along with water in an open cup.
Storage Tips
Refrigerate for up to 4 days. Freeze for up to 2 months and thaw overnight in the refrigerator before serving.
6. Soft Salmon & Potato Cakes
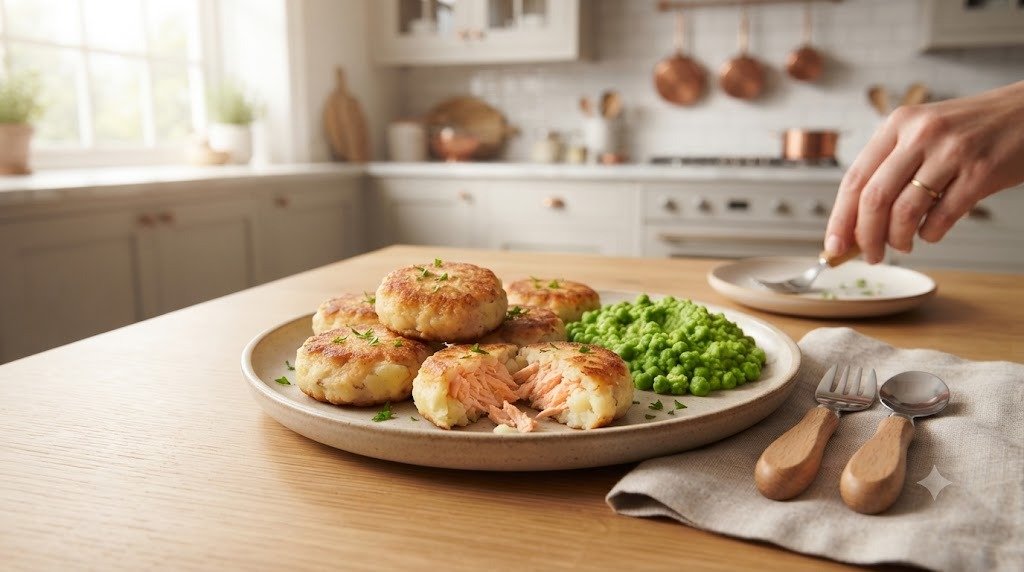
These little salmon cakes became one of my favorite ways to serve fish without making a big fuss at mealtime. They’re soft enough for tiny gums, easy to break into bite-sized pieces, and sturdy enough for babies who are learning to pick up smaller foods with their thumb and forefinger. I usually make a double batch because the leftovers disappear quickly.
Health Benefits
Salmon is packed with protein and healthy omega-3 fats that support brain and eye development. Potatoes add energy-rich carbohydrates, while parsley brings a little vitamin C. Cooking everything together creates a soft texture that’s gentle on little mouths.
Ingredients
- 1 cup cooked salmon, skin and bones removed
- 1 medium potato (about 200 g)
- 1 egg yolk
- 2 tablespoons oat flour
- 1 tablespoon finely chopped parsley (optional)
- 1 teaspoon olive oil for brushing
Step-by-Step Recipe
- Peel the potato and cut it into evenly sized chunks. Boil or steam for 15–20 minutes until very soft.
- Drain well and mash the potato while it’s still warm. Let it cool for about 10 minutes.
- Flake the cooked salmon carefully with your fingers, checking twice for any tiny bones.
- Add the salmon, egg yolk, oat flour, and parsley to the mashed potato.
- Mix gently until everything is evenly combined without overworking the mixture.
- Scoop small portions and shape them into mini patties about 2 inches wide.
- Place the patties on a parchment-lined baking tray and lightly brush the tops with olive oil.
- Bake at 375°F (190°C) for 15–18 minutes, flipping halfway so both sides become lightly golden.
- Let the cakes cool until just room temperature.
- Break each cake into small bite-sized pieces before placing them on your baby’s tray.
BLW Serving Tips
These are lovely with mashed peas, soft avocado slices, or steamed carrot sticks. I usually offer two small cakes alongside a vegetable to keep the meal balanced.
Storage Tips
Store in the refrigerator for up to 3 days in an airtight container. Freeze for up to 2 months. Reheat gently until warm, then allow them to cool before serving.
7. Cheesy Cauliflower Tots
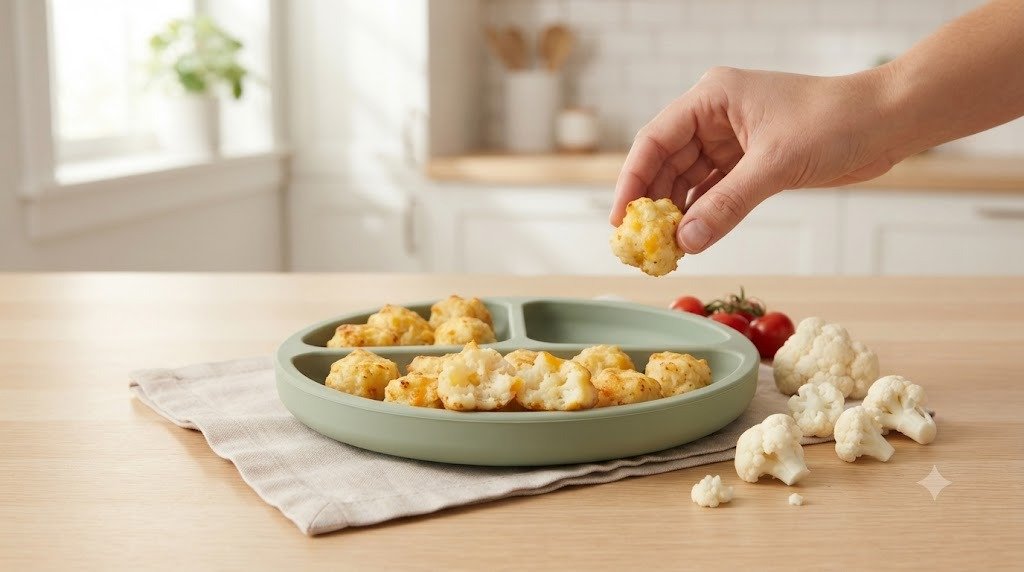
Whenever I had half a head of cauliflower left in the fridge, these tots were my go-to recipe. They’re soft in the middle with just enough firmness for little fingers to hold, making them wonderful for practicing the pincer grasp.
Health Benefits
Cauliflower provides fiber, vitamin C, and antioxidants. Cheese adds calcium and protein, while the egg helps hold everything together without making the tots dense.
Ingredients
- 2 cups cauliflower florets
- ½ cup shredded cheddar cheese
- 1 egg
- ¼ cup oat flour
- 1 tablespoon grated Parmesan (optional)
Step-by-Step Recipe
- Steam the cauliflower until extremely tender, about 10–12 minutes.
- Drain thoroughly and let it cool for several minutes.
- Mash the cauliflower with a fork, leaving only tiny soft pieces.
- Stir in the cheese, egg, oat flour, and Parmesan.
- Mix until the ingredients form a soft but shapeable mixture.
- Scoop tablespoon-sized portions and gently roll them into short tots.
- Arrange them on a lined baking tray with a little space between each one.
- Bake at 375°F (190°C) for 18–20 minutes, turning once halfway through.
- Let the tots cool completely before serving.
- If they’re slightly large, break them into smaller pieces for newer eaters.
BLW Serving Tips
Serve with plain Greek yogurt for dipping or alongside steamed broccoli. The soft center makes these easy for babies to manage even if they only have a few teeth.
Storage Tips
Keep refrigerated for up to 4 days. Freeze in a single layer before transferring to a freezer bag for up to 2 months.
8. Blueberry Yogurt Oat Muffins
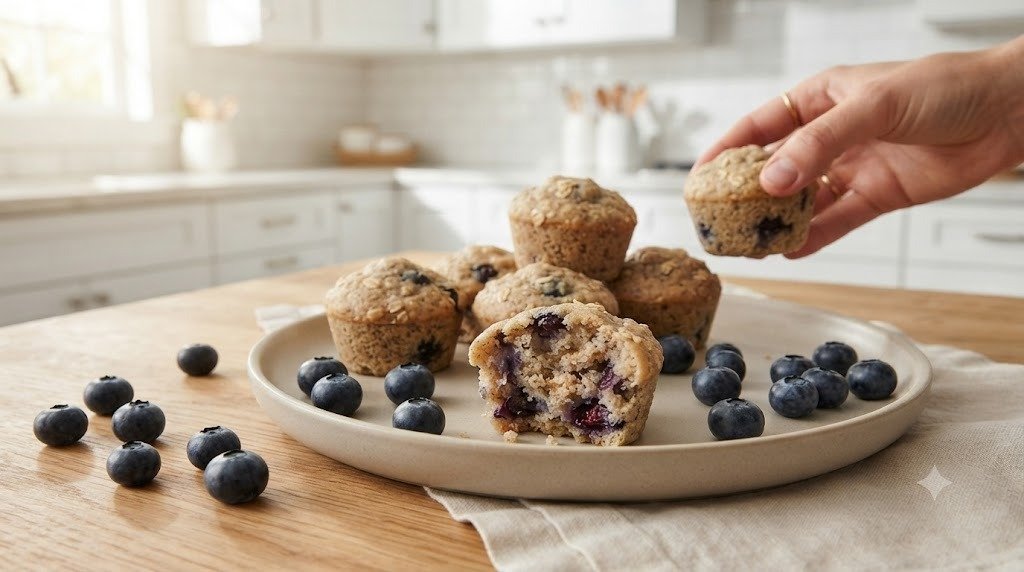
These muffins are one of those recipes I always seem to come back to. They’re naturally moist, easy to crumble into little pieces, and just sweet enough from the fruit without needing any added sugar.
Health Benefits
Blueberries provide antioxidants and vitamin C. Greek yogurt contributes calcium and protein, while oats add fiber that helps keep little tummies happy.
Ingredients
- 1 cup rolled oats
- ½ cup plain Greek yogurt
- 1 ripe banana
- 1 egg
- ½ cup fresh blueberries
- 1 teaspoon baking powder
Step-by-Step Recipe
- Blend the oats into a fine flour.
- Mash the banana until smooth.
- Whisk together the banana, yogurt, and egg.
- Stir in the oat flour and baking powder until no dry spots remain.
- Fold the blueberries into the batter gently so they don’t burst too much.
- Spoon the mixture into a greased mini muffin pan.
- Fill each cup about three-quarters full.
- Bake at 350°F (175°C) for 18–20 minutes until lightly golden.
- Allow the muffins to cool for at least 15 minutes.
- Break them into bite-sized pieces before serving.
BLW Serving Tips
I like serving these with a few slices of ripe kiwi or soft strawberries. They’re also handy for breakfast on busy mornings because they’re easy to prepare ahead.
Storage Tips
Store in the refrigerator for up to 4 days. Freeze for up to 2 months and thaw overnight before serving.
9. Spinach Ricotta Pasta Stars
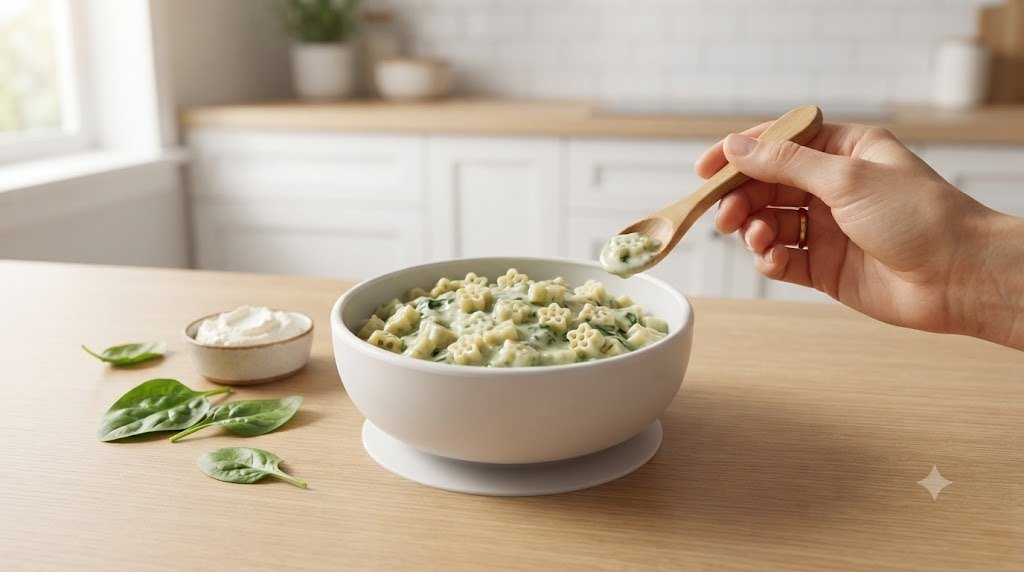
Pasta became much more fun once I started using tiny shapes that were easy for little fingers to grab. These creamy pasta stars are soft, colorful, and perfect for babies who are becoming more confident with self-feeding.
Health Benefits
Spinach adds iron, vitamin A, and folate. Ricotta provides calcium and protein, while pasta offers carbohydrates that give active little ones plenty of energy for exploring and playing.
Ingredients
- 1 cup tiny star pasta
- ½ cup ricotta cheese
- ½ cup finely chopped spinach
- 1 teaspoon unsalted butter
- 2 tablespoons reserved pasta water
Step-by-Step Recipe
- Cook the pasta until very soft, about 2–3 minutes longer than the package instructions.
- Reserve a few tablespoons of pasta water before draining.
- Steam or sauté the spinach until wilted and chop it finely.
- Melt the butter in a small pan over low heat.
- Stir in the spinach and ricotta until smooth.
- Add the cooked pasta and a splash of reserved pasta water.
- Stir gently until every piece is coated with the creamy sauce.
- Let the pasta cool for several minutes.
- Check the texture by pressing a pasta star between your fingers—it should squash easily.
- Spoon small portions onto the tray, spreading them out so babies can pick up individual pieces.
BLW Serving Tips
This pairs nicely with tiny pieces of roasted sweet potato or soft peas. I usually serve a modest portion because pasta can be surprisingly filling.
Storage Tips
Refrigerate for up to 2 days. This recipe is best enjoyed fresh, but leftovers can be gently reheated with a splash of milk or water.
10. Zucchini Carrot Quinoa Fritters
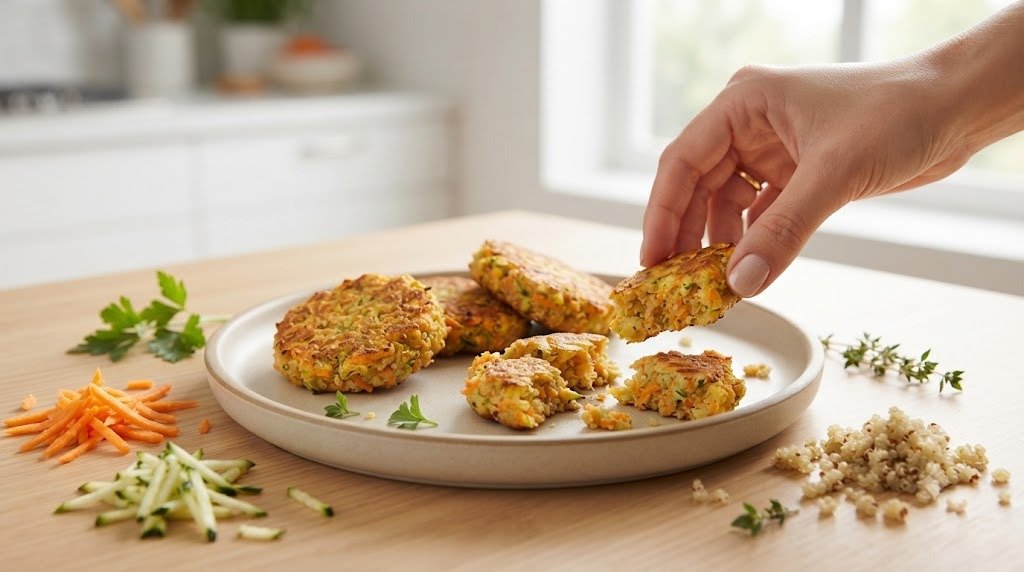
These colorful fritters are one of those meals that let me use up extra vegetables while giving my baby something fun to hold. They’re soft inside, lightly crisp around the edges, and easy to pull apart into tiny pieces for practicing the pincer grasp.
Health Benefits
Quinoa provides complete protein, iron, and fiber. Carrots add beta-carotene for healthy vision, while zucchini keeps the fritters tender and moist without making them heavy.
Ingredients
- 1 cup cooked quinoa
- ½ cup grated zucchini
- ½ cup grated carrot
- 1 egg
- 3 tablespoons oat flour
- 1 tablespoon olive oil
Step-by-Step Recipe
- Cook the quinoa according to the package directions and let it cool completely.
- Grate the zucchini and squeeze out as much moisture as possible with a clean kitchen towel.
- Grate the carrot finely so it softens quickly while baking.
- Combine the quinoa, zucchini, carrot, egg, and oat flour in a mixing bowl.
- Stir until the mixture holds together when pressed with a spoon.
- Shape into small, flat fritters using damp hands.
- Place them on a parchment-lined baking tray and lightly brush with olive oil.
- Bake at 375°F (190°C) for about 20 minutes, carefully flipping halfway through.
- Allow the fritters to cool until they are just room temperature.
- Break them into small, soft pieces that are easy for your baby to grasp independently.
BLW Serving Tips
Serve with mashed avocado, plain yogurt, or soft cucumber spears. These fritters also make a nice lunch packed alongside fruit for babies who eat away from home.
Storage Tips
Store in the refrigerator for up to 4 days. Freeze between sheets of parchment paper for up to 3 months. Reheat gently in the oven or microwave and cool before serving.
11. Turkey & Spinach Mini Meatballs
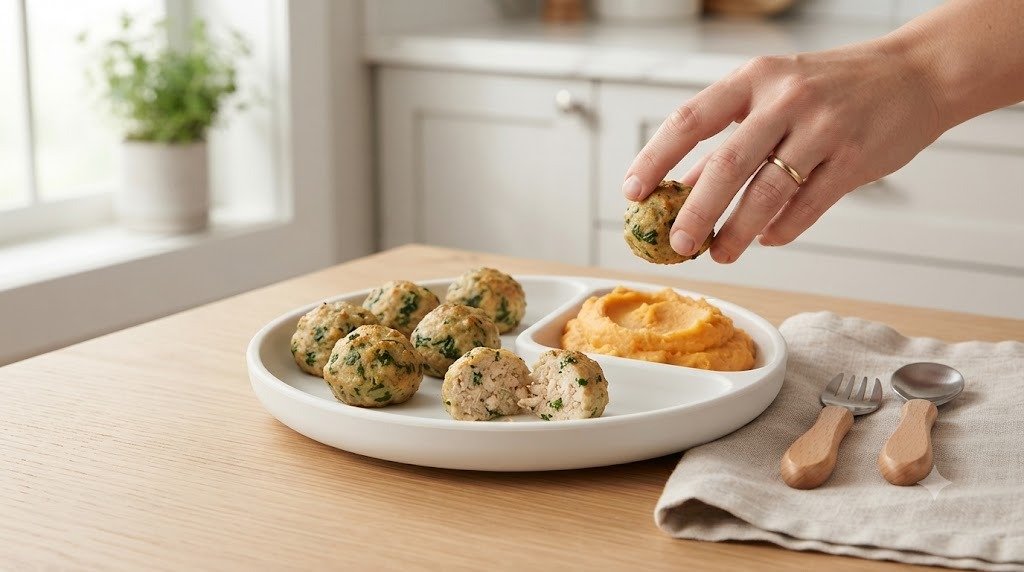
These little meatballs became one of my favorite freezer meals once my baby was eating more finger foods. They’re tender enough to mash easily with tiny gums and hold together well, making them perfect for practicing the pincer grasp. I usually keep a batch in the freezer for busy days when I need a quick, balanced lunch.
Health Benefits
Turkey is an excellent source of protein and iron, which support healthy growth and developing bodies. Spinach adds iron, vitamin A, vitamin C, and folate, while oats help keep the meatballs soft and easy for babies to chew.
Ingredients
- 1 pound (450 g) lean ground turkey
- 1 cup finely chopped fresh spinach
- ⅓ cup oat flour
- 1 small egg
- 2 tablespoons finely grated onion
- 1 tablespoon olive oil
Step-by-Step Recipe
- Preheat your oven to 375°F (190°C) and line a baking tray with parchment paper.
- Wash the spinach well, pat it dry, and chop it into very fine pieces so it blends evenly into the mixture.
- In a large bowl, combine the turkey, spinach, oat flour, egg, and grated onion.
- Mix gently with a spoon or clean hands until everything is evenly combined. Try not to overmix, as that can make the meatballs firm.
- Scoop about one tablespoon of the mixture for each meatball and roll gently into small balls.
- Arrange them on the prepared baking tray and lightly brush or spray with olive oil.
- Bake for 18–22 minutes, turning once halfway through so they cook evenly.
- Check that the turkey is fully cooked with no pink remaining in the center.
- Let the meatballs cool completely before serving.
- Cut each meatball into quarters or smaller bite-sized pieces for babies practicing their pincer grasp.
BLW Serving Tips
Serve two or three small meatballs with mashed sweet potato, soft green beans, or avocado slices. If your baby is still getting used to meat, gently flatten the pieces with a fork to make them even easier to manage.
Storage Tips
Store in an airtight container in the refrigerator for up to 4 days. Freeze for up to 3 months. Reheat gently until warm and allow them to cool before serving.
12. Soft Pear & Chia Overnight Oats
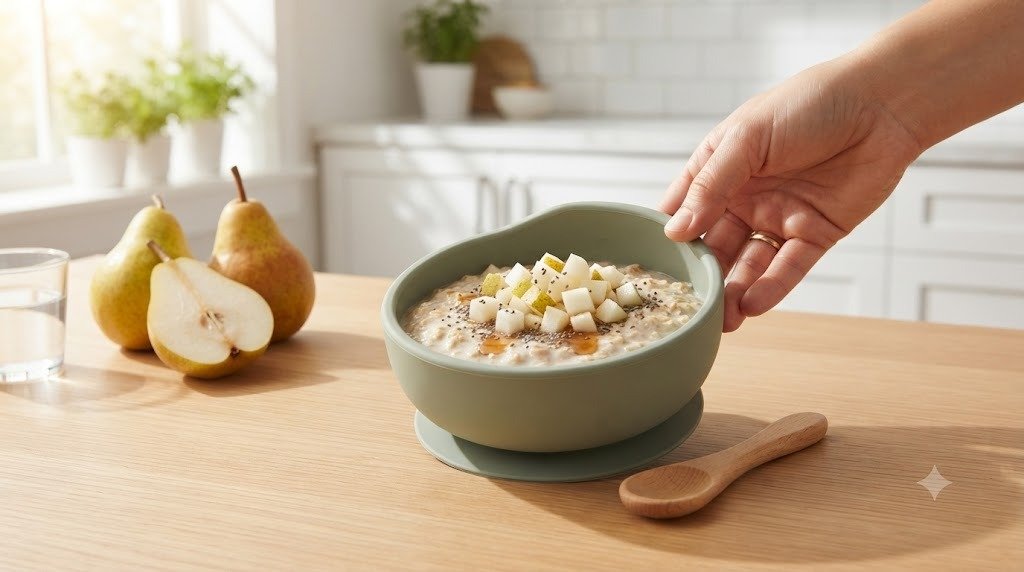
This has been one of my favorite make-ahead breakfasts because everything is ready when the morning starts. The oats become wonderfully soft overnight, while the tiny pear pieces give babies lots of opportunities to practice picking up small bites.
Health Benefits
Oats provide fiber for healthy digestion and long-lasting energy. Pears add vitamin C and natural sweetness, while chia seeds contribute healthy fats, fiber, and minerals like calcium.
Ingredients
- ½ cup rolled oats
- ½ cup whole milk or prepared infant-safe milk
- ¼ cup plain Greek yogurt
- ½ ripe pear, peeled and finely diced
- 1 teaspoon chia seeds
- ¼ teaspoon cinnamon (optional)
Step-by-Step Recipe
- Peel the pear and cut it into very small cubes.
- If the pear is still quite firm, steam the pieces for 3–4 minutes until softened, then let them cool.
- In a bowl or jar, combine the oats, milk, yogurt, chia seeds, and cinnamon.
- Stir well so the chia seeds are evenly distributed.
- Fold in the softened pear pieces.
- Cover and refrigerate overnight, or for at least 6 hours.
- The next morning, stir everything together. If the oats seem too thick, add a splash of milk until they’re creamy.
- Taste the texture by pressing a spoonful between your fingers. The oats should mash very easily.
- Spoon small portions onto your baby’s tray or into a suction bowl.
- Scatter a few extra soft pear pieces on top so your baby can practice picking them up individually.
BLW Serving Tips
Serve with tiny banana pieces or mashed berries for extra variety. I like using a silicone spoon alongside finger-feeding so babies can explore both skills at their own pace.
Storage Tips
Keep refrigerated for up to 2 days. This recipe isn’t ideal for freezing because the texture changes after thawing.
13. Rainbow Veggie Rice Balls
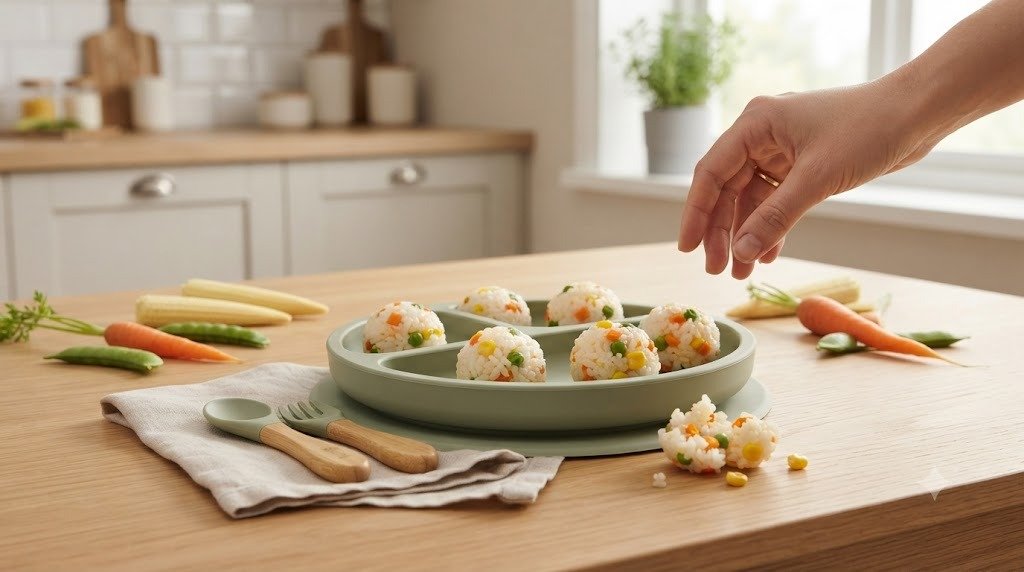
These colorful rice balls are always a fun way to finish the week because I can use leftover vegetables from the fridge. They’re soft enough to break apart easily, yet firm enough for little fingers to hold without falling apart immediately.
Health Benefits
Rice provides energy for active babies, while carrots, peas, and sweet corn offer fiber, vitamins, and antioxidants. Cheese adds calcium and protein, making these little bites satisfying as part of a balanced meal.
Ingredients
- 1½ cups cooked short-grain rice
- ¼ cup finely grated carrot
- ¼ cup cooked peas, lightly mashed
- ¼ cup cooked sweet corn kernels, chopped if large
- ¼ cup shredded mozzarella cheese
- 1 tablespoon finely chopped parsley (optional)
Step-by-Step Recipe
- Cook the rice until it’s slightly softer than usual, then allow it to cool until warm.
- Steam the carrot until tender if using freshly grated carrot, then let it cool.
- Mash the peas lightly with a fork, leaving a little texture.
- Chop the sweet corn into smaller pieces if needed so it’s easier for babies to manage.
- Mix the rice, vegetables, cheese, and parsley together in a large bowl.
- Allow the warm rice to soften the cheese slightly, helping everything stick together.
- With damp hands, gently roll the mixture into small balls about the size of a walnut.
- If the mixture feels too loose, chill it in the refrigerator for 15 minutes before shaping.
- Let the finished rice balls cool completely before serving.
- Break each ball into smaller bite-sized pieces for babies who are still mastering the pincer grasp.
BLW Serving Tips
Pair these rice balls with soft cucumber sticks, sliced avocado, or plain yogurt. I often serve two or three at lunch with fresh fruit to round out the meal.
Storage Tips
Refrigerate in an airtight container for up to 3 days. Freeze for up to 2 months. Reheat gently in the microwave with a splash of water to keep the rice soft, then cool before serving.
Conclusion
Watching your baby learn to feed themselves is one of those little parenting moments that feels both exciting and a bit messy. Some meals will end up on the floor, some bites will actually make it into tiny mouths, and every attempt helps build confidence. That’s all part of the learning process.
I like keeping a mix of vegetables, fruit, whole grains, healthy fats, and protein in our weekly meals so there’s always something new to explore. If one recipe isn’t a hit today, don’t worry. Babies often need several chances before deciding they like a new food or texture.
Most importantly, enjoy these moments together. Every baby develops eating skills at their own pace, and there isn’t a perfect timeline. Offer a variety of soft, safe finger foods, celebrate the small wins, and let curiosity lead the way. Before you know it, those tiny fingers will be picking up every little bite with confidence.