
Lunch can feel like the trickiest meal of the day when you’re doing Baby-Led Weaning. Some days your baby happily munches on everything you put in front of them, and other days it all ends up on the floor. I’ve been there, and I learned that keeping lunch simple, colorful, and easy to hold makes a huge difference. The best BLW lunches don’t have to be fancy—they just need to be nutritious, soft enough for little mouths, and fun to explore.
Most babies are ready for Baby-Led Weaning around 6 months of age once they’re sitting well with support, showing interest in food, and able to grasp and bring food to their mouth. It’s always a good idea to introduce one new food at a time and make sure everything is cooked until soft enough to mash between your fingers. With a little planning, lunch can become one of the easiest meals of the day instead of the most stressful.
1. Cheesy Broccoli Egg Muffins
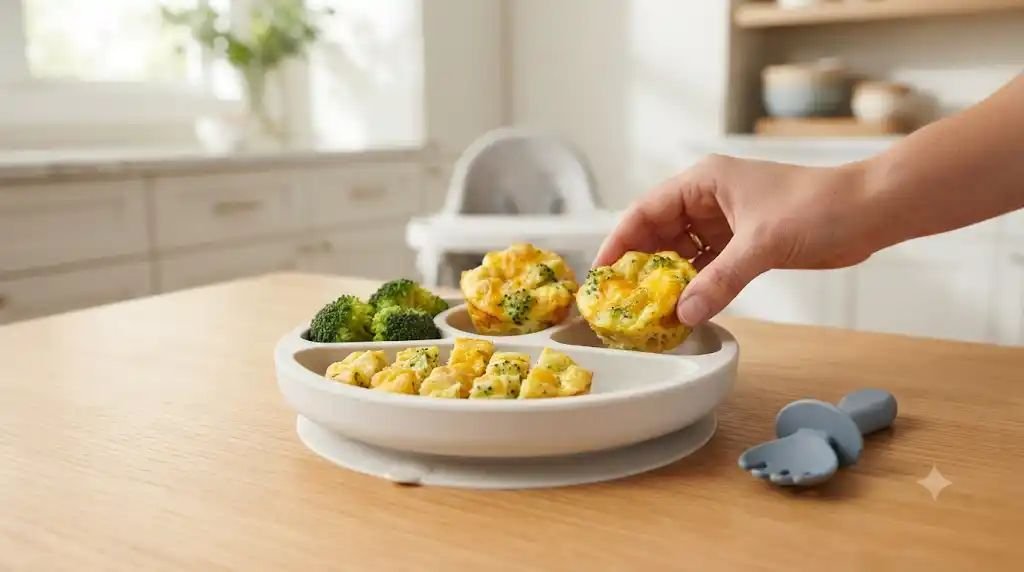
These soft little egg muffins have been one of my favorite make-ahead lunches for busy weeks. They’re easy for tiny hands to grab, packed with vegetables, and stay wonderfully soft inside. I usually start serving these around 6 months once eggs have been introduced safely, and they continue to be a family favorite well into the toddler years.
Health Benefits
Eggs provide protein and choline to support growing brains, while broccoli adds fiber, vitamin C, folate, and iron. Cheese contributes calcium and healthy fats, making these muffins both filling and nourishing.
Ingredients
- 4 large eggs
- ½ cup finely chopped broccoli florets
- ¼ cup finely shredded cheddar cheese
- 2 tablespoons whole milk (optional)
- 1 tablespoon finely chopped spinach
- 1 teaspoon olive oil (for greasing)
- Pinch of garlic powder (optional for older babies)
Step-by-Step Recipe
- Preheat your oven to 350°F (175°C). Lightly grease a silicone muffin tray or regular muffin tin with olive oil.
- Wash the broccoli thoroughly and chop it into very small pieces. Steam it for about 4–5 minutes until it’s tender, then let it cool slightly.
- Finely chop the spinach so it blends easily into the egg mixture.
- Crack the eggs into a mixing bowl and whisk until completely smooth. Add the milk if using.
- Stir in the steamed broccoli, spinach, and shredded cheese until everything is evenly combined.
- Spoon the mixture into the muffin cups, filling each about three-quarters full.
- Bake for 18–22 minutes, or until the centers are set and the tops are lightly golden.
- Remove the muffins from the oven and let them cool in the pan for about 10 minutes before taking them out.
- For younger babies, slice each muffin into long strips or quarters so they’re easier to grasp.
- Check that the muffins are only slightly warm before serving.
BLW Serving Tips
- Serve one or two strips at a time to avoid overwhelming your baby.
- Pair with soft avocado slices or ripe pear wedges.
- If your baby is still developing their pincer grasp, larger strips are usually easier to hold than tiny pieces.
Storage Tips
- Refrigerate in an airtight container for up to 4 days.
- Freeze for up to 2 months.
- Reheat gently in the microwave for 20–30 seconds or warm in the oven before serving. Always check the temperature carefully.
2. Sweet Potato & Salmon Patties
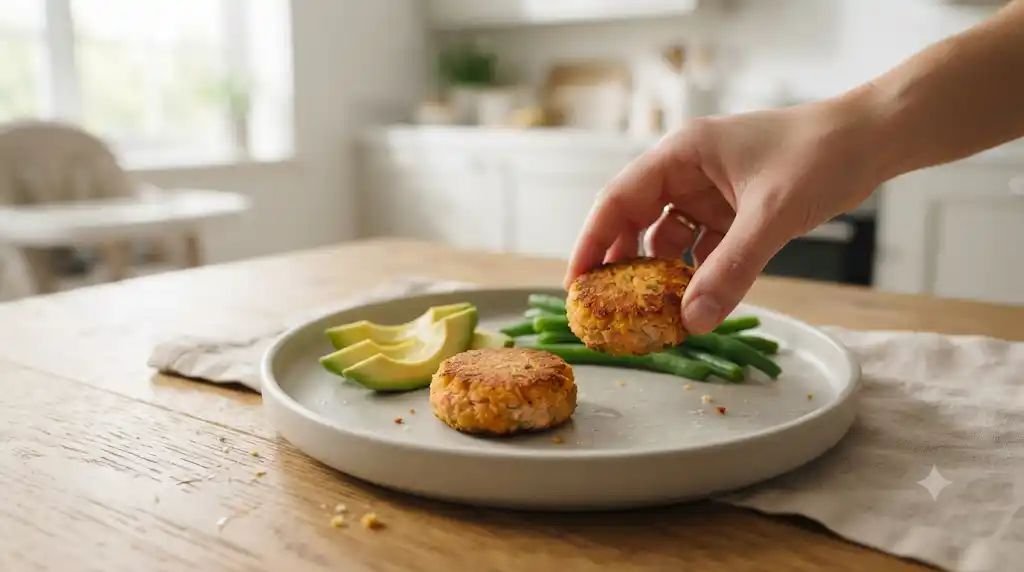
Whenever I have leftover baked salmon, these patties are the first thing I make. They’re soft, naturally flavorful, and don’t fall apart easily, which makes them perfect for little hands learning to feed themselves.
Health Benefits
Salmon is rich in omega-3 fats, protein, and vitamin D. Sweet potatoes provide fiber, vitamin A, potassium, and natural sweetness that many babies enjoy.
Ingredients
- 1 cup cooked sweet potato, mashed
- ¾ cup cooked salmon, skin and bones removed
- 1 egg
- 2 tablespoons oat flour
- 1 tablespoon finely chopped parsley
- 1 teaspoon olive oil
Step-by-Step Recipe
- Bake or steam the sweet potato until very soft. Mash it until smooth and allow it to cool.
- Carefully check the cooked salmon for every tiny bone before flaking it into small pieces.
- Add the mashed sweet potato, salmon, egg, oat flour, and parsley to a large bowl.
- Mix gently until everything comes together into a soft mixture.
- If the mixture feels sticky, let it rest for five minutes so the oat flour absorbs moisture.
- Shape into small patties about the size of your palm and around half an inch thick.
- Heat olive oil in a non-stick skillet over medium-low heat.
- Cook each patty for about 3–4 minutes per side until lightly golden.
- Transfer to a cooling rack and allow them to cool completely before serving.
- Cut larger patties into finger-length strips for younger babies.
BLW Serving Tips
- Serve with steamed green beans or soft cucumber spears.
- A spoonful of plain Greek yogurt on the side makes a nice dipping option for older babies.
- Don’t overcrowd the plate. Two small patties are usually enough for one meal.
Storage Tips
- Refrigerate for up to 3 days.
- Freeze between sheets of parchment paper for up to 2 months.
- Reheat in a skillet or oven until warmed through.
3. Soft Chicken & Veggie Rice Balls
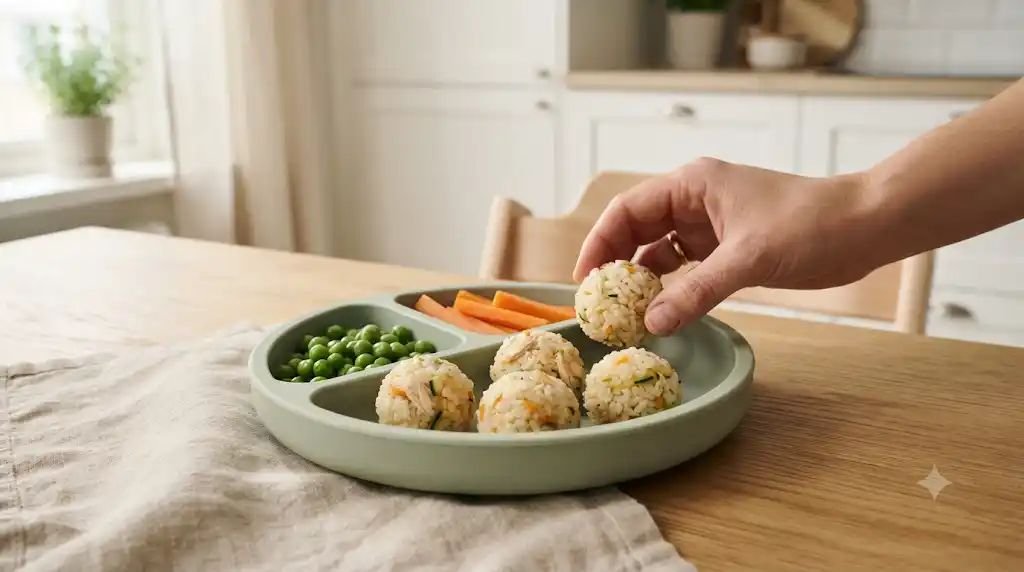
Rice balls quickly became one of my favorite lunch ideas because they’re easy to prepare with leftovers. They’re soft enough for babies to gum comfortably while staying together surprisingly well.
Health Benefits
Chicken provides protein and iron, while vegetables add vitamins and fiber. Rice supplies energy for active little bodies, making this a balanced lunch option.
Ingredients
- 1 cup cooked short-grain rice
- ½ cup cooked shredded chicken
- ¼ cup finely grated carrot
- 2 tablespoons finely chopped peas
- 1 tablespoon cream cheese
- 1 teaspoon olive oil
Step-by-Step Recipe
- Cook the rice until it’s slightly softer than usual.
- Steam the carrots and peas until completely tender.
- Finely shred the cooked chicken into tiny pieces.
- Mix the rice, chicken, vegetables, and cream cheese together while the rice is still slightly warm.
- Stir well until the mixture becomes sticky enough to hold together.
- Let the mixture cool enough to handle comfortably.
- Wet your hands lightly with water and shape into small balls or oval logs.
- If needed, chill them in the refrigerator for 15 minutes to firm up.
- Serve at room temperature or slightly warm.
- Gently flatten each rice ball if your baby is just starting BLW, making them easier to grasp.
BLW Serving Tips
- Pair with avocado slices or steamed zucchini sticks.
- Offer water in an open cup or straw cup alongside lunch.
- These also make a great lunch for outings.
Storage Tips
- Refrigerate for up to 2 days.
- Best enjoyed fresh.
- Freeze only if needed, though the texture may become softer after thawing.
4. Avocado Turkey Roll-Ups
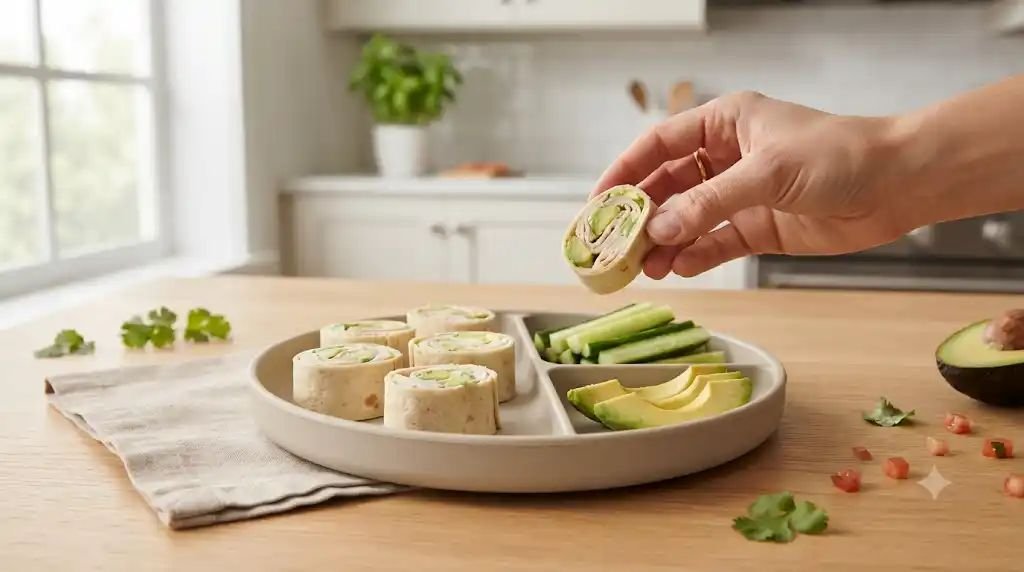
This lunch takes just a few minutes to prepare, which is exactly what I need on hectic afternoons. The creamy avocado helps keep everything soft while the turkey adds satisfying protein.
Health Benefits
Avocados are packed with healthy fats and fiber. Turkey provides protein, zinc, and iron, while the tortilla offers extra energy for growing babies.
Ingredients
- 1 small whole wheat tortilla
- ½ ripe avocado
- 2 thin slices cooked turkey breast, chopped
- 1 tablespoon plain cream cheese
- 1 tablespoon finely grated cucumber
Step-by-Step Recipe
- Mash the avocado until smooth.
- Stir the cream cheese into the avocado until creamy.
- Spread the mixture evenly across the tortilla.
- Sprinkle the chopped turkey and grated cucumber over the spread.
- Roll the tortilla tightly from one end.
- Let it rest for two minutes so it holds its shape.
- Slice into thick finger-width pinwheels or long strips.
- For younger babies, long strips are usually easier to pick up than round slices.
- Check that the filling stays secure before serving.
- Serve immediately while the avocado is fresh.
BLW Serving Tips
- Offer with soft roasted sweet potato wedges.
- Avoid overfilling the tortilla so it stays easy to hold.
- If your baby struggles with tortillas, lightly warm it before rolling to soften it further.
Storage Tips
- Best served immediately.
- Can be refrigerated for up to 12 hours, though the avocado may darken slightly.
- Not recommended for freezing.
5. Lentil & Carrot Mini Fritters
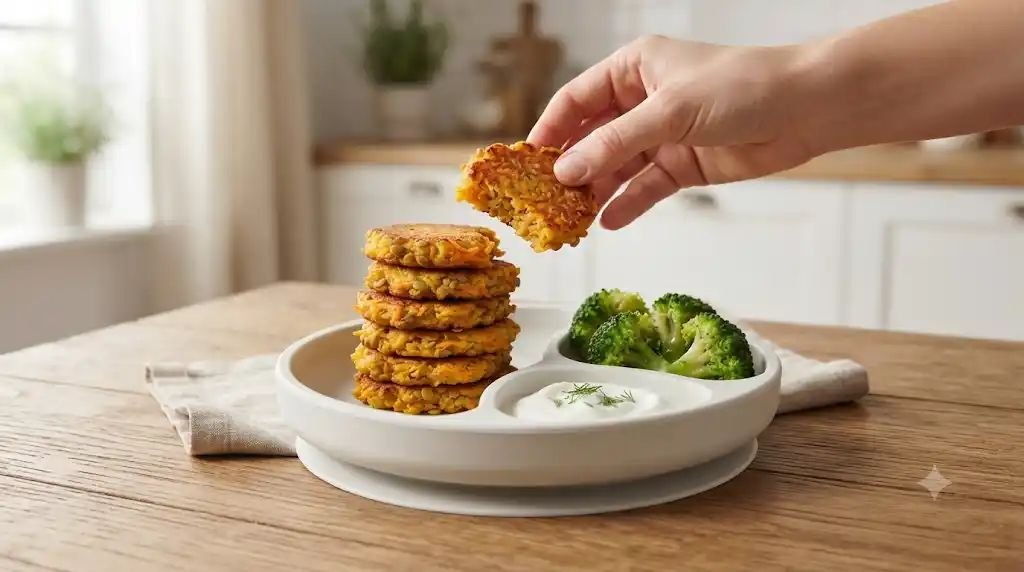
These little fritters have saved many lunches when I wanted something filling without spending much time in the kitchen. They’re wonderfully soft inside with just enough firmness on the outside for little fingers to grip.
Health Benefits
Lentils are an excellent source of plant protein, iron, and fiber. Carrots provide vitamin A, while eggs add extra protein to help keep babies satisfied.
Ingredients
- 1 cup cooked red lentils
- ½ cup finely grated carrot
- 1 egg
- 3 tablespoons oat flour
- 2 tablespoons finely chopped parsley
- 1 teaspoon olive oil
Step-by-Step Recipe
- Cook the red lentils until they’re very soft, then drain any excess liquid.
- Let the lentils cool slightly before placing them into a mixing bowl.
- Add the grated carrot, egg, oat flour, and parsley.
- Mix everything thoroughly until you have a thick batter.
- If the mixture seems loose, let it sit for about 10 minutes to thicken naturally.
- Heat olive oil in a non-stick skillet over medium-low heat.
- Scoop small spoonfuls into the pan and gently flatten each one with the back of the spoon.
- Cook for about 3–4 minutes per side until lightly golden and fully cooked.
- Transfer the fritters to a cooling rack so steam doesn’t make them soggy.
- Allow them to cool completely before serving. Cut larger fritters into strips if needed for younger babies.
BLW Serving Tips
- Serve with plain Greek yogurt for dipping if your baby enjoys self-feeding with dips.
- Pair with steamed broccoli florets or soft tomato wedges.
- Start with one or two fritters and let your baby ask for more if they’re still hungry.
Storage Tips
- Refrigerate in an airtight container for up to 4 days.
- Freeze for up to 2 months with parchment paper between layers.
- Reheat in the oven, air fryer, or skillet until warmed through. Avoid overheating so they stay soft.
6. Creamy Avocado Pasta
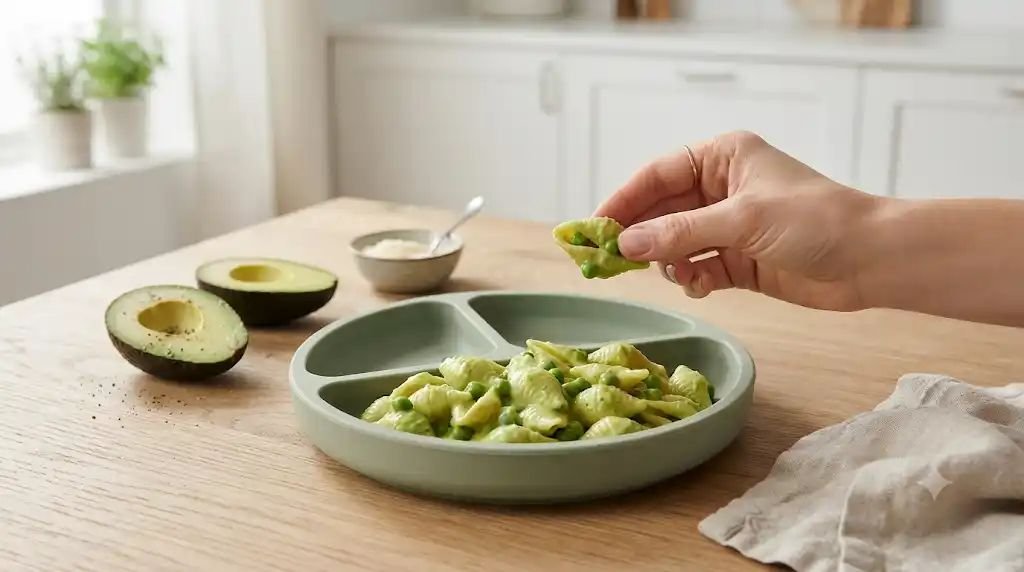
This is one of the lunches I make when I need something on the table fast. The creamy avocado coats every piece of pasta without needing a heavy sauce, and the soft texture makes it easy for little hands to grab. It’s a simple meal that feels fresh, filling, and perfect for busy afternoons.
Health Benefits
Avocado is full of healthy fats that support brain development, while whole wheat pasta provides fiber and lasting energy. Peas add vitamin C, fiber, and plant-based protein, and Parmesan contributes calcium for growing bones.
Ingredients
- 1 cup whole wheat pasta shells or fusilli
- ½ ripe avocado
- 2 tablespoons plain full-fat Greek yogurt
- 2 tablespoons finely grated Parmesan cheese
- ¼ cup frozen peas
- 1 teaspoon olive oil
- 1–2 tablespoons reserved pasta water
Step-by-Step Recipe
- Bring a pot of water to a boil and cook the pasta until very soft. During the final 3 minutes of cooking, add the peas to the same pot so they become tender.
- Reserve a couple of tablespoons of the pasta water, then drain the pasta and peas. Let them cool for a minute or two.
- Mash the avocado in a bowl until completely smooth. Stir in the Greek yogurt, Parmesan, olive oil, and a tablespoon of the warm pasta water to create a creamy sauce.
- Add the warm pasta and peas to the bowl. Toss gently until every piece is coated. If the sauce seems too thick, stir in another splash of pasta water.
- Spread the pasta out on a plate for a few minutes so it cools evenly. Check that it’s only slightly warm before serving.
- Serve a handful of pasta pieces at a time so your baby can easily pick them up without feeling overwhelmed.
BLW Serving Tips
- Pasta shapes like shells, fusilli, or penne are much easier for little hands to grasp than long noodles.
- Pair with soft cucumber spears, ripe tomato wedges (peeled if needed), or steamed broccoli.
- Let your baby self-feed while you enjoy the meal together—it often encourages more interest in eating.
Storage Tips
- Refrigerate in an airtight container for up to 2 days.
- Avocado may darken slightly but the pasta is still perfectly safe to eat.
- Not recommended for freezing.
- Reheat gently with a splash of water or milk to loosen the sauce.
7. Spinach & Cottage Cheese Quesadilla Strips
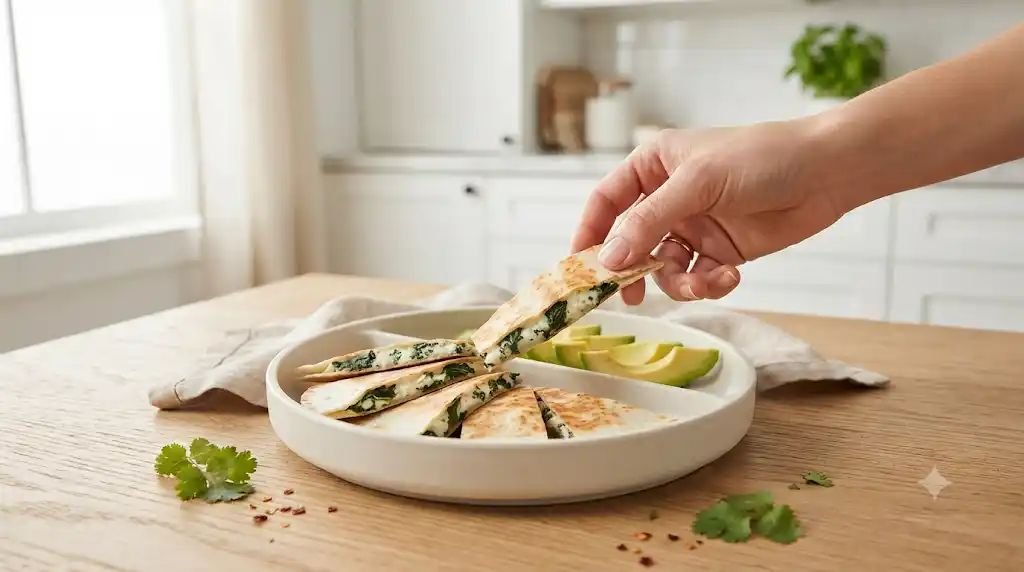
This is one of my favorite “I only have ten minutes” lunches. The filling stays creamy and soft while the tortilla becomes just lightly golden, giving babies something easy to grip without becoming crunchy.
Health Benefits
Cottage cheese provides calcium and protein, while spinach adds iron, folate, vitamin A, and fiber. Whole wheat tortillas contribute extra fiber and energy to keep little tummies satisfied.
Ingredients
- 1 small whole wheat tortilla
- ¼ cup full-fat cottage cheese
- ¼ cup finely chopped fresh spinach
- 2 tablespoons shredded mozzarella cheese
- 1 teaspoon butter or olive oil
Step-by-Step Recipe
- Finely chop the spinach and cook it in a dry skillet for about 2 minutes until wilted. Let it cool slightly, then stir it into the cottage cheese.
- Spread the spinach mixture over half of the tortilla and sprinkle the mozzarella evenly on top before folding the tortilla in half.
- Heat a lightly greased skillet over medium-low heat and cook the quesadilla for 2–3 minutes on each side, just until the cheese melts and the tortilla is lightly golden.
- Transfer it to a cutting board and let it cool for at least 5 minutes. The filling will firm up slightly as it cools.
- Slice into thick finger-length strips that are easy for little hands to hold.
- Check that the center isn’t too hot before serving.
- Serve immediately while the tortilla is still soft.
BLW Serving Tips
- Long strips are easier for younger babies than small triangles.
- Add avocado slices or roasted sweet potato wedges for a more filling lunch.
- If your baby enjoys dipping, offer a spoonful of plain Greek yogurt on the side.
Storage Tips
- Refrigerate leftovers for up to 2 days.
- Reheat gently in a skillet over low heat.
- Best enjoyed fresh and not recommended for freezing.
8. Turkey & Zucchini Meatballs
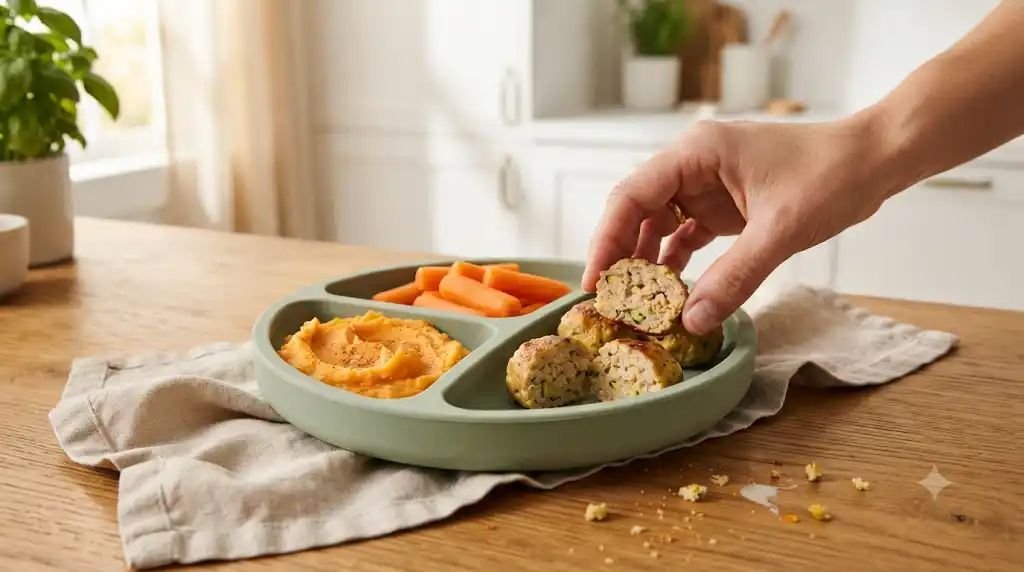
These meatballs are one of my favorite freezer lunches because they’re incredibly tender and easy to batch cook. The grated zucchini keeps them moist, and they’re just the right size for little hands once cut into smaller pieces.
Health Benefits
Turkey is an excellent source of protein, iron, and zinc, while zucchini adds vitamin C, fiber, and moisture. Oats provide whole grains that help keep the meatballs soft and satisfying.
Ingredients
- 1 pound lean ground turkey
- ½ cup finely grated zucchini
- ¼ cup quick oats
- 1 egg
- 1 tablespoon finely chopped parsley
- 1 tablespoon grated Parmesan cheese
- 1 teaspoon olive oil
Step-by-Step Recipe
- Preheat the oven to 375°F (190°C) and line a baking tray with parchment paper.
- Grate the zucchini and gently squeeze out as much liquid as possible using a clean kitchen towel. This helps the meatballs hold together.
- In a large bowl, combine the turkey, zucchini, oats, egg, parsley, and Parmesan. Mix gently with clean hands until everything is evenly combined. Overmixing can make the meatballs firm.
- Roll the mixture into small meatballs about the size of a golf ball and place them on the prepared baking tray, leaving a little space between each one.
- Lightly brush or drizzle with olive oil to help them brown.
- Bake for 18–22 minutes, turning them halfway through if you’d like even coloring.
- Check that the centers are fully cooked and no pink remains.
- Let the meatballs cool for at least 10 minutes before cutting each one into halves or quarters for younger babies.
- Serve slightly warm alongside mashed sweet potato, steamed vegetables, or soft pasta.
BLW Serving Tips
- Larger halves are easier for younger babies to grasp than tiny bite-sized pieces.
- Pair with soft roasted carrots, peas, or avocado slices.
- These meatballs also work well tucked into soft pita bread for older toddlers.
Storage Tips
- Refrigerate in an airtight container for up to 4 days.
- Freeze for up to 3 months.
- Reheat in the oven, microwave, or simmer briefly in tomato sauce until heated through.
9. Veggie Oat Pancakes
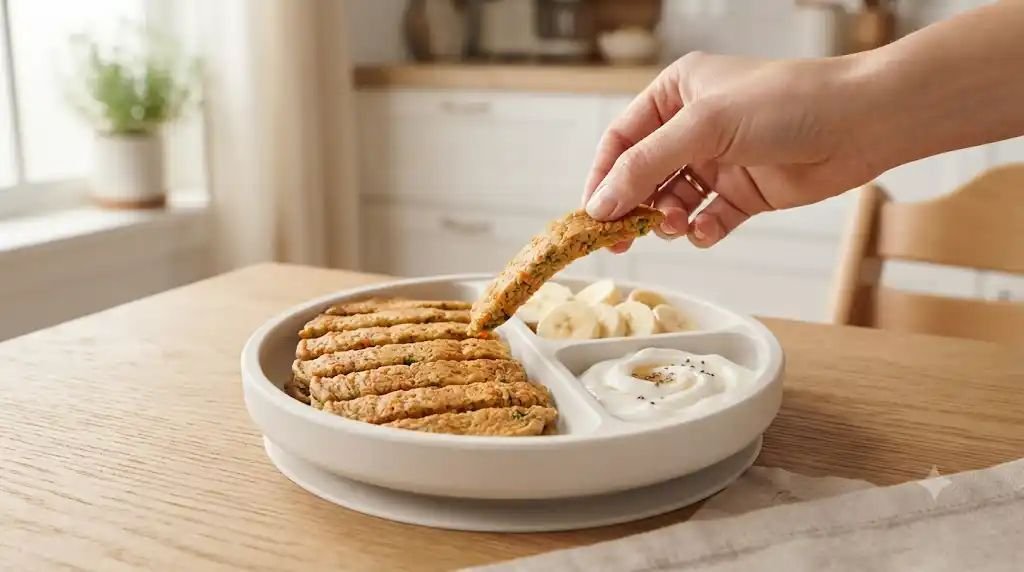
I love making a double batch of these because they work for lunch, snacks, or even breakfast. They’re soft, flexible, and packed with vegetables without feeling like “vegetable food.”
Health Benefits
Oats provide fiber for healthy digestion and steady energy. Eggs add protein, while zucchini and carrots supply vitamin A, vitamin C, antioxidants, and extra moisture.
Ingredients
- 1 cup rolled oats
- 2 eggs
- ½ cup finely grated zucchini
- ¼ cup finely grated carrot
- ¼ cup milk
- 1 teaspoon baking powder
- 1 teaspoon olive oil
Step-by-Step Recipe
- Blend the rolled oats into a fine flour. In a bowl, whisk together the eggs and milk before stirring in the oat flour and baking powder until smooth.
- Fold the grated zucchini and carrot into the batter and let it rest for about 5 minutes so the oats absorb some of the liquid.
- Heat a lightly greased non-stick skillet over medium-low heat. Spoon small circles of batter into the pan.
- Cook until bubbles appear on the surface, then flip carefully and cook the other side until fully set and lightly golden.
- Transfer the pancakes to a cooling rack and allow them to cool completely.
- Cut into finger-width strips before serving.
BLW Serving Tips
- Serve with mashed avocado, plain Greek yogurt, or soft fruit slices.
- These pancakes are easy to pack for picnics or daycare lunches.
- Start with one or two strips and offer more if your baby is still hungry.
Storage Tips
- Refrigerate for up to 4 days.
- Freeze between sheets of parchment paper for up to 2 months.
- Warm gently in a skillet or toaster oven before serving.
10. Chickpea & Sweet Corn Fritters
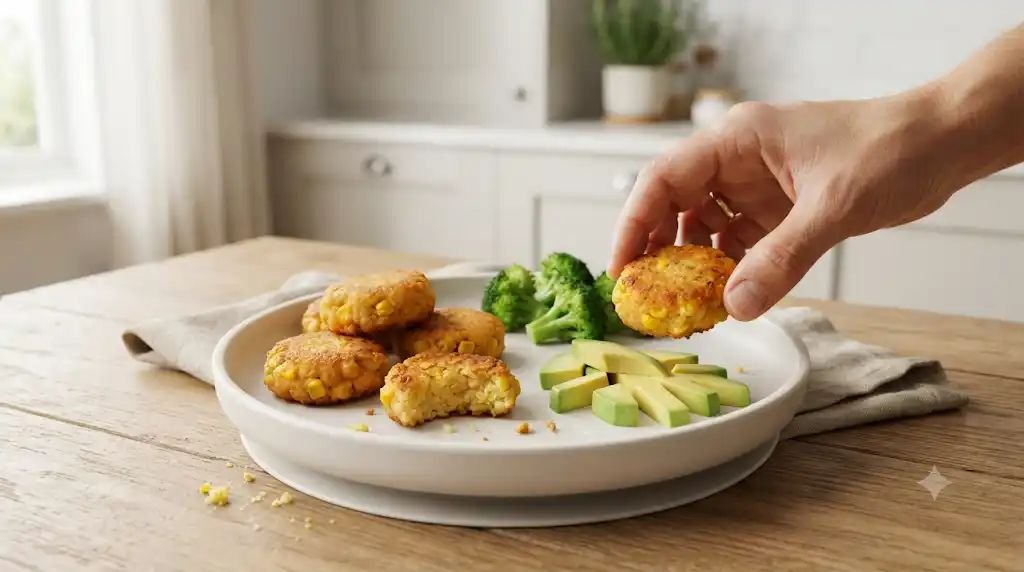
These fritters are one of those lunches the whole family ends up eating together. They’re soft in the center, easy to hold, and a great way to add more beans to your baby’s meals without much extra effort.
Health Benefits
Chickpeas are rich in plant-based protein, iron, fiber, and folate. Sweet corn adds natural sweetness, vitamin C, and carbohydrates for energy, while eggs help bind the mixture and provide additional protein.
Ingredients
- 1 cup cooked chickpeas
- ½ cup cooked sweet corn
- 1 egg
- 3 tablespoons oat flour
- 2 tablespoons finely chopped parsley
- 1 teaspoon olive oil
Step-by-Step Recipe
- Mash the chickpeas with a fork until mostly smooth, leaving a little texture. Lightly mash the sweet corn as well to make it easier for younger babies to manage.
- Add the egg, oat flour, parsley, and corn to the chickpeas, then mix until a thick batter forms. Let it sit for about 5 minutes if it feels too soft.
- Heat olive oil in a non-stick skillet over medium-low heat.
- Scoop small spoonfuls of the mixture into the pan and gently flatten each one with the back of the spoon.
- Cook for about 3–4 minutes per side until lightly golden and cooked through.
- Transfer the fritters to a cooling rack and allow them to cool before serving.
- Serve whole for confident eaters or cut into finger-sized pieces for younger babies.
BLW Serving Tips
- Pair with avocado slices, steamed broccoli, or roasted carrot sticks.
- A spoonful of plain yogurt makes a fun dipping option for babies who enjoy exploring different textures.
- These fritters travel well, making them a handy lunch for days out.
Storage Tips
- Refrigerate in an airtight container for up to 4 days.
- Freeze for up to 2 months.
- Reheat in a skillet, oven, or air fryer until warmed through while keeping the inside soft.
11. Mini Veggie & Cheese Frittata Squares
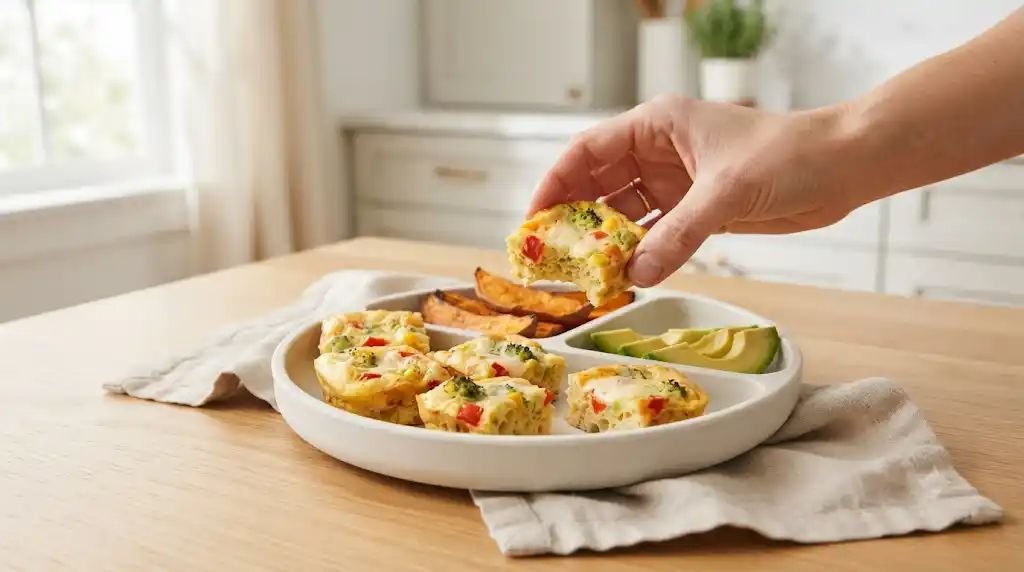
Whenever I have a few leftover vegetables in the refrigerator, this is one of the first lunches I make. It’s a simple way to use what you already have, and the soft, fluffy texture is perfect for babies learning to chew. I often bake a batch on Sunday so lunch is one less thing to think about during the week.
Health Benefits
Eggs are a great source of protein and choline to support healthy brain development. Bell peppers and spinach add vitamins A and C, while cheese provides calcium and healthy fats that help keep little tummies full.
Ingredients
- 4 large eggs
- ¼ cup finely chopped spinach
- ¼ cup finely diced red bell pepper
- ¼ cup shredded cheddar cheese
- 2 tablespoons whole milk
- 1 teaspoon olive oil
Step-by-Step Recipe
- Preheat the oven to 350°F (175°C) and lightly grease a small baking dish with olive oil.
- Whisk the eggs and milk together until smooth. Stir in the spinach, bell pepper, and shredded cheese.
- Pour the mixture into the prepared baking dish and spread the vegetables evenly so every slice has a little of everything.
- Bake for 18–22 minutes, or until the center is fully set and the edges are lightly golden.
- Let the frittata cool in the pan for about 10 minutes before lifting it out.
- Cut into long finger-sized strips or small squares, depending on your baby’s eating skills.
- Check that each piece is only slightly warm before serving.
BLW Serving Tips
- Finger-length strips are usually easiest for younger babies to grasp.
- Pair with soft avocado slices or roasted sweet potato wedges.
- Serve one or two pieces at a time and let your baby ask for more.
Storage Tips
- Refrigerate in an airtight container for up to 4 days.
- Freeze for up to 2 months.
- Reheat gently in the microwave or oven until just warm.
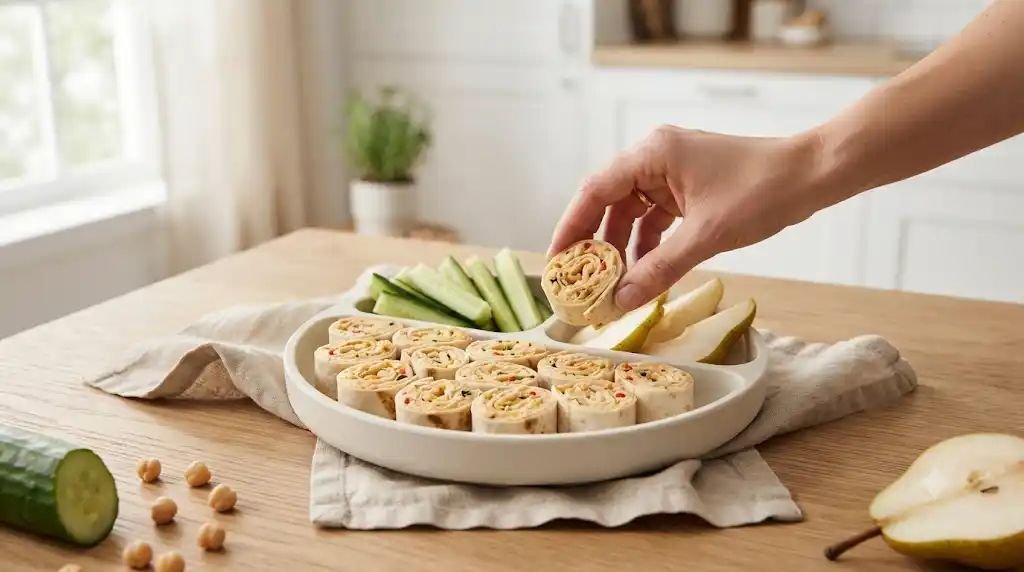
12. Hummus & Roasted Veggie Pinwheels
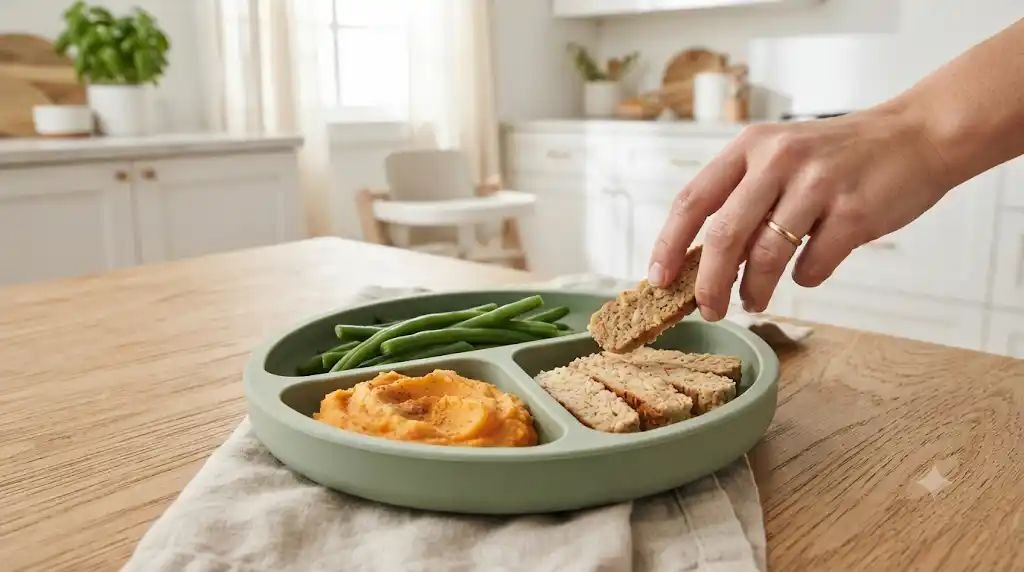
This is one of my favorite lunches for using leftover roasted vegetables. The hummus keeps everything soft, while the tortilla holds together well enough for little hands. It looks colorful on the plate without taking much extra effort.
Health Benefits
Hummus provides plant-based protein, healthy fats, fiber, and iron from chickpeas and tahini. Roasted vegetables add vitamins, antioxidants, and natural sweetness that many babies enjoy.
Ingredients
- 1 small whole wheat tortilla
- 3 tablespoons plain hummus
- ¼ cup roasted zucchini, finely chopped
- ¼ cup roasted red bell pepper, finely chopped
- 2 tablespoons finely grated carrot
Step-by-Step Recipe
- Spread the hummus evenly across the tortilla, leaving a small border around the edges.
- Scatter the roasted vegetables and grated carrot over the hummus in an even layer.
- Roll the tortilla tightly from one end, pressing gently as you roll so the filling stays in place.
- Let the roll rest for 2–3 minutes before slicing. This helps it hold its shape.
- Slice into thick pinwheels or long strips, whichever is easier for your baby to hold.
- Serve immediately once the vegetables have cooled to room temperature.
BLW Serving Tips
- Long strips are often easier for beginners than round pinwheels.
- Pair with ripe pear slices, steamed broccoli, or cucumber spears.
- If the tortilla feels a little firm, warm it for a few seconds before assembling.
Storage Tips
- Best served fresh.
- Refrigerate for up to 24 hours in an airtight container.
- Not recommended for freezing.
13. Baked Apple Chicken Meatloaf Fingers
These meatloaf fingers are one of those recipes that disappear quickly in our house. The grated apple keeps the chicken wonderfully moist, and the mild sweetness makes them especially appealing for babies who are still getting used to savory foods.
Health Benefits
Chicken provides protein, iron, and zinc to support healthy growth. Apple adds fiber and natural sweetness, while oats contribute whole grains that help keep the texture soft and tender.
Ingredients
- 1 pound ground chicken
- ½ cup grated apple (peeled)
- ¼ cup quick oats
- 1 egg
- 1 tablespoon finely chopped parsley
- 1 teaspoon olive oil
Step-by-Step Recipe
- Preheat the oven to 375°F (190°C) and line a baking tray or loaf pan with parchment paper.
- Peel and grate the apple, then gently squeeze out excess juice so the mixture isn’t too wet.
- Combine the ground chicken, grated apple, oats, egg, and parsley in a large bowl. Mix just until everything is evenly combined.
- Press the mixture into a small loaf pan or shape it into a flat rectangle about 1 inch thick on the prepared baking tray.
- Lightly brush the top with olive oil to help it brown.
- Bake for 25–30 minutes, or until the center reaches a safe internal temperature and the top is lightly golden.
- Let the meatloaf rest for 10 minutes before removing it from the pan. Resting helps it stay together when sliced.
- Slice into finger-length strips that are easy for little hands to hold.
- Allow the strips to cool until just warm before serving.
BLW Serving Tips
- Serve with mashed sweet potato, steamed green beans, or soft peas.
- Finger-length pieces are easier for younger babies than bite-sized cubes.
- Leftovers also make a great lunch for the next day.
Storage Tips
- Refrigerate for up to 4 days.
- Freeze in individual portions for up to 3 months.
- Reheat gently in the microwave, oven, or skillet until warmed through.
Conclusion
Baby-Led Weaning doesn’t have to mean preparing a different meal every day. I’ve found that keeping a few simple recipes in rotation makes lunch much less stressful, and many of these ideas can be made ahead, frozen, or turned into leftovers for another day. That little bit of planning has saved me more than once on busy afternoons.
Remember that every baby learns to eat at their own pace. Some lunches will disappear in minutes, while others may end up mostly on the floor—and that’s all part of the learning process. Keep offering a variety of textures, colors, and flavors without worrying about perfection. With patience, practice, and plenty of opportunities to explore food, your little one will continue building confidence one bite at a time.