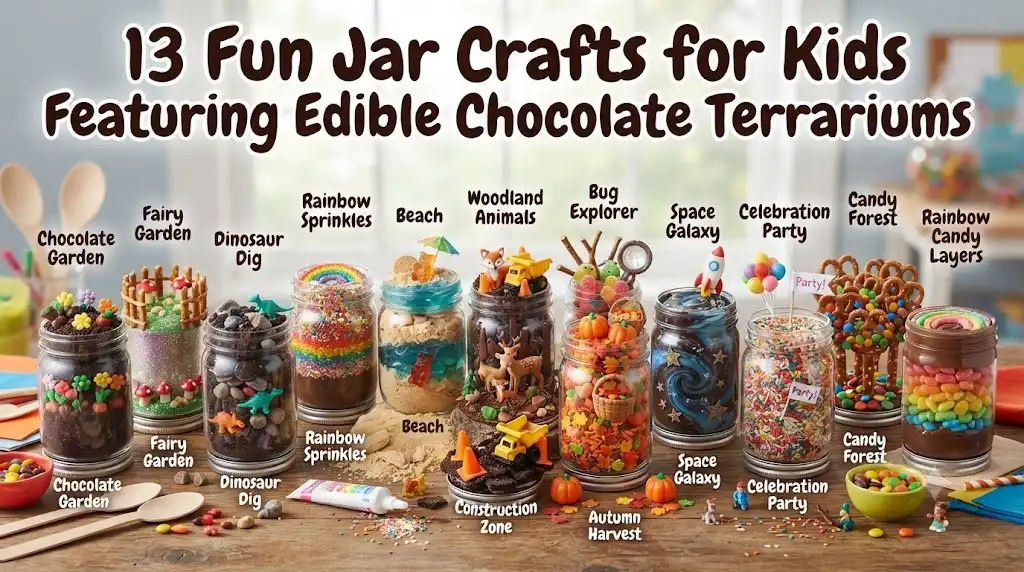
Looking for a screen-free activity that keeps little hands busy and excited? You’re in the right place. Whenever I pull out a box of clean jars, chocolate cookies, colorful candies, and craft supplies, the room fills with happy chatter. These projects have become some of my favorite rainy-day and classroom activities because they mix creativity with a delicious surprise at the end.
If you’ve ever watched preschoolers proudly carry home a craft they made themselves, you already know the magic. These jar crafts encourage imagination, build important early learning skills, and create sweet memories for families. Expect a few cookie crumbs on the table and chocolate smiles along the way—that’s simply part of the fun.
Safety First
Always supervise children during every activity, especially when using child-safe scissors, handling small decorations like sprinkles or candies, or working with glass jars. For younger children, consider using clear plastic jars instead of glass to reduce the risk of breakage. Check for food allergies before serving edible ingredients, encourage regular hand washing, and remind children that not every craft supply belongs in their mouths. Adult help makes these projects safer and much more enjoyable.
1. Chocolate Garden Terrarium Jar
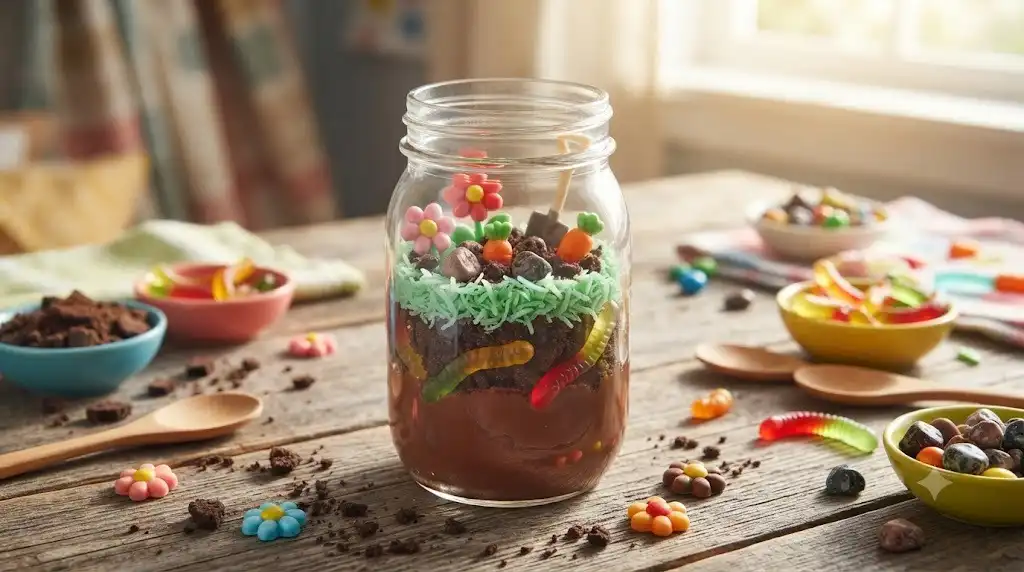
This edible chocolate garden is always the first craft I introduce because it feels like building a tiny world inside a jar. Preschoolers love layering the “soil” and carefully placing colorful candy flowers. Every child ends up with a unique little garden.
Skill Developed: Fine motor skills, sequencing, color recognition, creativity, hand-eye coordination.
Materials Needed:
- Clear mason jar or plastic jar
- Chocolate sandwich cookies
- Chocolate pudding
- Green shredded coconut (colored with green food coloring)
- Candy flowers
- Gummy worms
- Mini chocolate rocks or chocolate candies
- Small spoon
- Disposable bowl
Step-by-Step Instructions
- Wash and dry the jar thoroughly. Any moisture left inside can affect the pudding and cookie crumbs. Set the jar on a stable table where children have enough space to work comfortably.
- Prepare the chocolate soil. Separate the chocolate sandwich cookies and scrape out most of the filling if you’d like a more crumbly texture. Place the cookies into a zip-top bag and let children gently crush them using a rolling pin or the bottom of a cup until they resemble garden soil.
- Add the first layer. Spoon a layer of chocolate pudding into the bottom of the jar. Encourage children to spread it evenly by gently tapping the jar on the table.
- Sprinkle cookie crumbs over the pudding. Explain that this looks just like dirt in a real garden. Many children enjoy comparing their chocolate “soil” to dirt they have seen outside.
- Create another layer. Continue alternating pudding and cookie crumbs until the jar is around three-quarters full. The visible layers make the finished craft especially attractive.
- Add the grassy top. Sprinkle green shredded coconut over the cookie layer. Watching the brown soil suddenly become a grassy landscape is usually everyone’s favorite moment.
- Decorate the garden. Carefully press candy flowers into the coconut so they stand upright. Scatter chocolate rocks around the flowers and gently tuck gummy worms between them.
- Clean the jar rim. Wipe away any chocolate smudges before closing the lid. A clean jar instantly makes the finished project look more polished.
- Admire before eating. Encourage children to point out their favorite decoration before enjoying their edible garden.
Pro-Tip / Teacher’s Note: Place each topping into small bowls around the table. Children naturally practice sharing while choosing decorations, and cleanup becomes much easier afterward.
2. Candy Forest Chocolate Jar
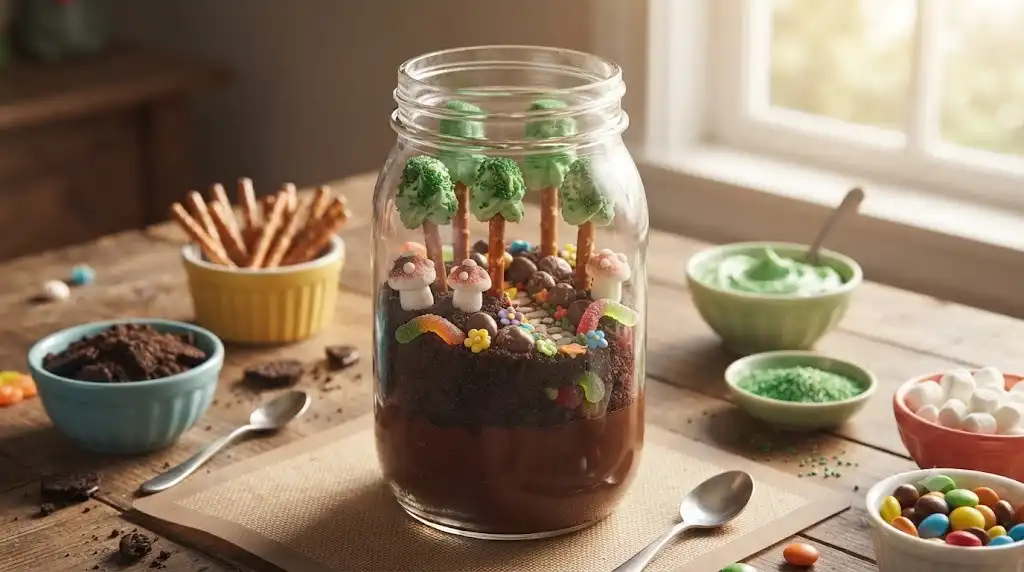
This little forest quickly turns into a storytelling activity. I’ve heard children invent tales about tiny woodland animals, magical trees, and hidden treasure while decorating these jars.
Skill Developed: Imaginative thinking, fine motor skills, language development, pattern recognition.
Materials Needed:
- Clear jar
- Chocolate pudding
- Crushed chocolate cookies
- Pretzel sticks
- Green candy melts or green frosting
- Green sprinkles
- Mini marshmallows
- Chocolate candies
- Small spoons
Step-by-Step Instructions
- Prepare your workspace. Give each child their own spoon, jar, and napkin to help keep supplies organized.
- Fill the base. Spoon chocolate pudding into the bottom third of the jar.
- Add cookie soil. Sprinkle crushed cookies evenly over the pudding to create a realistic forest floor.
- Make simple edible trees. Dip the top of each pretzel stick into green frosting or melted candy coating. Roll it gently through green sprinkles to create leafy treetops. Allow them to set for a few minutes.
- Build more layers. Repeat another pudding layer followed by more cookie crumbs until the jar reaches the desired height.
- Plant the trees. Carefully push the pretzel trees into the top layer. Children love deciding where each tree should stand.
- Add woodland details. Scatter mini marshmallows to become fluffy clouds or little mushrooms. Sprinkle chocolate candies around the base as forest rocks.
- Create a story together. Before eating, ask children questions like, “Who lives in your forest?” or “What adventure happens here?” This simple conversation often sparks wonderful imaginative thinking.
Pro-Tip / Teacher’s Note: If frosting feels too sticky for little hands, prepare the pretzel trees ahead of time so children can focus on designing their forests.
3. Dinosaur Dig Chocolate Terrarium
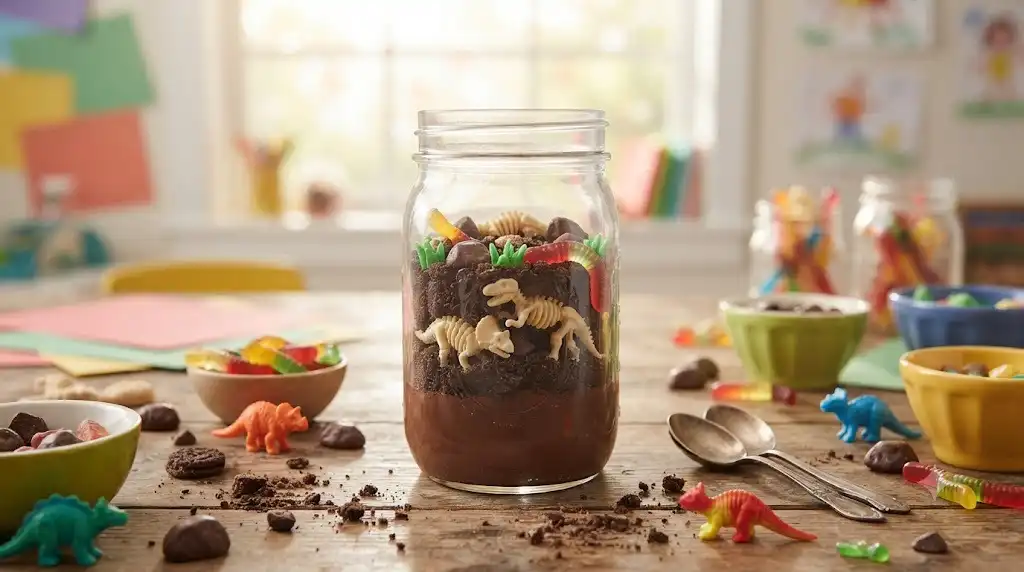
This activity has been a huge hit in preschool classes. Children become little paleontologists searching for dinosaurs hidden beneath layers of chocolate “earth.”
Skill Developed: Observation skills, sequencing, sensory exploration, imaginative play.
Materials Needed:
- Clear jar
- Chocolate pudding
- Crushed chocolate sandwich cookies
- Edible candy dinosaur decorations
- Chocolate pebbles
- Green candy grass
- Small spoons
Step-by-Step Instructions
- Prepare the edible dirt. Crush chocolate cookies until they look like loose soil.
- Add the first pudding layer. Spoon chocolate pudding into the jar, filling about one-quarter of the container.
- Cover with cookie crumbs. Spread the crumbs evenly to hide the pudding underneath.
- Hide the first dinosaur. Gently place a candy dinosaur against the side of the jar so it remains visible through the glass.
- Continue layering. Add another pudding layer followed by more cookie crumbs.
- Create a dig site. Place chocolate pebbles around the dinosaur as though they were buried rocks.
- Finish with grassy details. Sprinkle green candy grass over the top and add another small dinosaur peeking out from above.
- Encourage observation. Ask children to count how many dinosaurs they can find before digging in with their spoons.
- Enjoy the excavation. Eating becomes part of the adventure as children carefully uncover every hidden treat.
Pro-Tip / Teacher’s Note: Place the dinosaurs close to the glass instead of the center. They stay visible, making the finished terrarium look much more exciting.
4. Rainbow Sprinkle Chocolate Terrarium
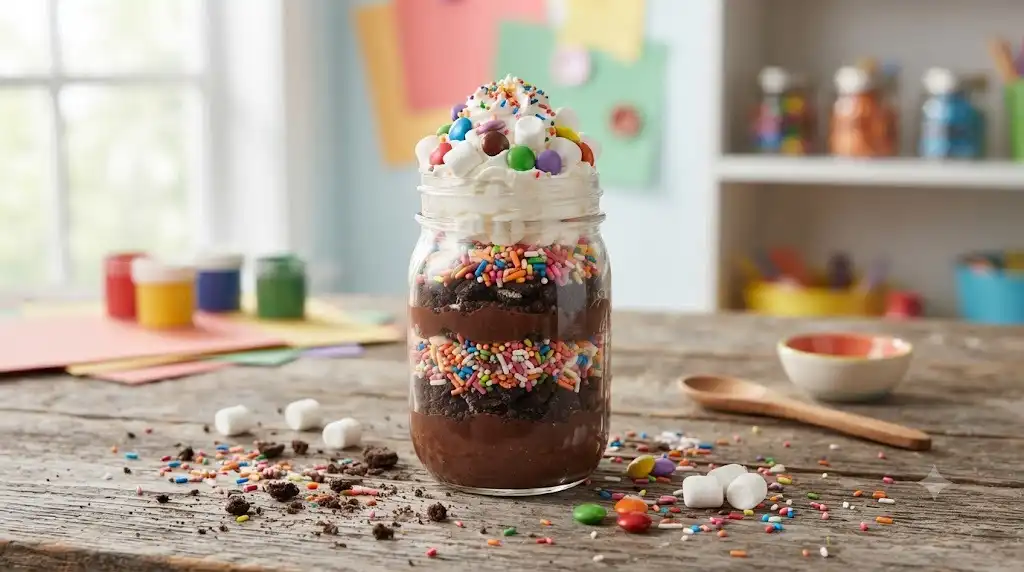
Whenever the weather is gloomy, this cheerful jar instantly brightens the classroom. Preschoolers absolutely love adding colorful sprinkles between rich chocolate layers.
Skill Developed: Color recognition, fine motor control, pattern building, creativity.
Materials Needed:
- Clear jar
- Chocolate pudding
- Chocolate cookie crumbs
- Rainbow sprinkles
- Mini marshmallows
- Chocolate candies
- Whipped cream (optional)
- Small spoon
Step-by-Step Instructions
- Start with chocolate pudding. Spoon a smooth layer into the bottom of the jar.
- Sprinkle cookie crumbs over the pudding. Encourage children to cover every bit of chocolate evenly so neat layers begin to form.
- Add rainbow sprinkles. Let children choose how many colors they’d like to include. Some enjoy making stripes while others prefer a colorful mix.
- Repeat the layers. Continue alternating pudding, cookie crumbs, and sprinkles until the jar is nearly full.
- Top with whipped cream. If using whipped cream, add a generous swirl on top to create fluffy clouds.
- Decorate the top. Scatter mini marshmallows, more rainbow sprinkles, and chocolate candies across the whipped cream.
- Talk about colors. Ask children to identify their favorite color or count how many different sprinkle colors they can see.
- Serve immediately. The crunchy sprinkles stay crisp, and the colorful layers remain beautifully visible.
Pro-Tip / Teacher’s Note: Expect plenty of stray sprinkles on the table. I usually place a large tray underneath each child’s workspace because those tiny sprinkles have a magical way of bouncing everywhere. They always make cleanup a little more colorful, and honestly, that’s part of the memory!
5. Beach Day Chocolate Terrarium Jar
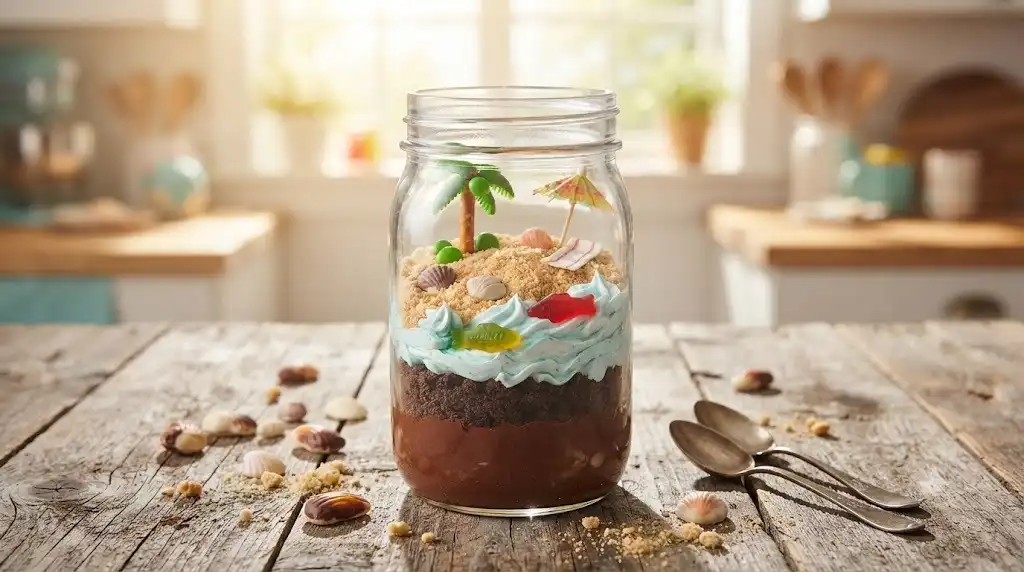
This sunny little terrarium brings summer vibes to any craft table, even on a chilly afternoon. Children love pretending they’re building a tiny beach complete with sand, waves, and seashells. I’ve found this one sparks plenty of conversations about vacations, oceans, and favorite beach memories.
Skill Developed: Fine motor skills, imaginative play, sensory exploration, color recognition, sequencing.
Materials Needed:
- Clear mason jar or sturdy plastic jar
- Chocolate pudding
- Crushed chocolate sandwich cookies
- Crushed vanilla cookies or graham crackers
- Blue-tinted whipped topping or blue frosting
- Gummy fish
- Candy seashells
- Mini paper umbrella (optional, for decoration only)
- Small spoon
- Paper towels for cleanup
Step-by-Step Instructions
- Prepare the cookie crumbs. Crush the chocolate cookies into fine crumbs for the “earth” and the vanilla cookies into slightly coarser crumbs to resemble beach sand. Keep them in separate bowls so children can easily identify each layer.
- Add the ocean floor. Spoon a layer of chocolate pudding into the bottom of the jar. Explain that this will become the hidden layer beneath the beach.
- Create the shoreline. Sprinkle a layer of crushed vanilla cookies over part of the pudding. Children enjoy watching the pale “sand” appear against the chocolate.
- Add the water. Carefully spoon or pipe blue whipped topping along one side of the jar to create a small ocean section. Encourage children to move slowly so the colors stay separate.
- Build another layer. Repeat with a little more pudding, followed by chocolate cookie crumbs, keeping the layers visible through the glass.
- Decorate the beach. Place gummy fish near the blue layer and candy seashells along the sandy section. Younger children often enjoy arranging and rearranging these before deciding where they belong.
- Finish the top. Sprinkle a little more cookie sand over the surface. If using a decorative umbrella, gently place it on top just before serving. Since it’s not edible, remind children to remove it before eating.
- Take a moment to admire the scene. Ask children what else they might find at the beach. Their answers usually range from dolphins to buried pirate treasure.
Pro-Tip / Teacher’s Note: If you’re working with a large group, pre-crush the cookies ahead of time. Little ones love crushing cookies, but doing it for twenty children at once can quickly turn into a cookie crumb explosion.
6. Fairy Garden Chocolate Jar
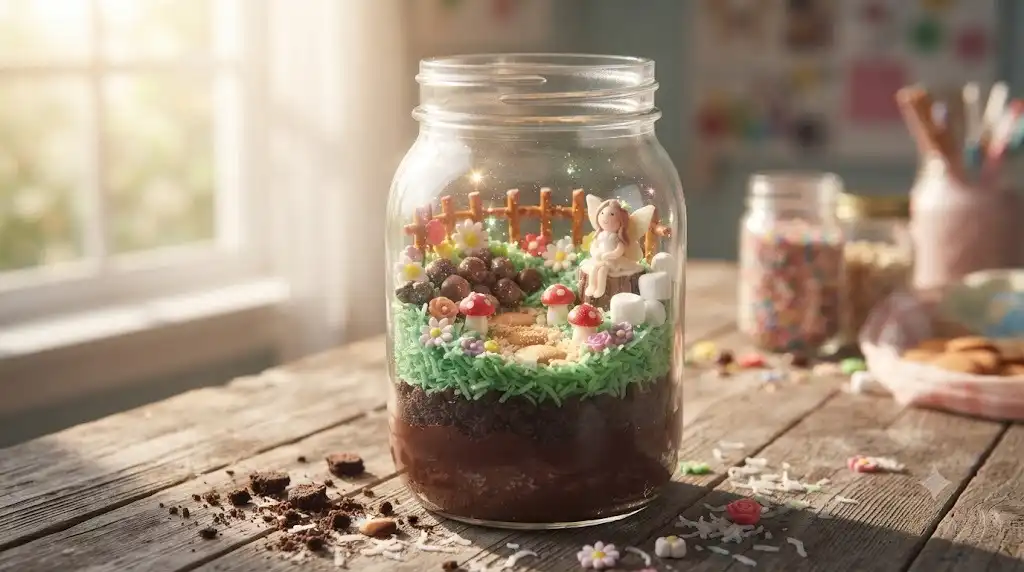
Every preschool class seems to have a few children who adore fairies, flowers, and magical stories. This craft gives them a chance to build their own enchanted garden using edible treats and plenty of imagination.
Skill Developed: Storytelling, creativity, fine motor skills, vocabulary development, imaginative thinking.
Materials Needed:
- Clear jar
- Chocolate pudding
- Chocolate cookie crumbs
- Green-colored shredded coconut
- Candy flowers
- Mini marshmallows
- Chocolate candies
- Edible glitter sprinkles
- Small spoon
Step-by-Step Instructions
- Wash and prepare the jar. Make sure it is completely dry before adding any ingredients.
- Create the garden base. Spoon chocolate pudding into the bottom of the jar until it reaches about one-third full.
- Add the garden soil. Sprinkle crushed chocolate cookies evenly over the pudding.
- Repeat the layers. Continue alternating pudding and cookie crumbs until the jar is nearly full, leaving space for decorations.
- Make grassy pathways. Sprinkle green coconut over the top to create a bright grassy surface.
- Decorate with candy flowers. Press each flower gently into the coconut. Encourage children to spread the flowers throughout the garden instead of placing them all together.
- Add magical touches. Scatter mini marshmallows as fluffy clouds or magical stepping stones. Sprinkle edible glitter lightly across the top for a sparkling finish.
- Tell a fairy story. Invite children to describe who lives in their fairy garden and what magical adventures happen there. This often becomes everyone’s favorite part.
- Enjoy the edible garden. Let children admire their creations before digging in with a spoon.
Pro-Tip / Teacher’s Note: A tiny sprinkle of edible glitter goes a long way. Too much can hide all the beautiful decorations underneath.
7. Construction Zone Chocolate Terrarium
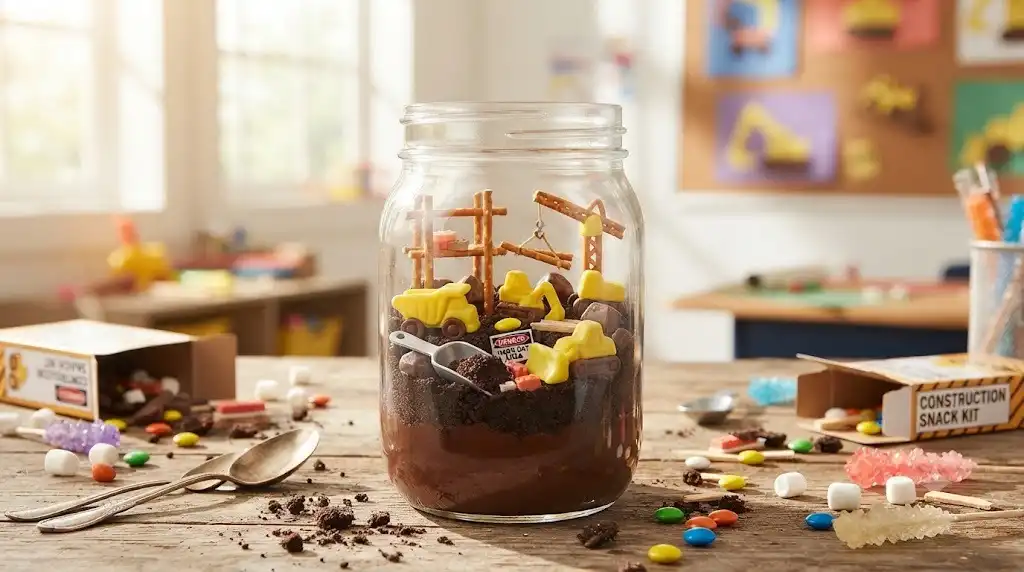
If your little builders love dump trucks and diggers, this activity is almost guaranteed to be a hit. The children in my class always become very serious “construction workers” while carefully building their edible worksite.
Skill Developed: Hand-eye coordination, sequencing, pretend play, observation skills.
Materials Needed:
- Clear jar
- Chocolate pudding
- Crushed chocolate cookies
- Yellow candy-coated chocolates
- Pretzel sticks
- Chocolate rocks or chocolate candies
- Candy construction vehicle decorations (optional)
- Small spoon
Step-by-Step Instructions
- Prepare your construction materials. Place cookie crumbs, candies, and pretzel sticks into separate bowls for easy access.
- Lay the foundation. Spoon chocolate pudding into the jar as the first layer.
- Add the dirt. Sprinkle crushed cookies over the pudding until it resembles freshly dug soil.
- Build additional layers. Continue alternating pudding and cookie crumbs until the jar is almost full.
- Create wooden beams. Break pretzel sticks into shorter pieces and place them on top to resemble construction supports.
- Add heavy equipment. Arrange yellow candy-coated chocolates throughout the top layer. If you have edible construction decorations, carefully place them near the edge of the jar.
- Scatter construction rocks. Add chocolate candies around the pretend building site to complete the scene.
- Encourage pretend play. Ask children what their construction crew is building today. You’ll hear everything from castles to giant playgrounds.
Pro-Tip / Teacher’s Note: Let children build their own patterns with the yellow candies before placing them. It gives them a little extra ownership over the finished project.
8. Bug Explorer Chocolate Terrarium
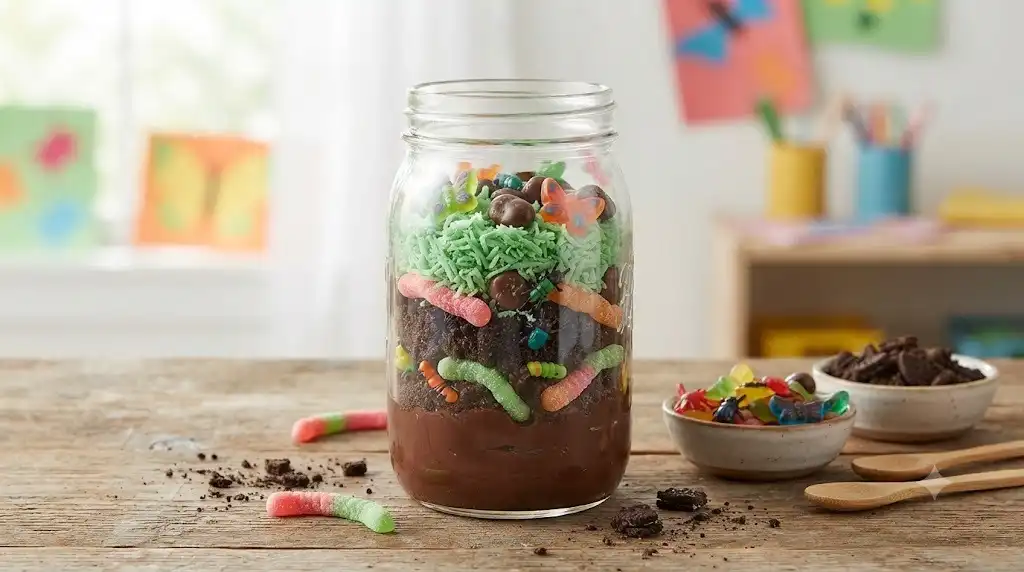
This craft is always full of giggles because children love discovering gummy bugs hidden throughout the layers. Even kids who usually avoid insects seem fascinated when they’re made from candy.
Skill Developed: Observation skills, counting, sensory awareness, fine motor coordination.
Materials Needed:
- Clear jar
- Chocolate pudding
- Crushed chocolate sandwich cookies
- Green coconut
- Gummy worms
- Gummy butterflies
- Chocolate pebbles
- Small spoon
Step-by-Step Instructions
- Prepare the edible soil. Crush chocolate cookies into fine crumbs and place them in a bowl.
- Add the first layer. Spoon chocolate pudding into the bottom of the jar.
- Cover with cookie soil. Sprinkle the crushed cookies evenly across the pudding.
- Hide your first bug. Press a gummy worm gently against the side of the jar so it’s easy to spot later.
- Repeat the layering process. Continue adding pudding and cookie crumbs until the jar is nearly full.
- Create grassy ground. Sprinkle green coconut across the top to resemble fresh grass.
- Add more insects. Arrange gummy butterflies, worms, and chocolate pebbles across the grassy surface. Encourage children to spread the decorations around instead of placing everything in one corner.
- Play a counting game. Before eating, ask children to count how many bugs they can find inside and on top of their terrarium.
- Celebrate their creations. Give everyone a chance to show off their favorite hidden bug before enjoying their edible masterpiece.
Pro-Tip / Teacher’s Note: Some children love adding lots of bugs, while others prefer just one or two. Let them personalize their terrarium instead of aiming for identical finished projects. That’s one of the best parts of crafting with preschoolers.
9. Woodland Animal Chocolate Terrarium
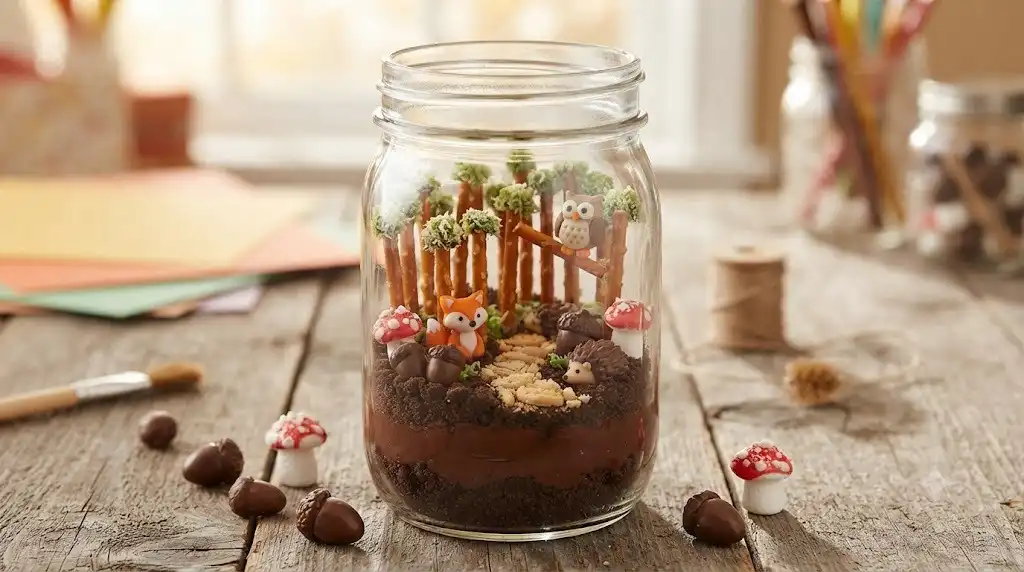
This is one of those crafts that gets everyone talking. As soon as the little woodland animals come out, children start making up stories about foxes, owls, squirrels, and hedgehogs living together in a tiny forest. Every jar ends up looking different, and that’s exactly what makes this activity so special.
Skill Developed: Storytelling, fine motor skills, creativity, vocabulary development, sequencing.
Materials Needed:
- Clear mason jar or sturdy plastic jar
- Chocolate pudding
- Crushed chocolate sandwich cookies
- Green shredded coconut
- Chocolate-covered raisins or chocolate candies
- Edible woodland animal candy decorations
- Pretzel sticks
- Mini marshmallows
- Small spoon
Step-by-Step Instructions
- Wash and dry the jar completely. A clean jar helps the chocolate layers stay visible and makes the finished craft look much neater.
- Spoon chocolate pudding into the bottom until the jar is about one-quarter full.
- Cover the pudding with crushed chocolate cookies to create a rich woodland forest floor.
- Repeat the layers until the jar is almost full, leaving enough room for decorations on top.
- Add green coconut to create grass and moss across the surface.
- Break pretzel sticks into small pieces and gently stand them upright to resemble tree trunks or fallen logs.
- Arrange edible woodland animals around the little forest. Encourage children to think about where each animal would like to live.
- Scatter chocolate candies around the trees to look like rocks or tiny acorns.
- Add mini marshmallows as fluffy clouds or little mushrooms hiding in the forest.
- Invite children to tell a short woodland story before enjoying their chocolate terrarium. Listening to everyone’s ideas is often the highlight of the activity.
Pro-Tip / Teacher’s Note: Don’t worry if the pretzel “trees” lean a little. My preschoolers always say the trees are bending in the wind, and somehow that makes them even cuter.
10. Space Adventure Chocolate Terrarium
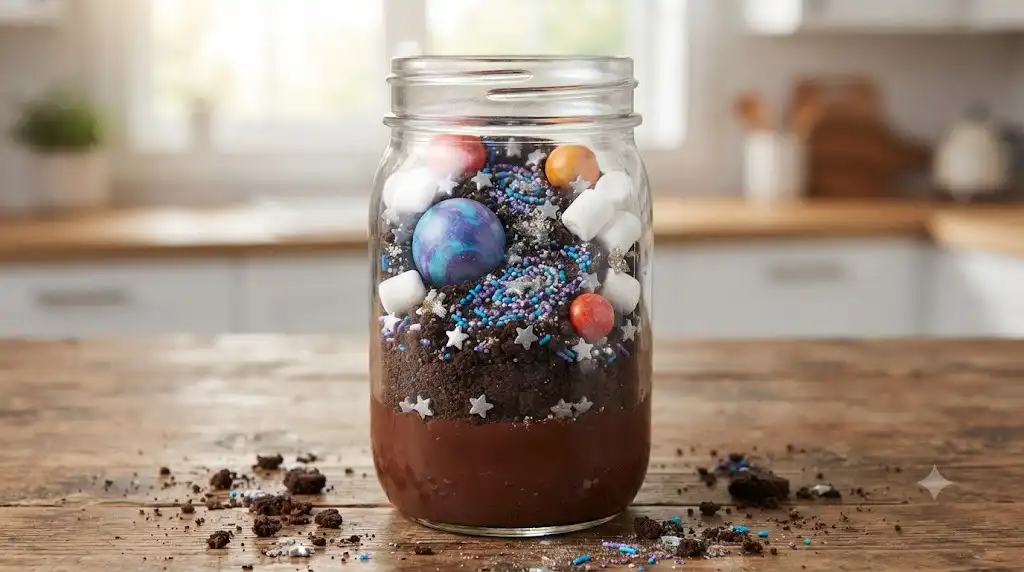
Whenever we talk about planets or astronauts, this edible craft is always a favorite. Children enjoy creating their own tiny galaxy filled with stars, planets, and colorful surprises hidden among the chocolate layers.
Skill Developed: Imagination, fine motor skills, color recognition, early science discussions.
Materials Needed:
- Clear jar
- Chocolate pudding
- Crushed chocolate cookies
- Silver or star-shaped sprinkles
- Round chocolate candies
- Mini marshmallows
- Blue and purple candy sprinkles
- Small spoon
Step-by-Step Instructions
- Fill the bottom of the jar with a layer of chocolate pudding.
- Sprinkle cookie crumbs evenly over the pudding to create the darkness of outer space.
- Repeat the layers until the jar is almost full, keeping each layer visible through the side.
- Scatter blue and purple sprinkles between the upper layers to create colorful galaxies.
- Arrange round chocolate candies to represent planets orbiting through space.
- Add silver star sprinkles across the top for a sparkling night sky.
- Place mini marshmallows on top as fluffy little clouds floating near imaginary planets.
- Talk about space together. Ask children which planet they would visit first and what they think they would find there.
- Serve immediately while the sprinkles stay crisp and colorful.
Pro-Tip / Teacher’s Note: This craft pairs perfectly with a simple picture book about planets before you begin. Children love connecting the story to the galaxy they create.
11. Rainbow Candy Layer Jar
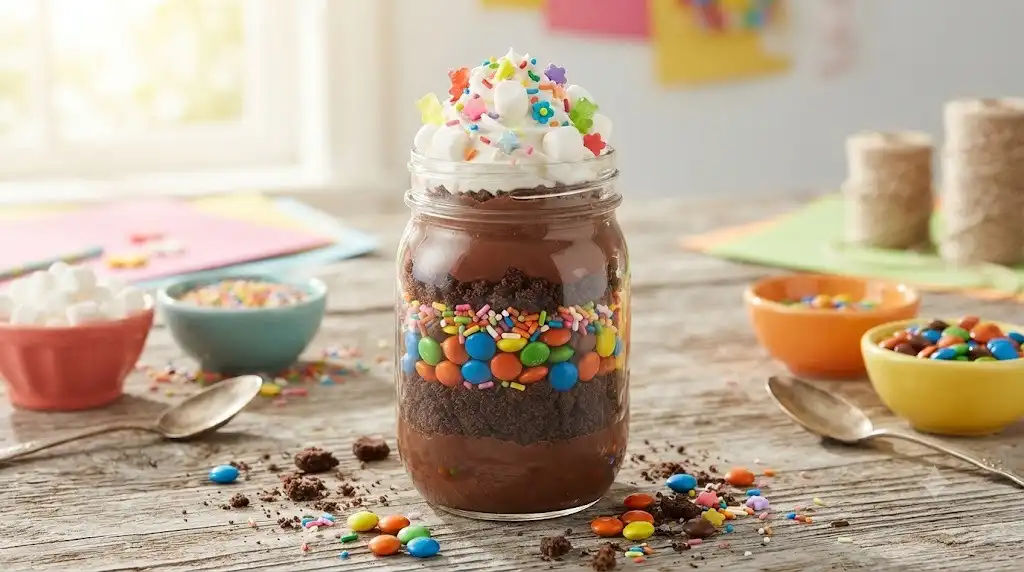
Sometimes the simplest crafts create the biggest smiles. This colorful chocolate terrarium lets children practice making neat layers while experimenting with bright candy colors. It’s always exciting to watch them proudly show off the rainbow they’ve built inside the jar.
Skill Developed: Fine motor skills, color sorting, sequencing, hand-eye coordination.
Materials Needed:
- Clear jar
- Chocolate pudding
- Chocolate cookie crumbs
- Rainbow candy-coated chocolates
- Rainbow sprinkles
- Mini marshmallows
- Whipped topping (optional)
- Small spoon
Step-by-Step Instructions
- Add a layer of chocolate pudding to the bottom of the jar.
- Sprinkle crushed cookie crumbs evenly across the pudding.
- Repeat the layers until the jar reaches about three-quarters full.
- Sort the candy colors into small bowls. This gives children extra practice identifying and grouping colors before decorating.
- Arrange the candies in colorful rows or patterns across the top of the terrarium.
- Sprinkle rainbow jimmies between the candies for extra texture and color.
- Add whipped topping if desired, then decorate with a few more candies.
- Talk about patterns. Encourage children to name the colors or create simple repeating color sequences.
- Enjoy together after everyone has shared their favorite part of their design.
Pro-Tip / Teacher’s Note: Children naturally compare their jars, so I always remind them that every rainbow looks a little different—and that’s exactly what makes each one beautiful.
12. Autumn Harvest Chocolate Terrarium
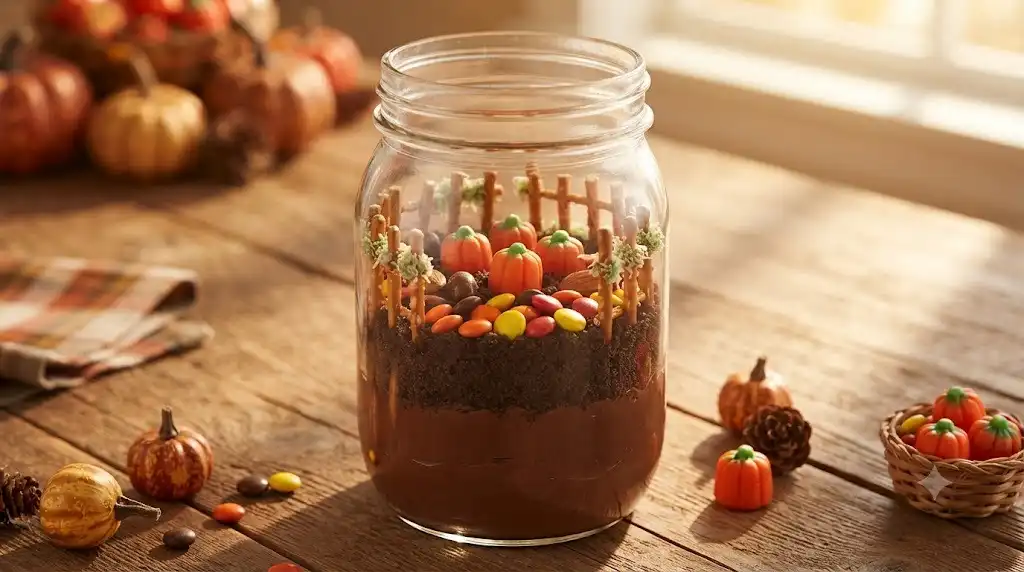
This cozy craft works beautifully during fall. The warm candy colors and chocolate layers remind children of pumpkin patches, crunchy leaves, and crisp autumn afternoons. It also makes a fun addition to a harvest celebration or Thanksgiving classroom party.
Skill Developed: Seasonal awareness, fine motor control, creativity, observation skills.
Materials Needed:
- Clear mason jar
- Chocolate pudding
- Crushed chocolate cookies
- Orange and yellow candy-coated chocolates
- Candy pumpkins
- Pretzel pieces
- Chocolate candies
- Small spoon
Step-by-Step Instructions
- Spoon chocolate pudding into the base of the jar.
- Cover with cookie crumbs to create rich garden soil.
- Repeat alternating layers until the jar is almost full.
- Arrange candy pumpkins across the top like a tiny pumpkin patch.
- Break pretzels into short pieces and place them beside the pumpkins as little fence posts.
- Scatter orange and yellow candies to resemble colorful autumn leaves.
- Add chocolate candies around the edges to represent small stones lining the garden.
- Talk about fall. Ask children what they enjoy most about autumn, whether it’s leaves, apples, or cooler weather.
- Serve and enjoy after everyone has admired their tiny harvest scene.
Pro-Tip / Teacher’s Note: If candy pumpkins aren’t available, orange candy-coated chocolates make a wonderful substitute and still create a festive fall look.
13. Celebration Party Chocolate Terrarium
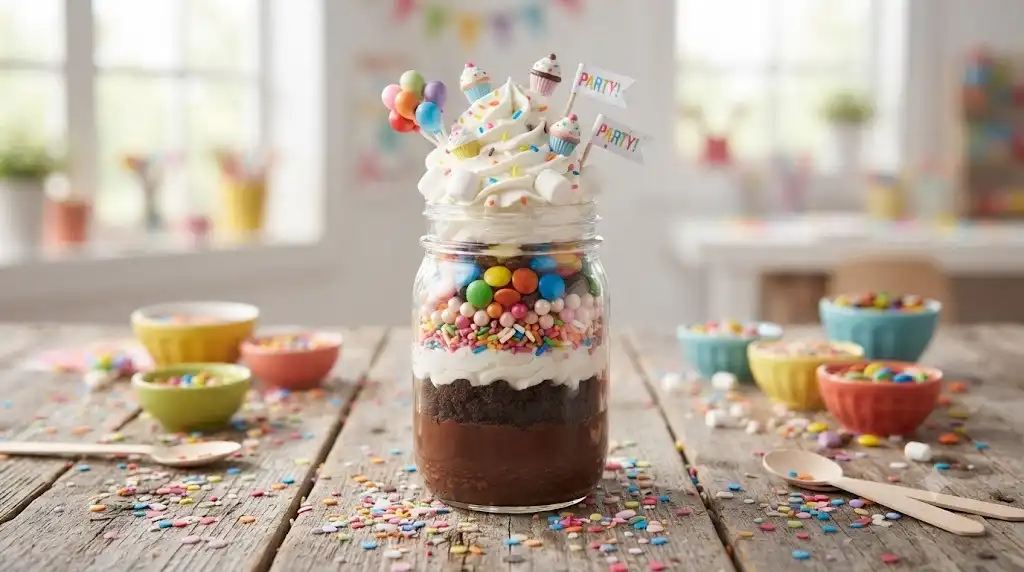
I like saving this craft for birthdays, classroom celebrations, or the last day before a holiday break. Children love making something colorful that feels like its own little party inside a jar.
Skill Developed: Creativity, fine motor skills, pattern recognition, confidence through independent decorating.
Materials Needed:
- Clear jar
- Chocolate pudding
- Chocolate cookie crumbs
- Rainbow sprinkles
- Chocolate candies
- Mini marshmallows
- Colorful candy pearls
- Whipped topping (optional)
- Small spoon
Step-by-Step Instructions
- Layer chocolate pudding into the bottom of the jar.
- Add crushed cookie crumbs to build the first chocolate terrarium layer.
- Repeat the layering process until the jar is nearly full.
- Top with whipped cream if using, spreading it gently with the back of a spoon.
- Decorate generously with rainbow sprinkles, candy pearls, chocolate candies, and mini marshmallows.
- Encourage children to create patterns instead of simply scattering decorations. Some enjoy making flowers, while others create smiling faces or colorful circles.
- Clean the outside of the jar using a damp paper towel so every child can proudly admire their finished creation.
- Celebrate everyone’s work. Give each child a chance to explain their design before it’s time to enjoy the sweet treat.
Pro-Tip / Teacher’s Note: Keep a few extra sprinkles nearby. There’s always one child who decides they need “just a tiny bit more sparkle” after everyone else finishes.
Conclusion
After making these edible chocolate terrariums with preschoolers year after year, I’ve learned that the best part isn’t the chocolate—it’s watching children beam with pride as they create something all by themselves. Every jar tells its own story, and no two ever turn out exactly alike.
Don’t stress about perfectly even layers or spotless tables. Preschool crafting is wonderfully messy, and those cookie crumbs, chocolate fingerprints, and happy giggles are part of the experience. Whether you’re planning a rainy afternoon activity at home, a classroom celebration, or a weekend family project, these fun jar crafts are an easy way to encourage creativity, build important early learning skills, and make memories that children will happily talk about long after the last spoonful is gone.