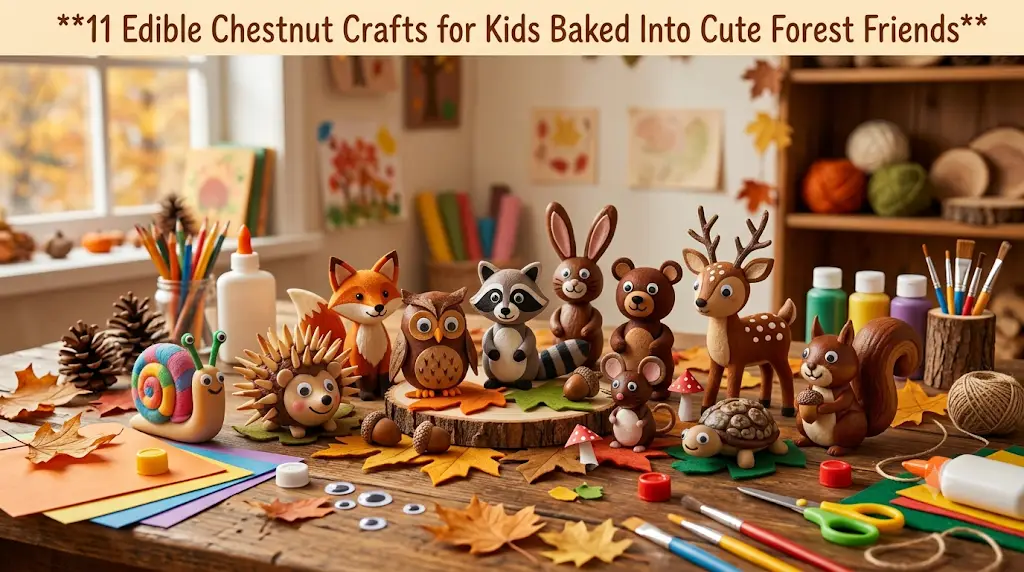
Creating crafts with edible chestnuts is one of those wonderfully simple activities that keeps little hands busy while bringing a little bit of autumn indoors. I’ve found that preschoolers are instantly curious about the smooth shells, warm earthy colors, and all the funny little creatures they can imagine. It’s a screen-free project that feels more like play than learning, even though they’re building important skills the entire time.
If you’re a teacher trying to fill a rainy afternoon or a parent looking for something cozy after school, these chestnut crafts are easy to pull together with supplies you probably already own. Don’t worry if every fox has crooked ears or every owl has giant eyes. That’s usually the best part! Preschool crafts are meant to be a little messy, full of giggles, and wonderfully unique.
Safety First
Edible chestnuts are fun to craft with, but they should always be used under adult supervision. Since chestnuts and small decorations like googly eyes can become choking hazards, these activities are best completed with a grown-up nearby. Adults should also handle any sharp tools, while children use only child-safe scissors and non-toxic craft supplies.
Expect a little glue on the table and a few paint-covered fingers. That’s all part of the creative process!
1. Smiling Chestnut Hedgehog
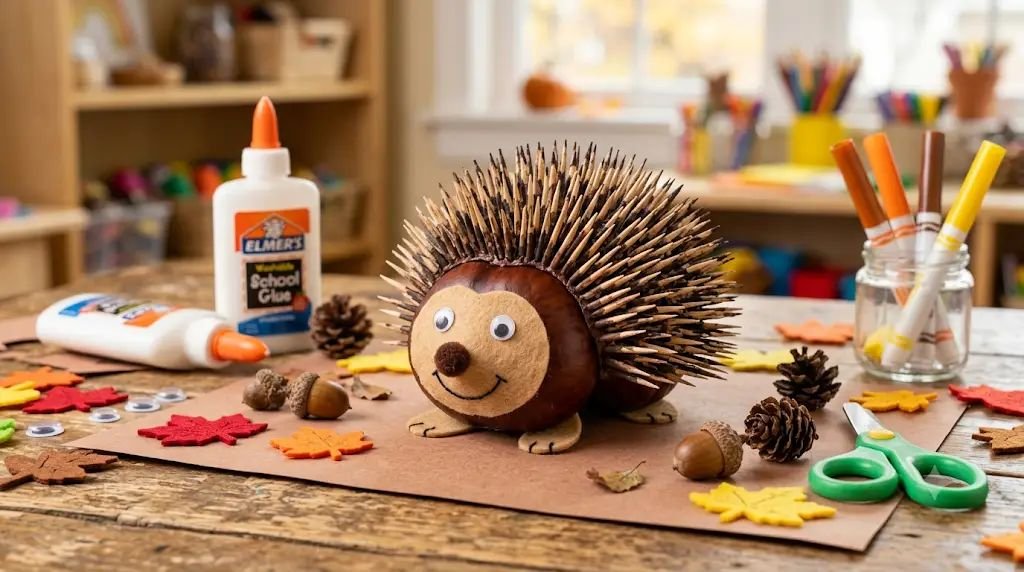
One of my preschool classes always asked to make hedgehogs first because they’re quick, adorable, and almost impossible to mess up. Every hedgehog ends up with its own funny personality.
Skill Developed: Fine motor skills, creativity, hand-eye coordination, colour recognition, imaginative play.
Materials Needed:
- 2-3 edible chestnuts
- Brown construction paper
- Tan cardstock
- Non-toxic glue
- Small googly eyes
- Black marker
- Child-safe scissors
- Brown paint (optional)
- Paintbrush
Step-by-Step Instructions
- Cover your table with newspaper or a washable craft mat. Preschool glue has a funny way of ending up everywhere, and this makes cleanup much easier afterward.
- Cut out the hedgehog body. Draw a simple oval from brown construction paper. Cut it out using child-safe scissors. Adults can lightly sketch the shape first for younger children.
- Create the face. Cut a smaller tan oval and glue it onto one end of the brown body to make the hedgehog’s face.
- Arrange the chestnuts. Place two or three chestnuts on the body before gluing them. Let children move them around until they’re happy with the placement. This little planning step helps develop spatial awareness.
- Glue the chestnuts securely. Apply generous dots of non-toxic glue beneath each chestnut. Press gently for several seconds. Depending on the glue, allow about 20–30 minutes for everything to dry completely.
- Add the eyes. Glue two googly eyes onto the tan face. Younger children love watching the eyes wobble as they gently press them into place.
- Draw the nose and smile. Use a black marker to make a tiny nose and a cheerful smile. Encourage children to choose different expressions if they’d like.
- Paint extra details. If using paint, lightly dab brown paint around the chestnuts to create soft little spikes. Preschoolers often enjoy using small sponge brushes for this step.
- Finish with tiny feet. Draw four little feet underneath the body using the marker, or cut tiny paper feet for extra texture.
- Let everything dry completely before picking up the finished hedgehog. Some children get excited and try to carry their masterpiece too soon.
Pro-Tip / Teacher’s Note: Let children name their hedgehogs before taking them home. They become even more excited when their craft has its own personality.
2. Friendly Chestnut Fox
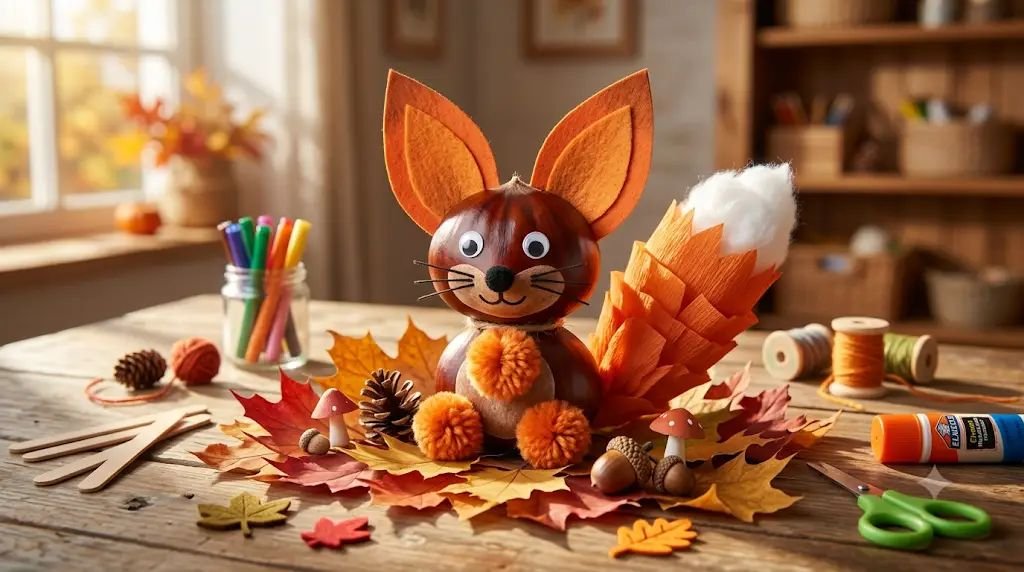
Foxes are always a classroom favorite because children love making the pointy ears and fluffy tails. No two foxes ever look alike, which makes the display board extra cute.
Skill Developed: Shape recognition, fine motor control, sequencing, creativity.
Materials Needed:
- 3 edible chestnuts
- Orange construction paper
- White cardstock
- Black construction paper
- Glue
- Googly eyes
- Child-safe scissors
- Black marker
- Orange washable paint (optional)
Step-by-Step Instructions
- Prepare the fox body. Place one large chestnut in the center of your workspace. This becomes the fox’s body.
- Attach the head. Glue a slightly smaller chestnut above the body. Hold it gently until it stays in place.
- Create pointy ears. Cut two orange triangles from construction paper. Glue a smaller white triangle inside each ear before attaching them behind the head.
- Add a fluffy tail. Cut a long curved tail from orange paper. Glue a white tip onto the end before attaching it behind the body.
- Glue on the eyes. Place two googly eyes near the top of the head.
- Make the nose. Cut a tiny black paper circle or simply draw one with marker.
- Draw facial details. Add a small smile and tiny whiskers using a fine black marker.
- Paint light orange highlights around the body if desired. Children often enjoy lightly stamping paint with cotton balls instead of brushes.
- Let children personalize their fox. Some may want giant ears, extra fluffy tails, or even tiny paper scarves.
- Allow everything to dry before moving the fox to a display shelf.
Expect plenty of giggles when children compare whose fox looks the sneakiest.
Pro-Tip / Teacher’s Note: Pre-cut the tails for younger preschoolers if you’re short on craft time.
3. Woodland Chestnut Owl
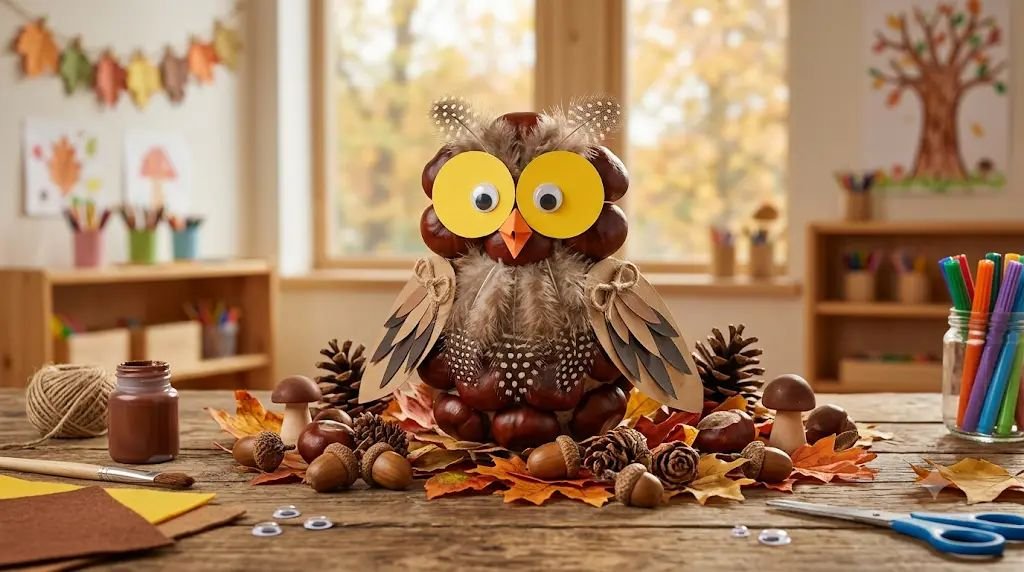
Owls always spark conversations about forests, nighttime animals, and autumn. This craft also gives children wonderful practice placing pieces symmetrically.
Skill Developed: Hand-eye coordination, symmetry, observation skills, concentration.
Materials Needed:
- 2 edible chestnuts
- Brown cardstock
- Yellow construction paper
- Orange paper
- Large googly eyes
- Glue
- Child-safe scissors
- Brown marker
- Feathers (optional)
Step-by-Step Instructions
- Place one chestnut on the table for the owl’s body.
- Glue a second chestnut slightly above it to create the head.
- Cut two wings from brown cardstock. Make them slightly rounded rather than perfectly straight.
- Attach the wings evenly to each side of the body. Encourage children to check that both sides match.
- Cut two large yellow circles for the owl’s eye area.
- Glue the yellow circles onto the head first, followed by the googly eyes.
- Create the beak using a tiny orange diamond folded in half. Glue it between the eyes.
- Draw little feathers across the body using short curved lines with a brown marker.
- Glue small craft feathers behind the wings if you’d like a fluffier owl.
- Leave the owl flat to dry before displaying it.
This project usually creates lots of conversation about who has seen an owl before. It’s a nice chance to mix crafting with simple nature learning.
Pro-Tip / Teacher’s Note: Show children photos of real owls first. They’ll notice details like feather patterns and big round eyes.
4. Happy Chestnut Squirrel
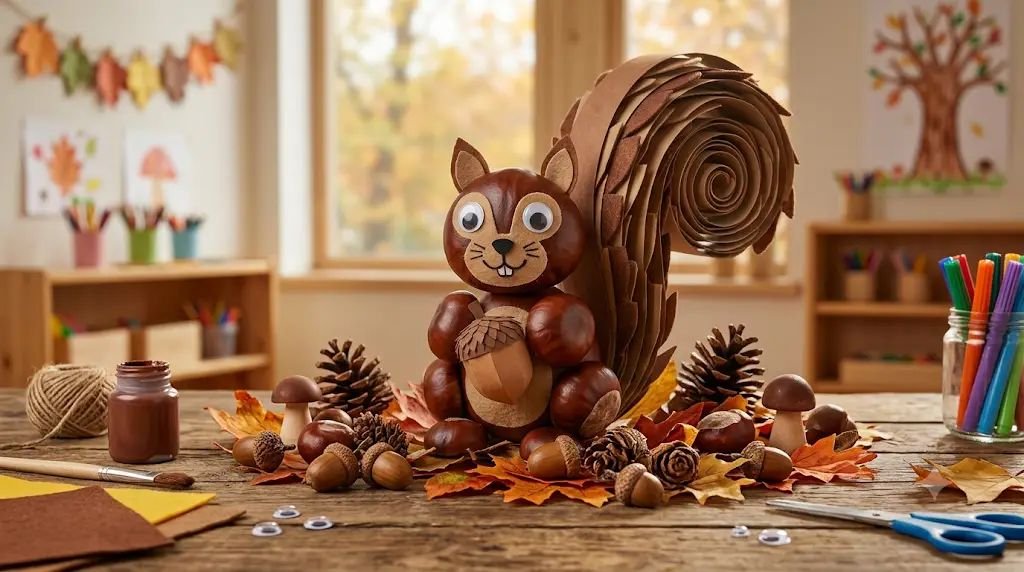
Squirrels seem to appear everywhere once autumn arrives, making this craft a wonderful seasonal activity. Children especially enjoy making the oversized curly tail.
Skill Developed: Fine motor development, imagination, storytelling, shape identification.
Materials Needed:
- 2 edible chestnuts
- Brown construction paper
- Tan cardstock
- Orange marker
- Glue
- Googly eyes
- Child-safe scissors
- Cotton ball (optional)
Step-by-Step Instructions
- Choose one large chestnut for the squirrel’s body and one smaller chestnut for its head.
- Glue the head above the body and allow a few moments for the pieces to hold together.
- Cut a giant curled tail from brown construction paper. Preschoolers love seeing how much bigger the tail is than the body.
- Glue the tail securely behind the squirrel.
- Create tiny ears by cutting two rounded triangles from brown paper.
- Attach the ears behind the head so they peek out above the chestnut.
- Glue on googly eyes and draw a little smiling mouth.
- Add a tiny paper acorn to the squirrel’s hands. This simple detail encourages imaginative storytelling later.
- Glue a small cotton ball onto the tail if you’d like to make it look extra fluffy.
- Allow the squirrel to dry completely before letting children play with their finished woodland friend.
I’ve noticed children almost always invent little adventures for their squirrels after the craft is finished. Some squirrels gather acorns, while others become superheroes protecting the forest.
Pro-Tip / Teacher’s Note: Invite children to create names and voices for their squirrels. It naturally encourages language development and pretend play.
5. Chestnut Raccoon Buddy
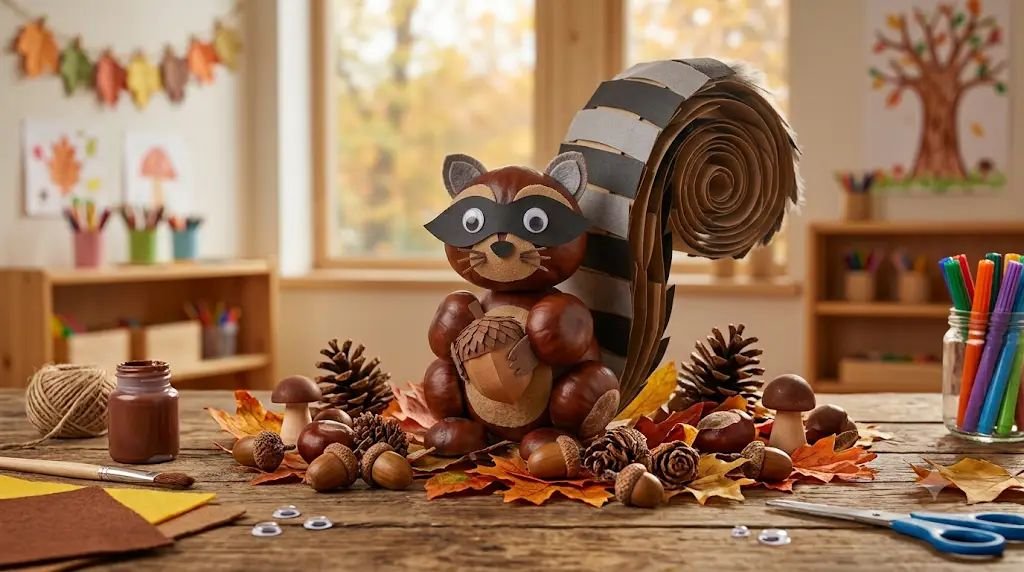
Raccoons always make children smile with their little “mask” and fluffy striped tails. This craft is a great opportunity to talk about woodland animals while practicing careful gluing and simple shapes.
Skill Developed: Fine motor skills, shape recognition, hand-eye coordination, creativity, animal recognition.
Materials Needed:
- 2 edible chestnuts
- Gray construction paper
- Black and white cardstock
- Googly eyes
- Non-toxic glue
- Child-safe scissors
- Black marker
- Gray crayon (optional)
Step-by-Step Instructions
- Glue the body together. Attach a smaller chestnut above a larger one to create the raccoon’s head and body. Set it aside for a minute while preparing the paper pieces.
- Make the raccoon’s mask. Cut a small oval from black cardstock and trim it so it fits nicely across the face. Glue it onto the head, then attach the googly eyes over the mask.
- Add the ears. Cut two small rounded ears from gray paper and glue them behind the top of the head. A tiny white circle inside each ear adds a cute detail.
- Create the striped tail. Cut one long curved tail from gray paper. Glue thin black paper strips across it before attaching the tail behind the body.
- Draw the finishing touches. Use a black marker to add a tiny nose, smiling mouth, and little paws. If you’d like, lightly shade around the body with a gray crayon to give your raccoon a soft furry look.
Once the glue dries, children usually enjoy pretending their raccoons are sneaking through the forest looking for shiny treasures.
Pro-Tip / Teacher’s Note: Let children count the tail stripes together. It’s an easy way to sneak a little counting practice into craft time.
6. Chestnut Bunny in the Woods
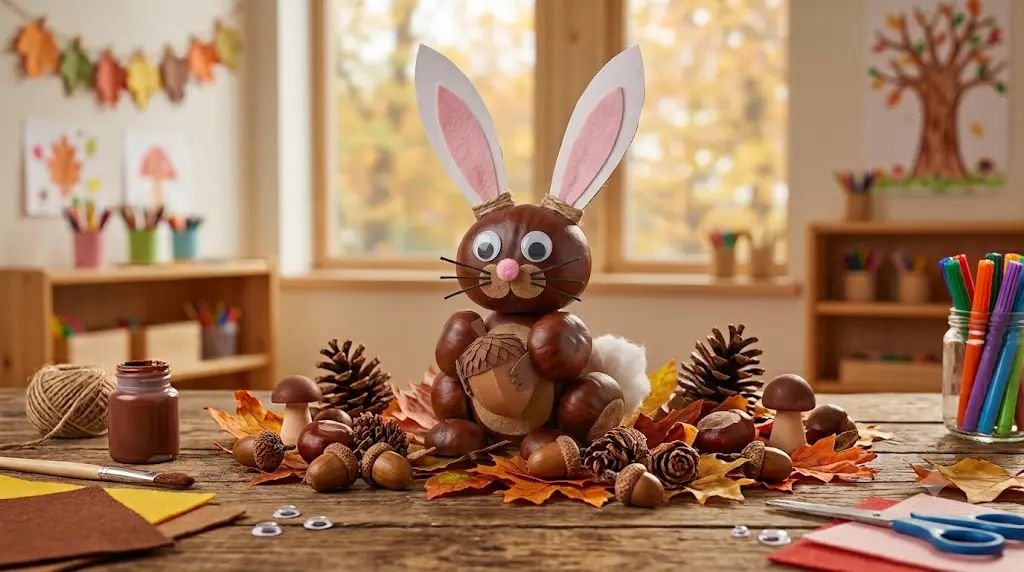
Although bunnies are often associated with spring, children love imagining woodland rabbits hopping through piles of colorful autumn leaves. The oversized ears make this craft especially adorable.
Skill Developed: Fine motor control, listening skills, creativity, hand-eye coordination.
Materials Needed:
- 2 edible chestnuts
- White and pink construction paper
- Googly eyes
- Pink pom-pom or pink paper circle
- Glue
- Child-safe scissors
- Black marker
- Small cotton ball
Step-by-Step Instructions
- Build the bunny. Glue one smaller chestnut above a larger one to create the head and body.
- Cut two long bunny ears from white paper. Then cut slightly smaller pink ear inserts and glue them inside each ear before attaching them behind the head.
- Add the face. Glue on the googly eyes, then attach a small pink pom-pom or paper circle for the nose. Draw a tiny smile and whiskers with a marker.
- Give your bunny a fluffy tail. Glue a small cotton ball to the back of the body. This simple detail is always a classroom favorite because children love touching the soft texture.
- Finish with little paws. Draw tiny front paws and feet using a black marker. Encourage children to imagine where their bunny is hopping and tell a short story about its adventure.
Expect a few ears to end up extra long or a little crooked. Those unique details often make the finished bunnies even more charming.
Pro-Tip / Teacher’s Note: If you’re working with younger preschoolers, prepare the ear shapes ahead of time so they can focus on assembling and decorating their bunny.
7. Chestnut Bear Cub
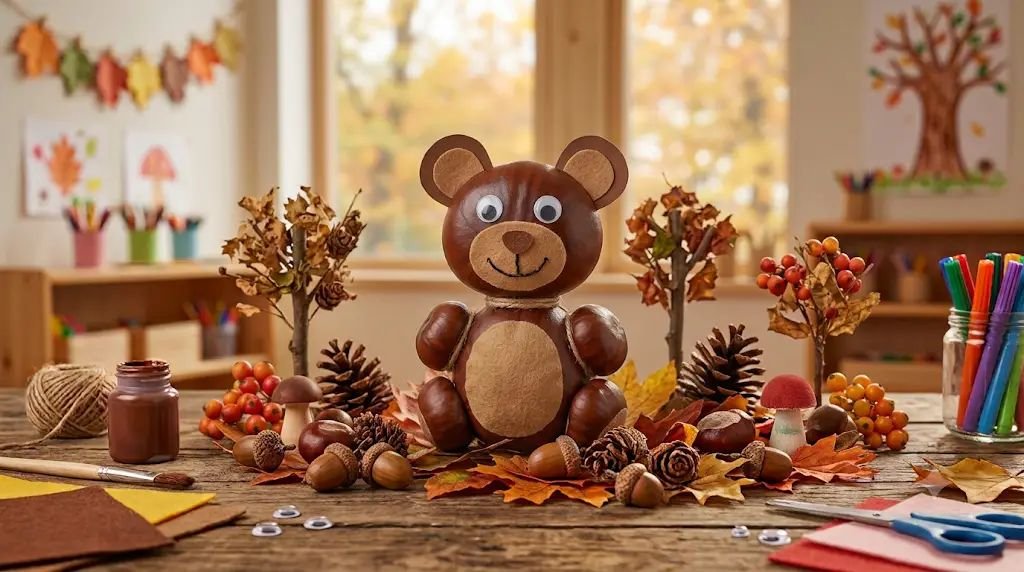
This little bear is one of the easiest forest friends to make, making it perfect for younger children who are still building confidence with crafts. Every bear ends up looking a little different, and that’s exactly what makes the finished collection so cute.
Skill Developed: Fine motor skills, creativity, visual planning, animal recognition.
Materials Needed:
- 2 edible chestnuts
- Brown cardstock
- Tan construction paper
- Googly eyes
- Glue
- Child-safe scissors
- Black marker
Step-by-Step Instructions
- Create the bear’s body by gluing the smaller chestnut above the larger one. Give the glue a minute to hold before adding more decorations.
- Cut two round ears from brown cardstock. Glue them behind the head so they peek out evenly on both sides.
- Make the muzzle. Cut a small tan oval and glue it to the center of the face. This helps the bear’s features stand out.
- Attach the eyes above the muzzle and draw a tiny black nose with a friendly smile underneath.
- Add little arms and feet. Draw them directly onto the paper background or cut simple rounded shapes from brown paper and glue them around the chestnuts.
- Decorate the background. Invite children to draw grass, mushrooms, trees, or falling leaves around their bear. This turns the craft into a complete woodland scene instead of just a single animal.
I’ve noticed children often turn these bears into story characters. Some become sleepy cave bears, while others love collecting berries with their forest friends.
Pro-Tip / Teacher’s Note: Read a short bear-themed picture book before crafting. It gives children lots of ideas for decorating their finished scene.
8. Chestnut Deer with Tiny Antlers
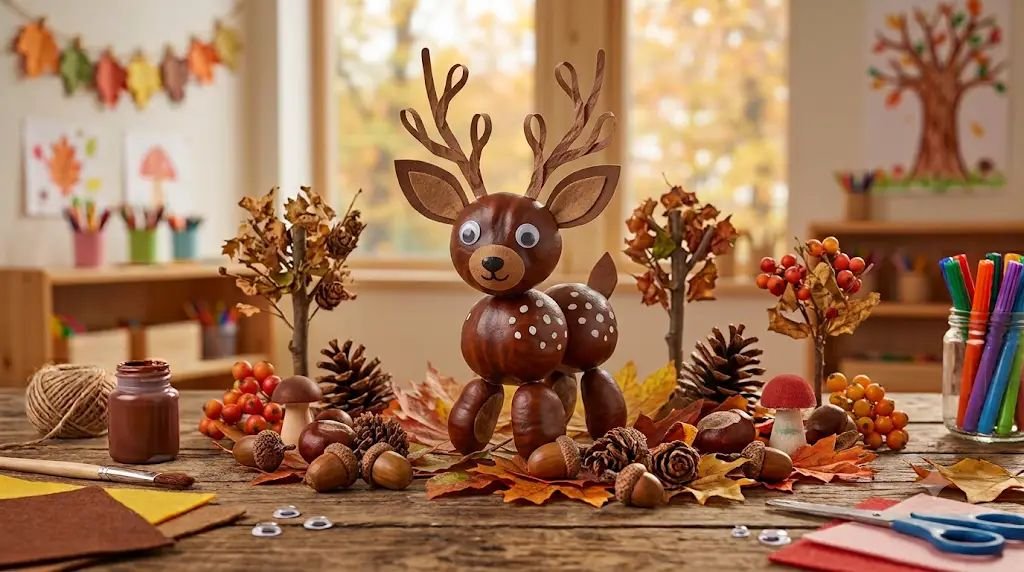
This elegant little deer looks beautiful displayed with the other woodland animals. Preschoolers enjoy making the delicate antlers and adding spots across the deer’s back.
Skill Developed: Fine motor development, concentration, pattern recognition, creativity.
Materials Needed:
- 2 edible chestnuts
- Brown and tan construction paper
- White paint or white marker
- Googly eyes
- Black marker
- Glue
- Child-safe scissors
- Small twigs (optional for antlers)
Step-by-Step Instructions
- Glue the chestnuts together to form the deer’s head and body. Allow them to sit for a minute before continuing.
- Make the antlers. Cut simple branching antlers from brown paper, or use two tiny clean twigs if available. Adults should help if using natural materials. Glue them securely behind the head.
- Cut two pointed ears from brown paper and attach them just below the antlers. Add smaller tan ear pieces if you’d like extra detail.
- Add the face. Glue on the googly eyes, then draw a small nose and gentle smile using a black marker.
- Paint white spots across the body using the end of a cotton swab or a small paintbrush. Children love watching the plain chestnut transform into a woodland deer.
- Create a forest setting. Glue the finished deer onto green construction paper and let children add trees, leaves, flowers, or little acorns around it with crayons or paper cutouts.
- Leave the project to dry completely before displaying it on a classroom bulletin board or taking it home.
One thing I’ve learned after making these with preschoolers is that no one worries if the antlers aren’t perfectly even. Children are much more interested in telling you where their deer lives and what it likes to eat.
Pro-Tip / Teacher’s Note: Collect a few real autumn leaves before craft time. They make wonderful decorations around the finished deer and give children another chance to explore nature indoors.
9. Chestnut Woodland Mouse
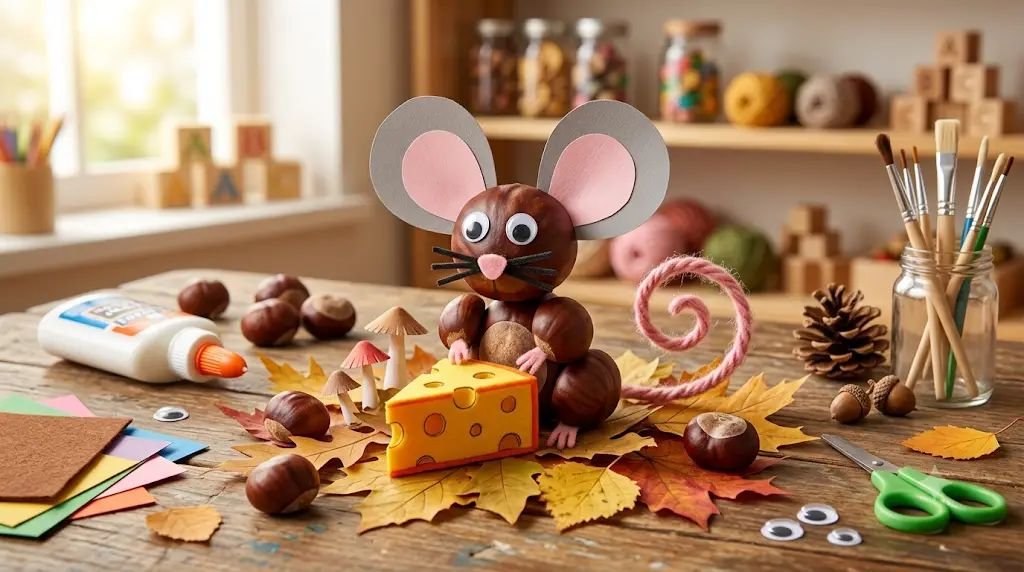
Little mice are always a hit with preschoolers because they’re quick to make and full of personality. The long curly tail and oversized ears usually inspire plenty of giggles, and children love imagining where their tiny mouse is scurrying off to.
Skill Developed: Fine motor skills, hand-eye coordination, creativity, storytelling, shape recognition.
Materials Needed:
- 2 edible chestnuts
- Gray construction paper
- Pink construction paper
- Googly eyes
- Pink yarn or pipe cleaner
- Non-toxic glue
- Child-safe scissors
- Black marker
Step-by-Step Instructions
- Build the mouse’s body by gluing the smaller chestnut above the larger one. Hold the pieces together for a few seconds until they stay in place.
- Cut two large round ears from gray construction paper. Cut slightly smaller pink circles and glue them inside each ear before attaching them behind the head.
- Add the face by gluing on the googly eyes. Draw a tiny triangle nose, smiling mouth, and a few whiskers with a black marker.
- Create the tail by curling a piece of pink yarn or a pink pipe cleaner. Glue one end behind the body so it curls naturally across the paper.
- Finish the woodland scene by letting children draw mushrooms, grass, acorns, or fallen leaves around their mouse. Many children enjoy adding a little wedge of paper cheese just for fun.
This craft often turns into a storytelling activity. One child might say their mouse lives under a tree stump, while another insists theirs sneaks into the forest bakery for tiny crumbs.
Pro-Tip / Teacher’s Note: Yarn tails are easier for preschoolers to glue than pipe cleaners and stay attached more securely after drying.
10. Chestnut Forest Turtle
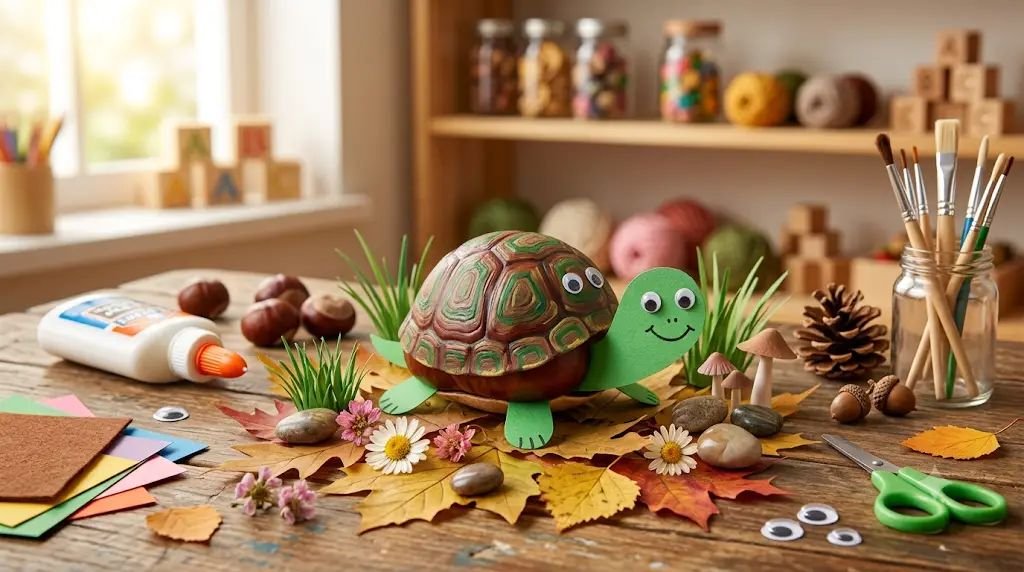
Turtles may not be the first animal children think of in the forest, but they fit beautifully into woodland nature themes. This craft is simple enough for younger preschoolers while still giving older children room to add creative details.
Skill Developed: Fine motor development, pattern recognition, creativity, hand-eye coordination.
Materials Needed:
- 1 large edible chestnut
- Green construction paper
- Light green cardstock
- Googly eyes
- Glue
- Black marker
- Child-safe scissors
- Green washable paint (optional)
Step-by-Step Instructions
- Place the chestnut in the center of your workspace to become the turtle’s shell. There’s no need to glue multiple chestnuts together for this project, making it one of the easiest crafts in the collection.
- Cut out the turtle’s body from green construction paper. Include the head, four legs, and a small tail as one connected piece before gluing the chestnut directly onto the center.
- Add the eyes by gluing two googly eyes onto the turtle’s head. Draw a tiny smile underneath with a marker.
- Decorate the shell using small dots, curved lines, or simple patterns with washable paint or markers. Encourage children to invent their own shell designs rather than copying one example.
- Create a woodland home by drawing grass, flowers, rocks, and tiny insects around the turtle. Some children even like adding a paper log for their turtle to hide beneath.
Expect plenty of creative conversations about where turtles sleep and what they eat. Those little discussions naturally build vocabulary while children work.
Pro-Tip / Teacher’s Note: Offer several shades of green paper so every turtle looks slightly different when displayed together.
11. Chestnut Woodland Snail
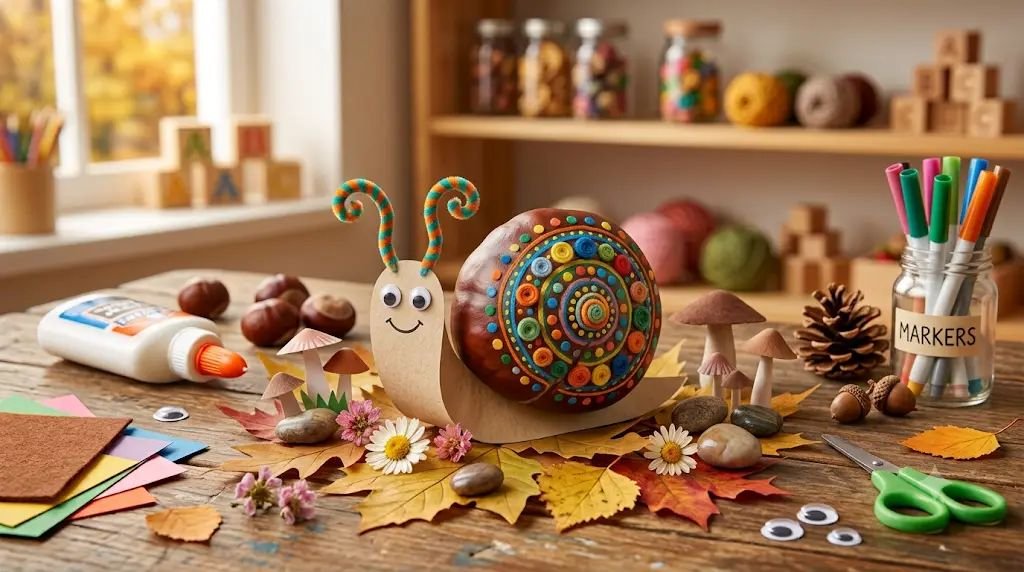
This cheerful little snail is the perfect way to finish your forest friends collection. It’s incredibly forgiving for younger children, and the colorful spiral shell gives everyone a chance to add their own artistic touch.
Skill Developed: Fine motor skills, creativity, pattern making, colour recognition, concentration.
Materials Needed:
- 1 large edible chestnut
- Brown or beige construction paper
- Googly eyes
- Pipe cleaner
- Non-toxic glue
- Washable markers
- Child-safe scissors
Step-by-Step Instructions
- Cut the snail’s body from brown or beige construction paper. Draw one long curved shape with a rounded head and gently tapering tail before cutting it out.
- Glue the chestnut onto the middle of the paper body to create the snail’s shell. Press gently and give the glue a minute to begin setting.
- Make the antennae by cutting a pipe cleaner into two short pieces. Adults can help if needed. Glue them behind the snail’s head so they stand upright.
- Attach the googly eyes to the front of the head and draw a happy smile beneath them.
- Decorate the shell with colorful spiral designs, tiny dots, hearts, or stripes using washable markers. Every child usually creates a completely different pattern.
- Build a tiny woodland garden around the snail by drawing flowers, mushrooms, butterflies, and leafy plants. Encourage children to think about where their snail likes to explore after it rains.
The best part of this project is watching children proudly compare their colorful shells. There are never two that look exactly alike.
Pro-Tip / Teacher’s Note: If glue needs extra drying time, let children work on decorating the background first. It keeps little hands busy while preventing accidental smudges.
Conclusion
After making these chestnut forest friends with preschoolers over the years, one thing always stands out—children care far more about the fun than making everything look perfect. A fox with oversized ears, a crooked hedgehog, or a snail covered in rainbow swirls often becomes the favorite creation of the day.
These simple crafts encourage imagination, strengthen fine motor skills, and create plenty of opportunities for conversation and storytelling. Best of all, they’re inexpensive, easy to prepare, and perfect for cozy autumn afternoons at home, in preschool, or in the classroom.
So gather a handful of edible chestnuts, clear a little space on the table, and let your young crafters fill the forest with their own wonderfully unique woodland friends.