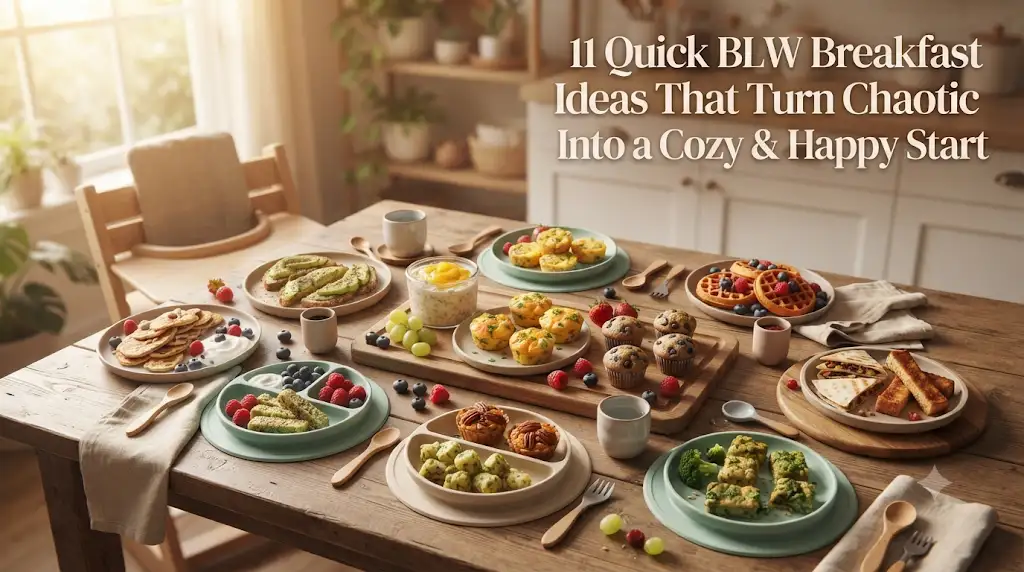
Mornings with a baby can feel like a race against the clock. Some days, I barely have enough time to make my own breakfast before my little one is happily banging on the highchair tray, ready to eat. That’s why I started collecting a handful of simple Baby-Led Weaning (BLW) breakfasts that are easy to prepare, nourishing, and made with everyday ingredients. Having a few reliable recipes on hand has made our mornings feel much calmer, and breakfast has become one of my favorite moments of the day instead of the most stressful.
Most babies are ready to begin Baby-Led Weaning around 6 months of age, provided they’re showing signs of readiness like sitting with minimal support, bringing food to their mouth, and showing interest in family meals. The recipes below are designed with little hands in mind, offering soft textures that are easy to grasp while encouraging babies to practice chewing, self-feeding, and exploring new flavors. As always, introduce new foods one at a time when appropriate, avoid added salt and sugar for babies under one, and stay with your baby throughout every meal.
1. Soft Banana Oat Pancake Strips
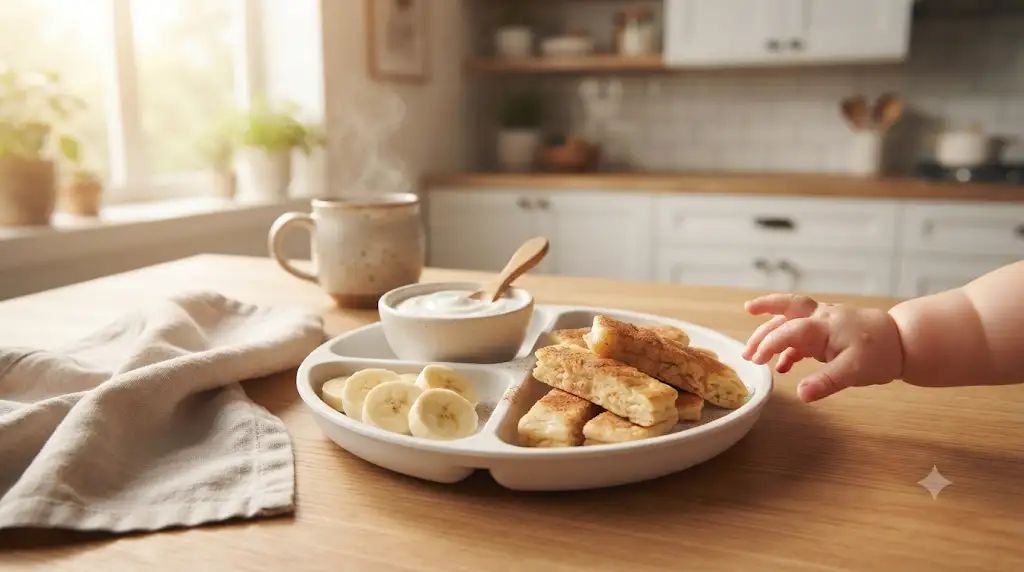
Short Summary
These three-ingredient banana oat pancakes have saved many of my busiest mornings. They’re naturally soft, easy for tiny hands to grip, and have a gentle sweetness that babies usually enjoy without needing any added sugar. I often make a double batch because they’re just as handy straight from the freezer as they are fresh off the pan.
Recommended age: Around 6 months+, once your baby is ready for BLW.
Health Benefits
Bananas provide potassium and vitamin B6, while oats add fiber that helps support healthy digestion. Eggs contribute protein, healthy fats, choline, and iron, making these pancakes a balanced breakfast that keeps little tummies satisfied.
Ingredients
- 1 ripe banana
- 1 large egg
- ½ cup rolled oats
- ¼ teaspoon ground cinnamon (optional)
- 1 teaspoon unsalted butter or avocado oil for the pan
Step-by-Step Recipe
- Peel the banana and place it in a medium bowl. Mash thoroughly with a fork until almost no lumps remain. A smooth batter helps create soft pancakes that hold together well.
- Crack the egg into the mashed banana and whisk until fully combined. The mixture should become smooth and slightly creamy.
- Add the rolled oats and cinnamon if using. Stir well, then let the batter rest for about 5 minutes so the oats soften and absorb some moisture. This simple step makes the finished pancakes much softer for younger babies.
- Heat a non-stick skillet over medium-low heat. Lightly grease with butter or avocado oil, wiping away any excess with a paper towel.
- Spoon small amounts of batter onto the skillet and gently spread into mini pancakes about 3 inches wide. Keeping them small makes flipping much easier.
- Cook for about 2–3 minutes until the edges begin to set and the bottoms turn lightly golden. Flip carefully with a thin spatula and cook another 2 minutes until fully cooked through.
- Transfer the pancakes to a cooling rack or plate and allow them to cool until comfortably warm. Warm pancakes are softer than hot ones and much safer for little mouths.
- Slice each pancake into finger-width strips, about the length of two adult fingers. These strips are much easier for babies to grasp than whole pancakes.
BLW Serving Tips
Serve two or three pancake strips alongside plain Greek yogurt, mashed berries, or soft avocado slices. If your baby is still learning to grasp food, slightly thicker strips are often easier to hold.
Storage Tips
Store cooled pancakes in an airtight container in the refrigerator for up to 3 days. Freeze between sheets of parchment paper for up to 2 months. Reheat gently in the microwave, skillet, or toaster until warmed through before serving.
2. Creamy Avocado Egg Toast Fingers
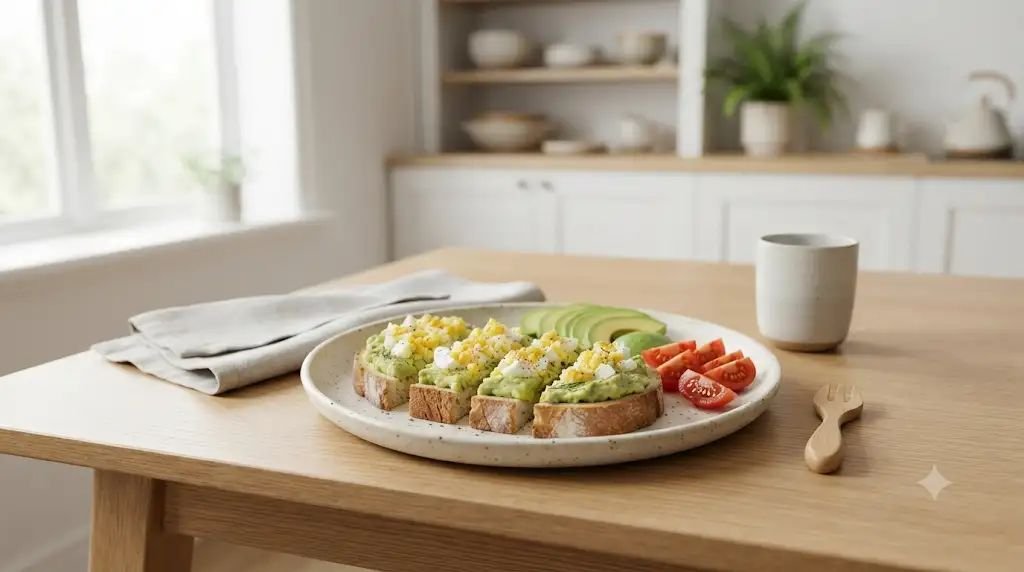
Short Summary
This has been one of my favorite “five-minute breakfasts” for busy mornings. Creamy avocado keeps the toast soft while chopped egg adds extra protein, creating a filling breakfast that’s easy for babies to pick up without falling apart.
Recommended age: Around 6 months+, adjusting the toast texture if needed.
Health Benefits
Avocados are packed with healthy fats that support brain development along with fiber, folate, and vitamin E. Eggs provide protein, iron, choline, and vitamin D, while whole grain bread contributes fiber and slow-releasing carbohydrates for lasting energy.
Ingredients
- 1 slice whole grain bread
- ½ ripe avocado
- 1 hard-boiled egg
- ½ teaspoon lemon juice (optional)
- Pinch of finely chopped fresh parsley (optional)
Step-by-Step Recipe
- Place the egg in a saucepan and cover with cold water. Bring to a boil, then simmer for about 10 minutes until fully cooked.
- Cool the egg under cold running water, peel it, and finely mash with a fork.
- Toast the bread lightly. I usually avoid making it overly crisp because softer toast is easier for younger babies to manage.
- Mash the avocado until smooth and creamy. Add a tiny splash of lemon juice if you want to help keep the color bright.
- Spread the avocado generously across the toast so every bite stays moist.
- Sprinkle the mashed egg evenly over the avocado and gently press it down with the back of a spoon so it sticks better.
- Let the toast cool for a minute or two before slicing it into finger-width strips.
BLW Serving Tips
Offer two or three toast fingers with soft tomato wedges, steamed broccoli florets, or ripe pear slices. Expect a little mess—avocado-covered hands are almost guaranteed, but that’s part of the fun.
Storage Tips
This recipe tastes best fresh. Hard-boiled eggs can be refrigerated for up to 7 days, making morning assembly much faster. Avoid freezing prepared avocado toast since the texture changes after thawing.
3. Apple Cinnamon Overnight Oats
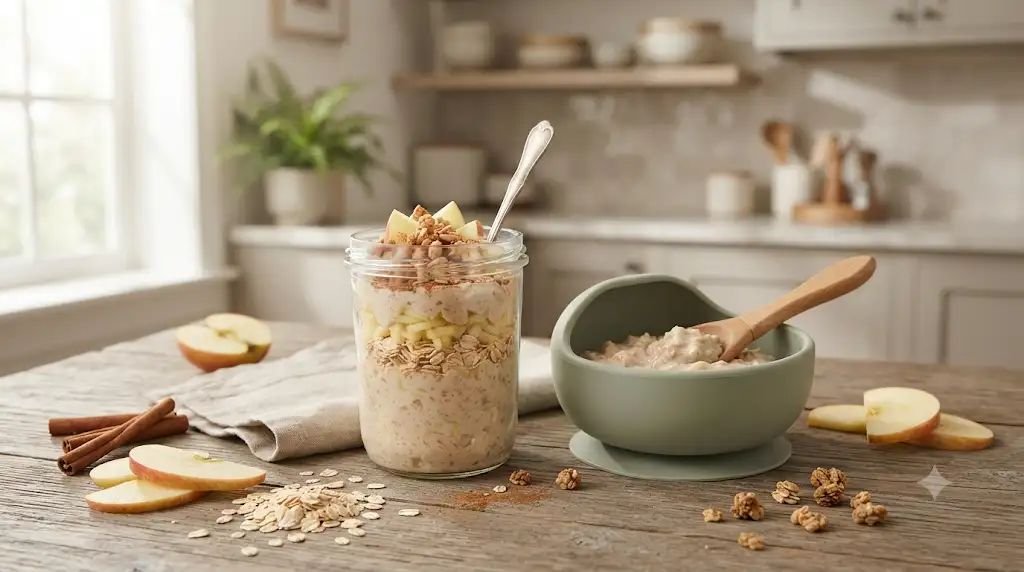
Short Summary
When I know the next morning will be hectic, I mix these overnight oats before bed. Breakfast is ready as soon as the fridge door opens, and my little one enjoys scooping up the soft oats with their hands or a beginner spoon.
Recommended age: Around 6 months+, served thick enough for self-feeding.
Health Benefits
Oats provide fiber for healthy digestion, apples add vitamin C and natural sweetness, while yogurt supplies calcium, protein, and beneficial bacteria that support gut health.
Ingredients
- ½ cup rolled oats
- ½ cup plain whole milk yogurt
- ¼ cup whole milk
- ¼ cup finely grated apple
- ¼ teaspoon ground cinnamon
- 1 teaspoon chia seeds (optional for babies already introduced)
Step-by-Step Recipe
- Wash and peel the apple if desired. Finely grate it using the small holes of a box grater so it blends smoothly into the oats.
- In a bowl or jar, combine the oats, yogurt, milk, grated apple, cinnamon, and chia seeds if using.
- Stir everything thoroughly, making sure the oats are fully coated with the liquid.
- Cover the container and refrigerate overnight, or for at least 6 hours.
- In the morning, stir well. If the mixture has become too thick, add a splash of milk until it reaches a soft, scoopable consistency.
- Serve chilled or let it sit at room temperature for 10–15 minutes if your baby prefers food that’s not straight from the refrigerator.
BLW Serving Tips
Serve in a suction bowl with a pre-loaded spoon or allow your baby to scoop with their hands. Pair with soft banana slices or ripe peaches for extra fruit.
Storage Tips
Refrigerate in an airtight container for up to 2 days. I don’t usually freeze overnight oats because they lose their creamy texture after thawing.
4. Spinach & Cheese Egg Muffins

Short Summary
These fluffy egg muffins became one of my favorite freezer breakfasts after my little one started enjoying finger foods. They’re soft, packed with vegetables, and easy to grab during rushed mornings when cooking from scratch isn’t realistic.
Recommended age: Around 6 months+, once eggs and dairy have been introduced individually.
Health Benefits
Eggs provide protein, iron, and choline, spinach contributes iron, vitamin A, vitamin C, and folate, while cheese adds calcium and healthy fats that support growing bones.
Ingredients
- 4 large eggs
- ¼ cup whole milk
- ½ cup finely chopped spinach
- ¼ cup finely shredded cheddar cheese
- 2 tablespoons finely diced bell pepper
- 1 tablespoon finely chopped onion (optional)
- 1 teaspoon olive oil for greasing the muffin tin
Step-by-Step Recipe
- Preheat your oven to 350°F (175°C) and lightly grease a silicone or non-stick muffin tin.
- Wash the spinach thoroughly and chop it into very small pieces so it blends evenly into the eggs.
- In a mixing bowl, whisk together the eggs and milk until smooth and slightly frothy.
- Stir in the spinach, cheese, diced bell pepper, and onion if using. Mix well so every muffin gets a little of everything.
- Divide the mixture evenly among the muffin cups, filling each about three-quarters full to allow room for rising.
- Bake for 18–22 minutes, or until the centers are fully set and the tops are lightly golden.
- Remove the pan from the oven and allow the muffins to cool for several minutes before carefully lifting them out.
- For younger BLW eaters, cut each muffin into halves or thick strips. As chewing skills improve, you can offer a whole muffin.
BLW Serving Tips
Serve one muffin with sliced avocado, roasted sweet potato wedges, or soft fruit. These muffins also travel well, making them a great breakfast for mornings when you’re heading out the door.
Storage Tips
Store in the refrigerator for up to 4 days or freeze for up to 2 months. Reheat gently in the microwave or oven until warm, then cool slightly before serving.
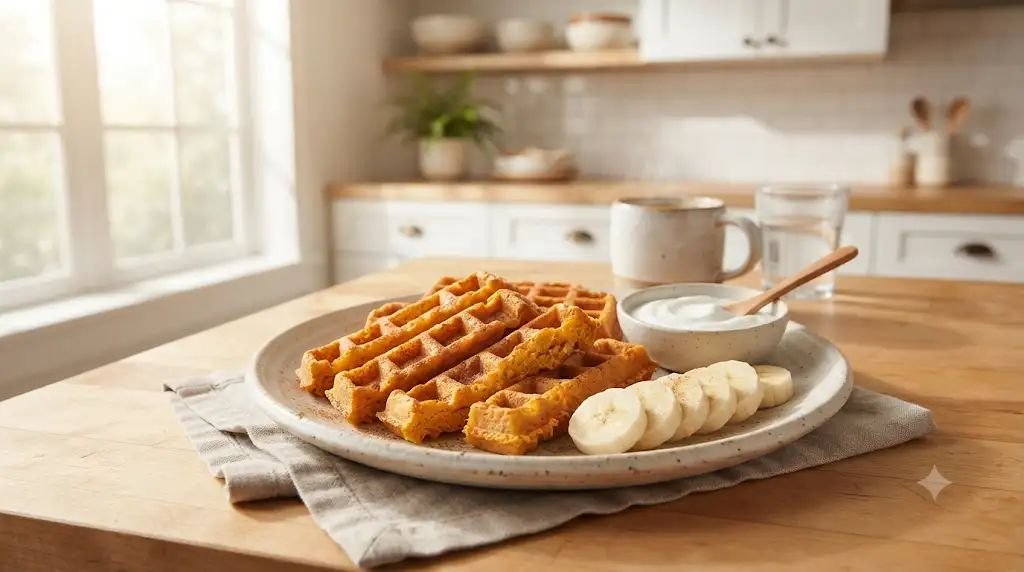
5. Sweet Potato Breakfast Waffles
Short Summary
These sweet potato waffles became a weekend favorite in our house, but I often freeze extras for busy weekdays. They’re soft inside with lightly crisp edges that soften as they cool, making them easy for little hands to hold. The naturally sweet flavor usually goes over well with babies, and I love that they’re filling without needing any added sugar.
Recommended age: Around 6 months+, when your baby is comfortably managing soft finger foods.
Health Benefits
Sweet potatoes are rich in vitamin A for healthy vision and immune support, along with fiber and potassium. Eggs add protein and choline, while oats provide slow-releasing energy and extra fiber. Together, they make a breakfast that keeps little tummies happy for longer.
Ingredients
- 1 cup mashed cooked sweet potato
- 2 large eggs
- ½ cup rolled oats, blended into oat flour
- ¼ teaspoon ground cinnamon
- 2 tablespoons whole milk
- 1 teaspoon avocado oil or melted unsalted butter for the waffle iron
Step-by-Step Recipe
- Peel and dice the sweet potato into small chunks. Steam or boil until very soft, about 12–15 minutes, then drain well and mash until completely smooth.
- Blend the rolled oats into a fine flour using a blender or food processor. This creates a softer waffle that’s easier for babies to chew.
- In a large bowl, whisk the eggs with the milk. Stir in the mashed sweet potato until smooth.
- Add the oat flour and cinnamon, mixing until no dry spots remain. Let the batter rest for about 5 minutes so it thickens slightly.
- Preheat the waffle maker and lightly grease it with avocado oil or butter.
- Spoon the batter into the waffle maker, spreading it gently if needed. Cook according to your waffle maker’s instructions until the waffles are cooked through and lightly golden.
- Transfer the waffles to a cooling rack rather than stacking them. This helps prevent them from becoming soggy.
- Once warm instead of hot, cut the waffles into long strips or bite-sized rectangles that are easy for your baby to grasp.
BLW Serving Tips
Serve one or two waffle strips with plain yogurt for dipping or alongside soft banana slices. If your baby is just starting BLW, thicker strips are often easier to hold than small cubes.
Storage Tips
Refrigerate for up to 4 days in an airtight container. Freeze for up to 2 months with parchment paper between each waffle. Reheat in a toaster, oven, or skillet until warmed through, then cool before serving.
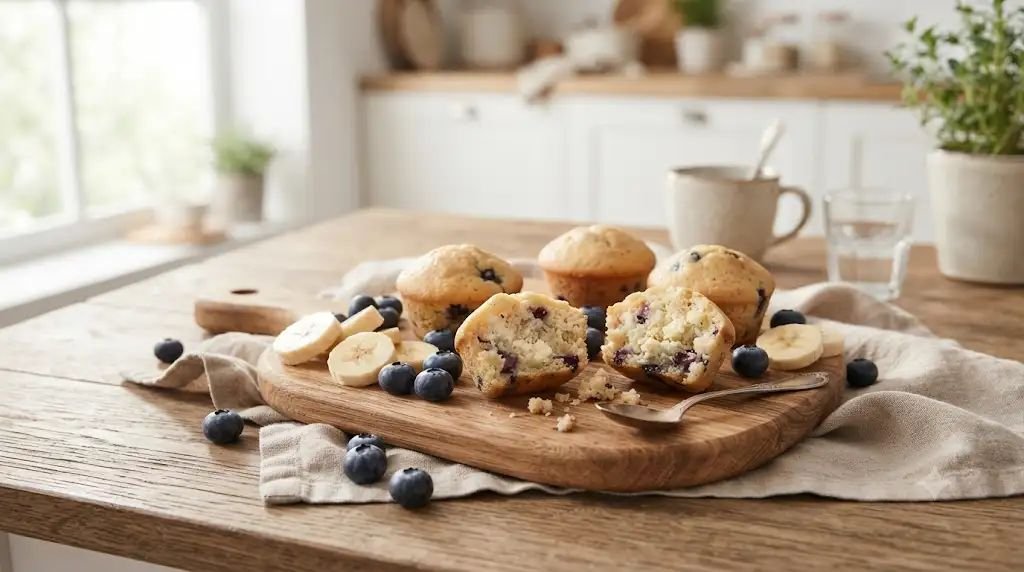
6. Blueberry Cottage Cheese Mini Muffins
Short Summary
I started making these when I wanted something that felt a little different from egg-based breakfasts. The cottage cheese keeps the muffins incredibly soft, while the blueberries add little bursts of natural sweetness. They’re easy to pack for daycare mornings or family outings, too.
Recommended age: Around 8 months+, depending on your baby’s chewing skills and familiarity with the ingredients.
Health Benefits
Cottage cheese provides protein and calcium to support growing bones, blueberries offer antioxidants and vitamin C, while oat flour adds fiber that helps support healthy digestion.
Ingredients
- 1 cup oat flour
- ½ cup cottage cheese
- 1 large egg
- ¼ cup mashed banana
- ¼ cup blueberries, lightly mashed
- 1 teaspoon baking powder
- 2 tablespoons whole milk
Step-by-Step Recipe
- Preheat the oven to 350°F (175°C) and grease a mini muffin tin or line it with silicone liners.
- Mash the banana until smooth. Gently crush the blueberries with a fork so larger berries won’t roll out of the muffins after baking.
- In a bowl, whisk together the egg, cottage cheese, milk, and mashed banana until mostly smooth.
- Stir in the oat flour and baking powder until just combined. Fold in the blueberries gently to avoid turning the batter completely purple.
- Fill each mini muffin cup about three-quarters full.
- Bake for 15–18 minutes, or until the tops are lightly golden and a toothpick inserted into the center comes out clean.
- Allow the muffins to cool in the pan for several minutes before transferring them to a cooling rack.
- Serve whole for confident eaters or cut into halves or quarters for younger babies.
BLW Serving Tips
Pair these muffins with sliced strawberries, kiwi, or plain yogurt. They’re soft enough to crumble easily, making them great for babies who are still learning how much bite pressure to use.
Storage Tips
Store in the refrigerator for 4 days or freeze for 2 months. Defrost overnight in the refrigerator or warm gently before serving.
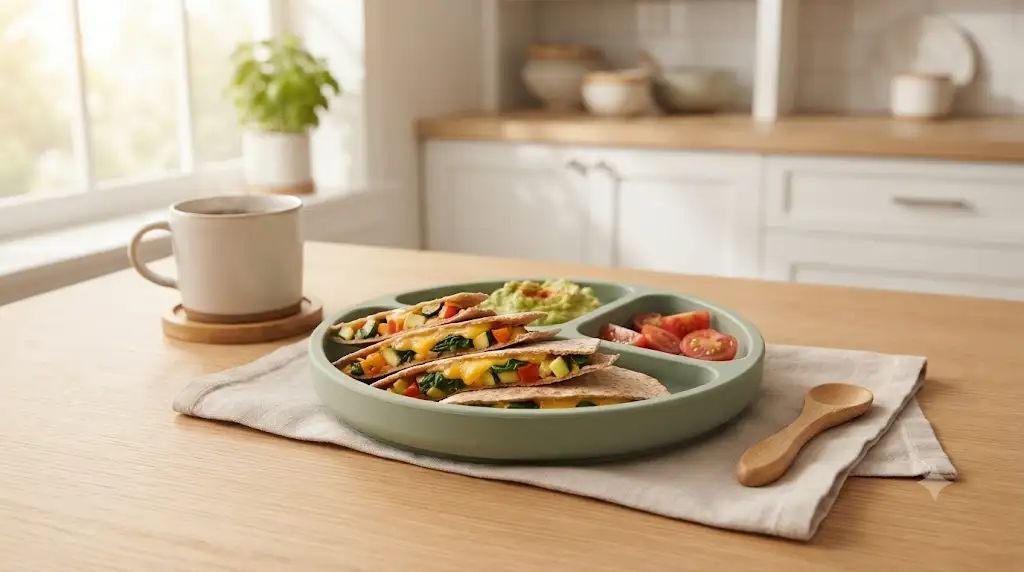
7. Veggie Breakfast Quesadilla Fingers
Short Summary
Whenever we have leftover cooked vegetables in the fridge, this is one of the first breakfasts I make. It’s quick, filling, and a simple way to use up small amounts of veggies without much effort. My little one loved pulling apart the soft strips and exploring the colorful filling.
Recommended age: Around 8 months+, depending on your baby’s comfort with mixed textures.
Health Benefits
Whole wheat tortillas provide fiber, cheese contributes calcium and protein, while vegetables add vitamins, minerals, and natural color that keeps breakfast interesting.
Ingredients
- 1 small whole wheat tortilla
- ¼ cup finely shredded cheddar or mozzarella cheese
- 2 tablespoons finely chopped cooked spinach
- 2 tablespoons finely grated zucchini, squeezed dry
- 1 tablespoon finely diced cooked bell pepper
- 1 teaspoon butter or olive oil
Step-by-Step Recipe
- Finely chop or grate all the vegetables. If using zucchini, gently squeeze out excess moisture with a clean kitchen towel.
- Heat a non-stick skillet over medium-low heat.
- Lay the tortilla flat and sprinkle half the cheese over one side.
- Add the spinach, zucchini, and bell pepper evenly across the cheese.
- Sprinkle the remaining cheese over the vegetables before folding the tortilla in half.
- Place the quesadilla into the warm skillet and cook for about 2–3 minutes on each side until the cheese melts and the tortilla is lightly golden.
- Remove from the skillet and let it cool for several minutes. The filling stays very hot even after the outside cools.
- Slice into finger-width strips that are easy for little hands to pick up.
BLW Serving Tips
Serve with mashed avocado, plain yogurt, or soft tomato slices. If the tortilla becomes slightly crisp, allow it to cool completely so it softens before offering it to your baby.
Storage Tips
Store leftovers in the refrigerator for 2 days. Reheat gently in a skillet or microwave until warm, then cool before serving. Freezing isn’t recommended because the tortilla can become chewy after thawing.
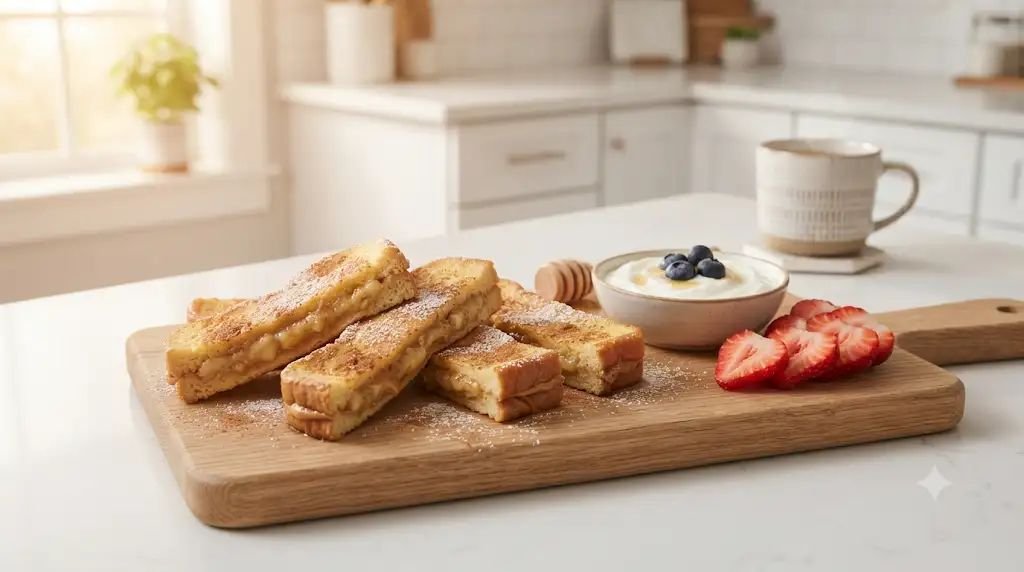
8. Creamy Peanut Butter Banana French Toast Sticks
Short Summary
This breakfast feels a little special while still coming together with simple pantry ingredients. The inside stays wonderfully soft, making it easy for babies to bite, while the outside develops just enough texture to help little fingers grip each strip. I usually make these when we have slightly stale bread that needs to be used up.
Recommended age: Around 6 months+, after peanut has been safely introduced according to your pediatrician’s guidance.
Health Benefits
Whole grain bread provides fiber, eggs supply protein and choline, bananas contribute potassium and vitamin B6, while natural peanut butter offers healthy fats and plant-based protein that help keep babies satisfied.
Ingredients
- 2 slices whole grain bread
- 1 egg
- 2 tablespoons whole milk
- ½ ripe banana, mashed
- 1 tablespoon natural peanut butter
- ½ teaspoon cinnamon (optional)
- 1 teaspoon butter for cooking
Step-by-Step Recipe
- Mash the banana until smooth and stir in the peanut butter until fully combined.
- Spread a thin layer of the banana mixture onto one slice of bread and top with the second slice to make a sandwich.
- In a shallow bowl, whisk together the egg, milk, and cinnamon until smooth.
- Dip both sides of the sandwich into the egg mixture, allowing the bread to absorb some of the liquid without becoming overly soggy.
- Heat a lightly buttered non-stick skillet over medium-low heat.
- Cook the sandwich for about 3–4 minutes per side until the egg is fully cooked and both sides are lightly golden.
- Transfer to a plate and allow it to cool until just warm.
- Slice into thick finger-width sticks that are easy for babies to grasp.
BLW Serving Tips
Serve with plain Greek yogurt or soft berries on the side. Offer just a few sticks at a time to avoid overwhelming your baby, and let them ask for more if they’re still hungry.
Storage Tips
French toast sticks can be refrigerated for 2 days or frozen for 2 months. Reheat in the toaster, oven, or skillet until warmed through, then cool before serving.
Read More:
- 13 Clever BLW 9 Months Ideas Perfect for Little Fingers & Practising the Pincer Grasp
- 10 Exciting BLW Recipes (8 Months) That Introduce Fun Flavours & Stop Picky Eating Early
9. Creamy Pumpkin Yogurt Oat Cups
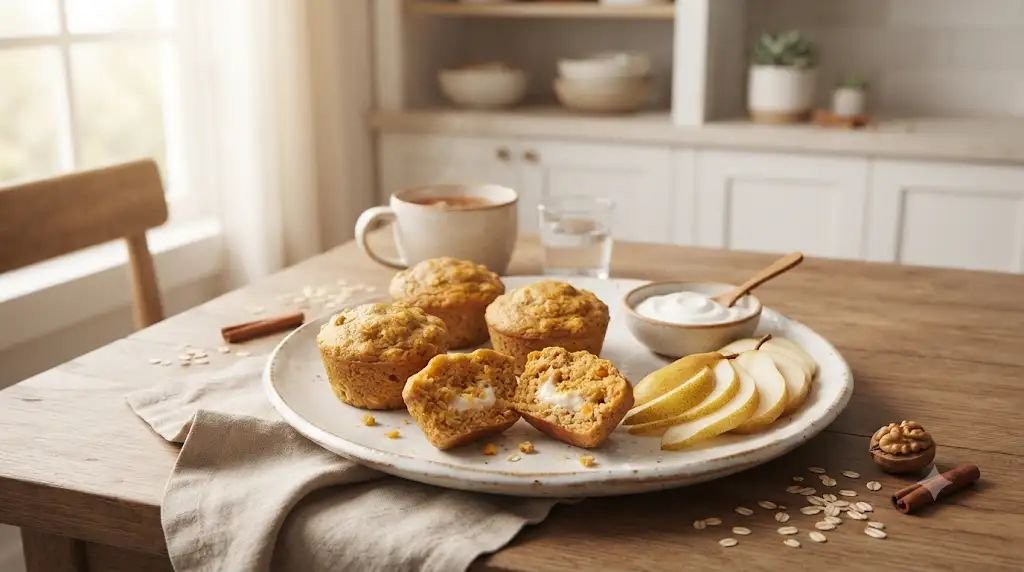
Short Summary
These no-fuss oat cups are one of my favorite make-ahead breakfasts once pumpkin season rolls around, although I happily make them year-round with canned pumpkin. They’re soft enough for little gums, easy to hold, and perfect for mornings when everyone is moving a little slower than planned.
Recommended age: Around 6 months+, when your baby is comfortable with soft finger foods and yogurt has already been introduced.
Health Benefits
Pumpkin is naturally rich in vitamin A, which supports healthy vision and immune function. Oats add fiber to help keep little tummies happy, while whole milk yogurt provides calcium, protein, and healthy fats that growing babies need.
Ingredients
- 1 cup rolled oats
- ½ cup plain whole milk yogurt
- ½ cup pumpkin purée (100% pumpkin, not pie filling)
- 1 large egg
- ¼ teaspoon ground cinnamon
- 1 teaspoon vanilla extract (optional)
- 1 teaspoon avocado oil for greasing the muffin tin
Step-by-Step Recipe
- Preheat your oven to 350°F (175°C) and lightly grease a silicone muffin pan or a regular muffin tin.
- In a medium bowl, combine the oats, yogurt, pumpkin purée, egg, cinnamon, and vanilla if using. Stir until everything is evenly mixed.
- Let the mixture rest for about 5 minutes so the oats begin to soften and absorb the moisture.
- Spoon the mixture evenly into the muffin cups, filling each about three-quarters full.
- Bake for 22–25 minutes, until the centers are set and the tops feel firm when gently touched.
- Allow the oat cups to cool in the pan for about 10 minutes before carefully removing them.
- For younger babies, slice each oat cup into thick strips or halves. Older babies can usually manage a whole cup.
BLW Serving Tips
Serve with soft pear slices, mashed berries, or a spoonful of plain yogurt for dipping. I like placing everything on a suction plate so little hands can grab one piece at a time without chasing breakfast around the tray.
Storage Tips
Refrigerate in an airtight container for 4 days. Freeze for up to 2 months. Thaw overnight in the refrigerator or warm gently in the microwave before serving. Always let them cool to a safe temperature before offering them to your baby.
10. Broccoli & Cheese Breakfast Tots
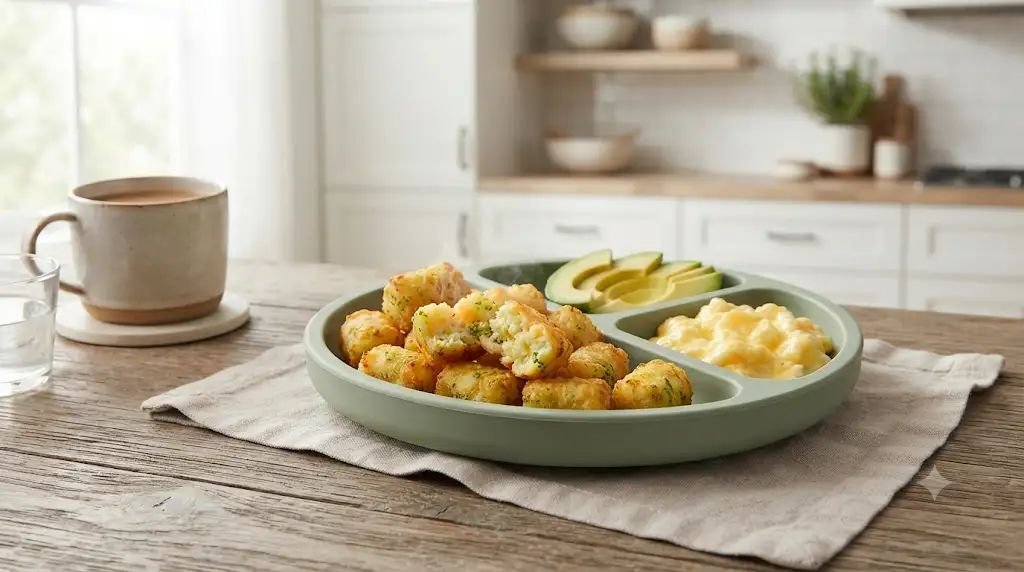
Short Summary
These little breakfast tots are a wonderful way to use leftover steamed broccoli. They’re crisp enough on the outside to hold together but wonderfully soft inside, making them easy for babies to bite into. They also work well as a lunchbox snack once your little one gets older.
Recommended age: Around 8 months+, depending on your baby’s chewing skills and comfort with mixed textures.
Health Benefits
Broccoli provides vitamin C, vitamin K, fiber, and folate. Cheese adds calcium and protein, while potatoes offer complex carbohydrates that help keep babies energized through busy mornings.
Ingredients
- 1 cup mashed cooked potato
- ½ cup finely chopped steamed broccoli
- ¼ cup finely shredded cheddar cheese
- 1 egg
- 2 tablespoons oat flour
- 1 tablespoon olive oil for brushing
Step-by-Step Recipe
- Steam the broccoli until very tender, then chop it as finely as possible so it mixes evenly into the potatoes.
- In a large bowl, combine the mashed potato, broccoli, cheese, egg, and oat flour. Mix until the ingredients form a soft but workable mixture.
- Scoop out small portions and gently shape them into short tots using your hands.
- Place the tots onto a parchment-lined baking tray, leaving a little space between each one.
- Lightly brush the tops with olive oil to encourage gentle browning.
- Bake at 400°F (200°C) for about 18–20 minutes, carefully turning the tots halfway through baking so both sides cook evenly.
- Remove from the oven and allow them to cool until just warm before serving.
BLW Serving Tips
Offer two or three tots alongside avocado slices, scrambled eggs, or soft fruit. Their chunky shape is easy for babies to grab with their whole hand before developing a pincer grasp.
Storage Tips
Store in the refrigerator for 4 days or freeze for 2 months. Reheat in the oven, air fryer, or microwave until heated through, then allow them to cool before serving.
11. Spinach Banana Breakfast Smoothie Oat Fingers
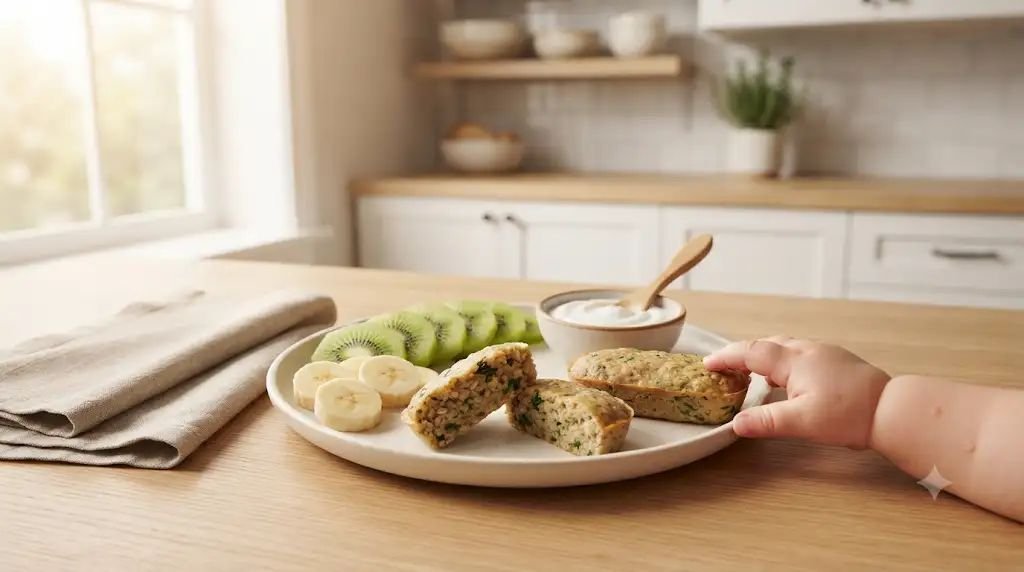
Short Summary
Whenever I have ripe bananas that need using, these baked oat fingers are one of the first things I make. They’re soft, naturally sweet, and packed with ingredients that blend together beautifully without tasting overly “green.” Even babies who aren’t quite sure about spinach often enjoy these.
Recommended age: Around 6 months+, served as soft finger-sized pieces.
Health Benefits
Spinach provides iron, folate, and vitamin A, bananas contribute potassium and natural sweetness, oats add fiber, while eggs provide protein and healthy fats to help support steady growth and development.
Ingredients
- 1 ripe banana
- 1 cup rolled oats
- 1 large egg
- ½ cup fresh spinach
- ¼ cup whole milk
- ½ teaspoon cinnamon (optional)
Step-by-Step Recipe
- Preheat the oven to 350°F (175°C) and line a small square baking pan with parchment paper.
- Blend the banana, spinach, egg, and milk until completely smooth. The mixture should be bright green with no visible spinach pieces.
- Pour the blended mixture into a bowl and stir in the oats and cinnamon.
- Let the batter sit for about 5 minutes so the oats soften and thicken the mixture.
- Spread the batter evenly into the prepared pan, smoothing the top with a spatula.
- Bake for 22–25 minutes, or until the center is fully set and the edges begin turning lightly golden.
- Cool completely before lifting the bake from the pan. This helps it slice neatly without crumbling.
- Cut into thick finger-sized bars that are easy for little hands to hold.
BLW Serving Tips
Serve with plain yogurt, soft kiwi slices, or mashed raspberries. I usually offer one or two bars at first and let my baby decide if they’re ready for more.
Storage Tips
Store in the refrigerator for 4 days or freeze individually for 2 months. Warm gently before serving if desired, then let the bars cool until they’re comfortable for little mouths.
Conclusion
Breakfast doesn’t have to be complicated to be nourishing. Some of our happiest mornings have started with simple foods made from ingredients already sitting in the kitchen. Having a few BLW-friendly breakfasts ready in the refrigerator or freezer has helped me spend less time cooking and more time sitting beside my little one while they proudly practice feeding themselves.
Remember that every baby develops eating skills at their own pace. One morning they may eagerly finish everything on their tray, and the next they might spend more time squishing food than eating it. That’s completely normal. Keep offering a variety of textures, colors, and flavors without pressure, celebrate the small milestones, and enjoy the messy moments along the way. Before long, those chaotic mornings begin to feel a little cozier, one breakfast at a time.