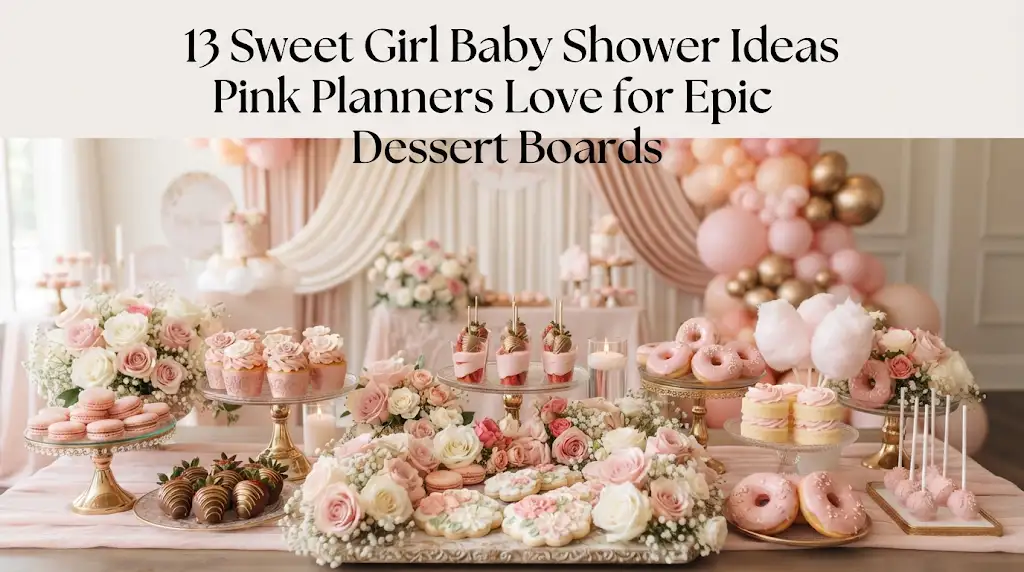
There is something extra special about planning a baby shower for a little girl. I always find myself reaching for soft pinks, fresh flowers, pretty desserts, and tiny details that make guests smile before they even take a bite. Some of my favorite parties weren’t the biggest or most expensive—they simply had thoughtful dessert tables that everyone gathered around all afternoon.
Over the years, I’ve learned that an unforgettable dessert board isn’t about buying every trendy decoration you see online. It’s about mixing beautiful sweets, playful textures, and personal touches that make the mom-to-be feel celebrated. These are the ideas I’ve either created myself or adapted for friends, and every single one has become the centerpiece of the party.
1. Blush Pink Macaron Garden Dessert Board
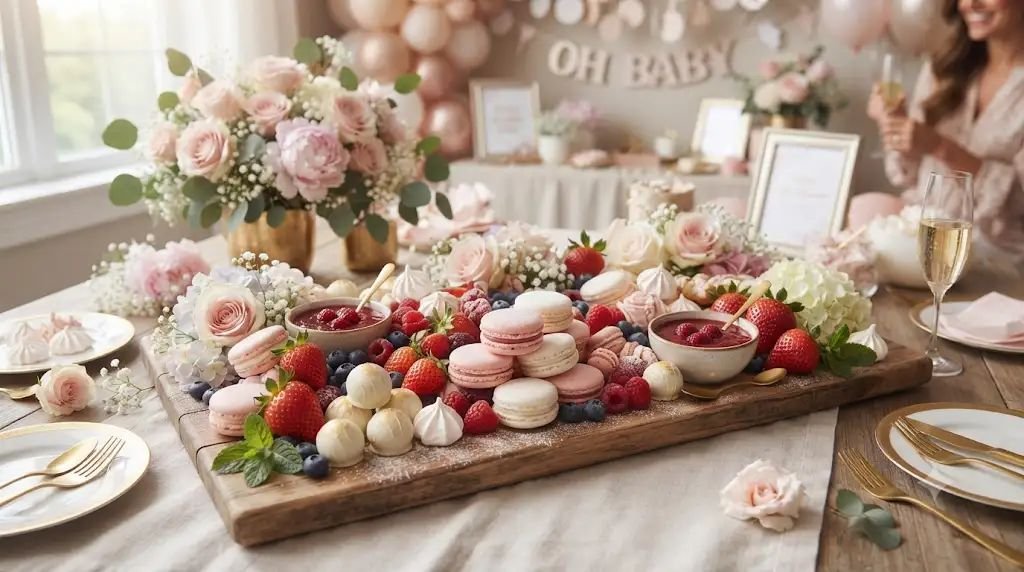
The Concept:
Whenever I want a dessert table to look elegant without feeling overly formal, I build a macaron garden board. Soft pink macarons, fresh berries, edible flowers, and delicate candies create the feeling of a blooming spring garden that’s perfect for welcoming a baby girl.
Estimated Budget: Medium ($70–$130)
Materials Needed:
- Large wooden serving board or grazing board
- Pink macarons (store-bought or homemade)
- White macarons
- Strawberries
- Raspberries
- Fresh blueberries
- Mini meringues
- Pink chocolate-covered almonds
- White chocolate truffles
- Edible flowers
- Fresh mint leaves
- Small bowls for sauces
- Raspberry sauce
- Powdered sugar
- Decorative cake stand (optional)
How to Set It Up (Step-by-Step):
- Start with a completely clean serving board. I always wipe it with a damp cloth first and let it dry completely before placing any food on it.
- Place the largest items first. If you’re using a cake stand or decorative bowl, position it slightly off-center to create height and make the display feel layered instead of flat.
- Arrange the macarons into small clusters instead of lining them up. Mixing pink and white colors creates a more natural look that reminds me of flower petals.
- Wash every berry thoroughly and dry them very well with paper towels. Damp fruit can make surrounding desserts soggy, so this step is worth taking your time with.
- Fill empty spaces with strawberries, raspberries, and blueberries, making little pockets of fresh color throughout the board.
- Scatter mini meringues around the fruit. They add texture and help fill smaller gaps without making the board look crowded.
- Place white chocolate truffles and chocolate-covered almonds in groups of three or five. Odd-numbered groupings usually look more balanced.
- Tuck fresh mint leaves underneath berries and candies so they peek out naturally. This simple trick instantly makes everything look fresher.
- Add edible flowers only after every dessert has been placed. I gently tuck them into open spaces rather than laying them directly on top of food.
- Fill tiny bowls with raspberry sauce for dipping and position them where guests can easily reach them without leaning across the board.
- Right before guests arrive, lightly dust a few macarons and berries with powdered sugar for a soft, dreamy finish.
- Keep extra macarons chilled in the refrigerator so you can quietly refill the board during the party without anyone noticing.
2. Pretty Pink Donut Wall with Sweet Treat Board
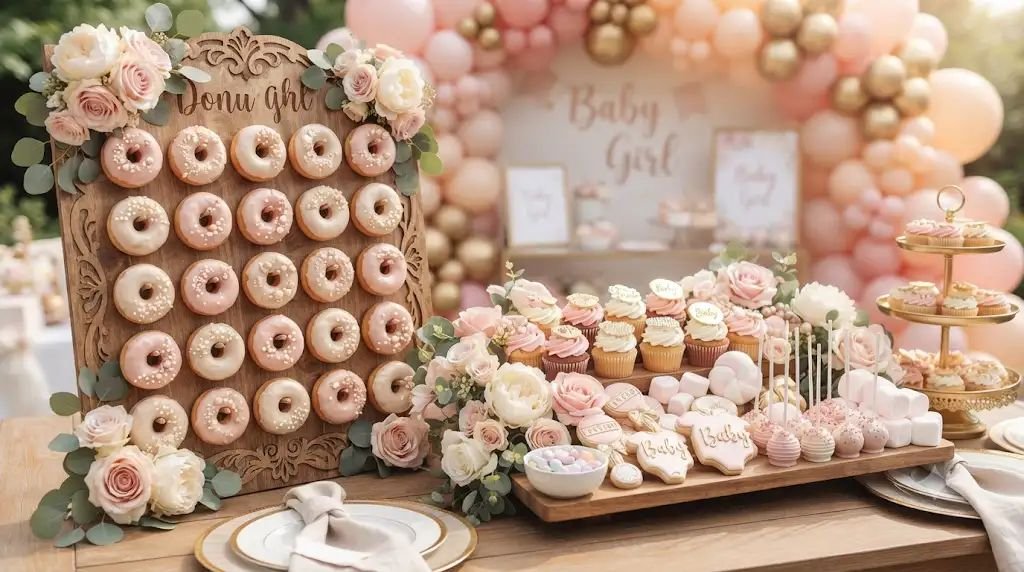
The Concept:
A donut wall always becomes the most photographed corner of the shower. Pairing it with a matching dessert board creates a fun dessert station that guests naturally gather around while chatting.
Estimated Budget: Medium ($80–$150)
Materials Needed:
- Wooden donut wall
- Pink frosted donuts
- White glazed donuts
- Mini cupcakes
- Sugar cookies
- Pink sprinkles
- Marshmallows
- Candy-coated chocolates
- Cake pops
- Decorative trays
- Silk flowers
- Small serving tongs
- Dessert plates
- Napkins
How to Set It Up (Step-by-Step):
- Assemble the donut wall first and make sure it sits securely on a sturdy table. Give it a gentle shake before decorating so you know it won’t wobble once loaded.
- Hang the donuts evenly across the pegs, alternating pink and white icing for a balanced look.
- Place the dessert board directly below the donut wall so the entire display feels connected.
- Arrange mini cupcakes in neat rows along one side of the board, leaving enough room for guests to grab one without disturbing nearby treats.
- Stack cake pops in a decorative holder or stand them upright in a container filled with decorative sugar.
- Add sugar cookies in overlapping layers to create dimension.
- Fill small spaces with marshmallows and candy-coated chocolates so the board looks full from every angle.
- Sprinkle a small amount of pink sprinkles around clusters of desserts rather than across the whole board. This creates little pops of sparkle without looking messy.
- Frame both sides of the display with silk flowers to soften the edges.
- Place serving tongs near cupcakes and cookies to make self-serving easier.
- Keep a small tray behind the table with backup donuts ready to replace empty spots throughout the celebration.
3. Baby in Bloom Floral Dessert Board
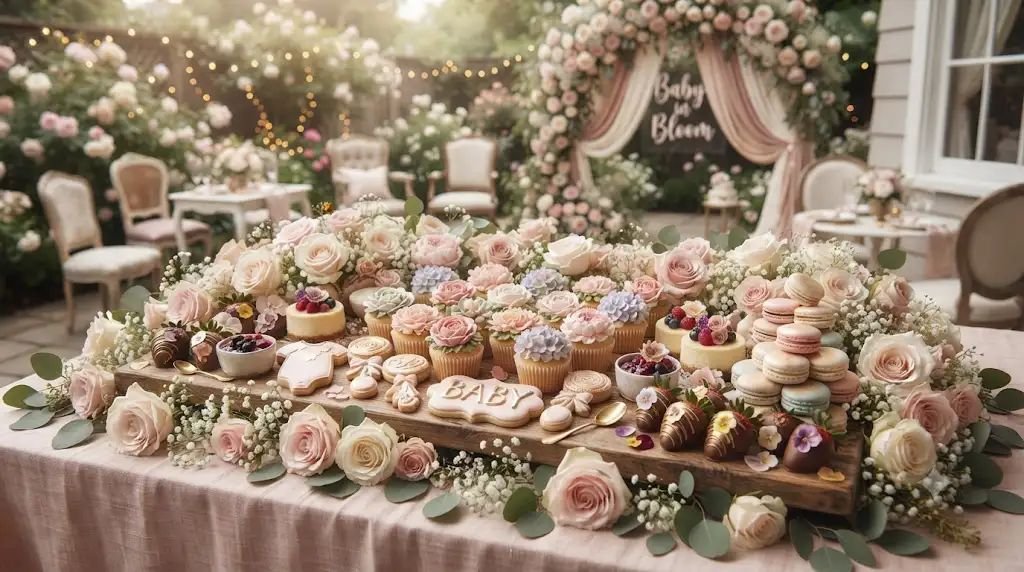
The Concept:
This has become one of my favorite themes because it feels timeless. Soft flowers mixed with pastel desserts create a peaceful, romantic table that fits almost any venue, from a backyard garden to a community hall.
Estimated Budget: Medium ($90–$170)
Materials Needed:
- Large grazing board
- Floral cupcakes
- Pink sugar cookies
- Macarons
- Mini cheesecakes
- Chocolate-covered strawberries
- Edible flowers
- Fresh roses
- Baby’s breath
- Eucalyptus stems
- Decorative bowls
- Floral cake topper
How to Set It Up (Step-by-Step):
- Cover the dessert table with a white or blush tablecloth to create a clean background.
- Place the largest desserts first, such as mini cheesecakes and cupcake stands.
- Arrange cupcakes with floral frosting throughout the board rather than grouping them all together.
- Position sugar cookies vertically against bowls whenever possible. This adds height and makes the board feel more dynamic.
- Alternate macarons and chocolate-covered strawberries to create a gentle flow across the display.
- Add fresh eucalyptus underneath serving trays where guests won’t accidentally eat it.
- Tuck baby’s breath into open corners and around the outer edges.
- Place edible flowers directly beside desserts instead of covering them so every sweet remains easy to identify.
- Keep fresh roses toward the back of the table as decorative accents rather than placing them near serving areas.
- Finish by checking the board from every viewing angle. I usually walk around the entire table once because little empty spots become much easier to notice.
4. Pink Candy Charcuterie Dessert Board
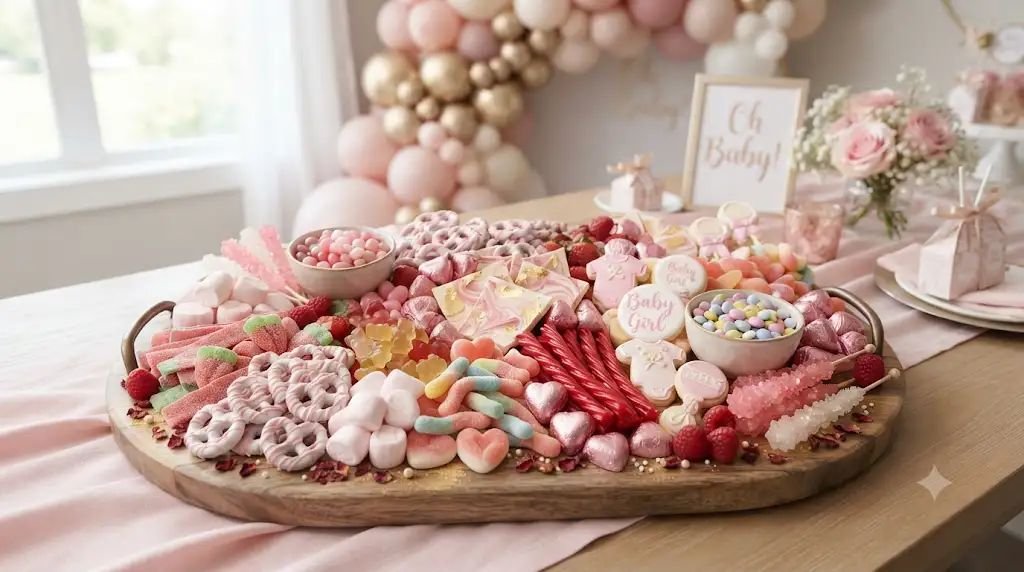
The Concept:
Whenever children are invited to the shower, this board disappears faster than almost anything else. It’s bright, playful, and full of different textures that encourage everyone to sample a little bit of everything.
Estimated Budget: Low to Medium ($45–$90)
Materials Needed:
- Large serving tray
- Pink gummy candies
- Strawberry marshmallows
- Yogurt-covered pretzels
- Pink chocolate candies
- Licorice twists
- Rock candy sticks
- Mini cookies
- White chocolate bark
- Small serving scoops
- Decorative bowls
How to Set It Up (Step-by-Step):
- Separate every candy into individual bowls before decorating. This makes arranging everything much faster.
- Place decorative bowls on opposite corners of the board for balance.
- Fill the bowls with smaller candies that could otherwise roll around the board.
- Arrange larger candies like licorice twists in loose curves to guide the eye across the display.
- Stack yogurt-covered pretzels in little piles instead of laying them flat.
- Break white chocolate bark into natural-looking pieces rather than perfect squares.
- Add mini cookies between candy sections to give guests a break from all the sweetness.
- Stand rock candy sticks inside a small jar near the center to create height.
- Leave enough space between candy sections so guests can scoop treats without mixing everything together.
- Place serving scoops beside each candy section and refill small portions throughout the party instead of overloading the board from the beginning.
5. Princess Tea Party Dessert Board
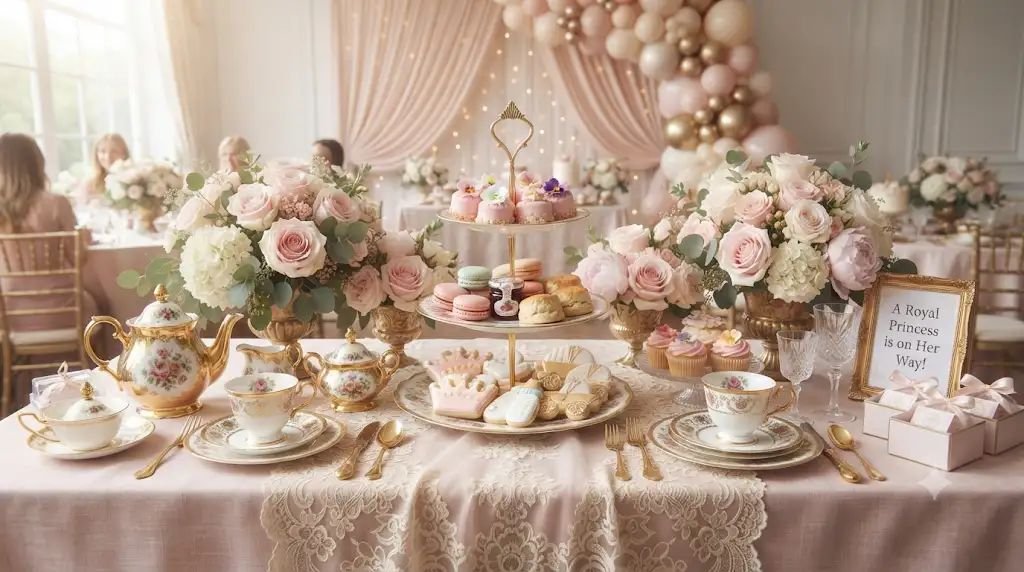
The Concept:
This idea always feels magical without becoming overly themed. Think elegant tea party with soft princess touches instead of cartoon decorations. It creates a sophisticated setup that both adults and kids enjoy.
Estimated Budget: Medium ($85–$160)
Materials Needed:
- Tiered dessert stand
- Mini tea sandwiches
- Pink petit fours
- Mini scones
- Strawberry jam
- Clotted cream
- Decorated sugar cookies
- Pink macarons
- Tea cups
- Vintage teapot
- Fresh roses
- Lace table runner
- Cake forks
- Cloth napkins
How to Set It Up (Step-by-Step):
- Lay a lace table runner down the center of the dessert table before placing any serving pieces. It instantly creates an elegant foundation.
- Position the tiered dessert stand in the center since it will naturally become the focal point.
- Place petit fours on the top tier because their detailed decorations are easiest to admire from above.
- Arrange macarons and decorated cookies on the middle tier, alternating colors to keep the display balanced.
- Fill the bottom tier with mini scones so guests can easily reach them.
- Place strawberry jam and clotted cream into small matching bowls with tiny serving spoons beside the scones.
- Arrange mini tea sandwiches neatly on a separate platter next to the dessert board so savory bites are easy to find.
- Scatter fresh roses around the serving pieces rather than placing them directly beside food. This keeps the arrangement elegant without getting in the way.
- Set out teacups in small groups with matching saucers and cake forks nearby so guests can serve themselves comfortably.
- Brew the tea about 20–30 minutes before guests begin eating. I like to keep one classic black tea and one caffeine-free herbal option available so everyone has something they’ll enjoy.
- Just before everyone gathers around the dessert table, do one final check for crumbs, fingerprints on serving trays, or empty spaces. Those last few minutes of tidying always make the entire display feel polished and welcoming.
6. Pink Ombre Cupcake Dessert Board
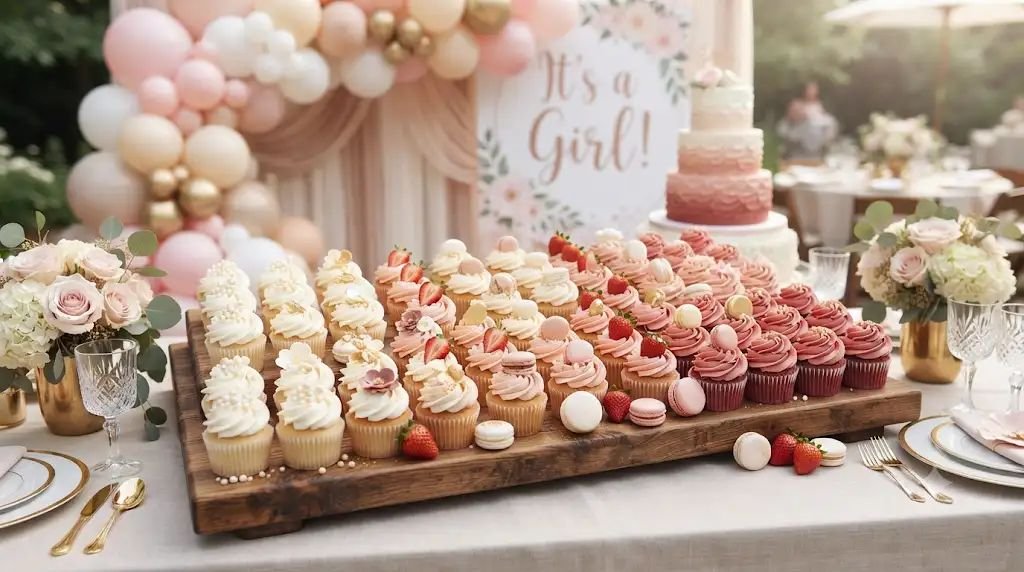
The Concept:
One of the easiest ways I’ve found to make a dessert table look professionally styled is by creating an ombre effect. Instead of using one shade of pink, gradually move from white to blush, rose, and deeper pink cupcakes across the board. It feels elegant without requiring complicated decorations.
Estimated Budget: Medium ($75–$140)
Materials Needed:
- Large wooden dessert board
- 24–36 cupcakes
- White, blush, light pink, medium pink, and dark pink buttercream frosting
- Piping bags with decorating tips
- Pink cupcake liners
- Mini macarons
- White chocolate pearls
- Fresh strawberries
- Cake stand (optional)
- Dessert tongs
- Small decorative flowers
How to Set It Up (Step-by-Step):
- Bake or purchase cupcakes one day before the shower so they have time to cool completely. Fresh cupcakes are much easier to frost neatly when they’re fully cooled.
- Frost the cupcakes using five shades of pink, beginning with white and gradually deepening the color. Arrange them on your counter first to make sure the color transition looks smooth.
- Place the lightest cupcakes on one end of the dessert board and slowly work toward the darkest shade on the opposite end.
- Leave small gaps between cupcake rows for decorative fillers. This prevents the display from looking crowded.
- Fill those spaces with mini macarons and fresh strawberries. I like placing berries in small clusters because they add a natural touch among all the frosting.
- Sprinkle white chocolate pearls around the cupcakes sparingly. A little sparkle goes a long way.
- Add a few tiny floral accents near the edges of the board instead of placing flowers directly on top of the desserts.
- Step back several feet and check that the ombre effect is clearly visible. If one color appears too concentrated, simply swap a few cupcakes until the gradient looks balanced.
- Keep extra cupcakes in the kitchen so you can quietly replace empty spots throughout the party.
7. Strawberry Shortcake Dessert Grazing Board
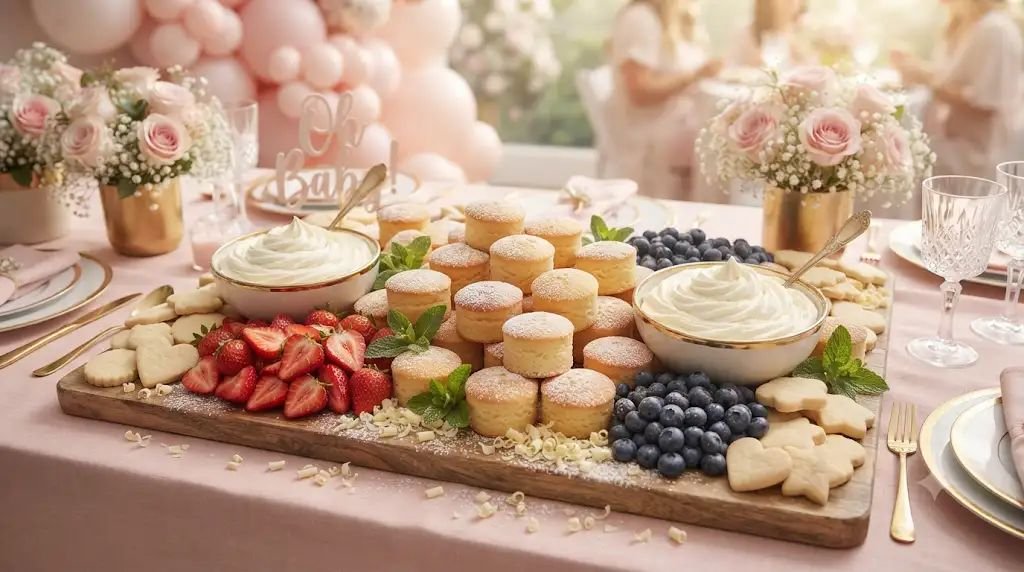
The Concept:
I’ve made this board for spring and summer baby showers, and it’s always one of the first dessert stations to empty. Fresh strawberries mixed with whipped cream and buttery cake create something that feels homemade and comforting.
Estimated Budget: Medium ($70–$135)
Materials Needed:
- Large serving board
- Mini sponge cakes
- Fresh strawberries
- Blueberries
- Homemade whipped cream
- Powdered sugar
- Mint leaves
- Vanilla cookies
- White chocolate curls
- Small serving bowls
- Dessert spoons
How to Set It Up (Step-by-Step):
- Wash all strawberries carefully and dry them completely before slicing. Extra moisture can soften the cakes too quickly.
- Slice larger strawberries while leaving a handful whole for decoration.
- Place bowls of whipped cream around the board first since they take up the most room.
- Arrange mini sponge cakes around the bowls, spacing them evenly so guests can reach every section.
- Fill open spaces with sliced strawberries and fresh blueberries.
- Scatter vanilla cookies throughout the display to provide another dessert option.
- Add white chocolate curls over the cakes just before serving so they stay crisp.
- Garnish with fresh mint leaves for a pop of green that makes all the pink and white desserts stand out beautifully.
- Dust the entire board lightly with powdered sugar only moments before guests begin serving themselves.
- Refresh the whipped cream every hour if the event is outdoors during warm weather.
8. Pink Chocolate Fountain Dessert Station
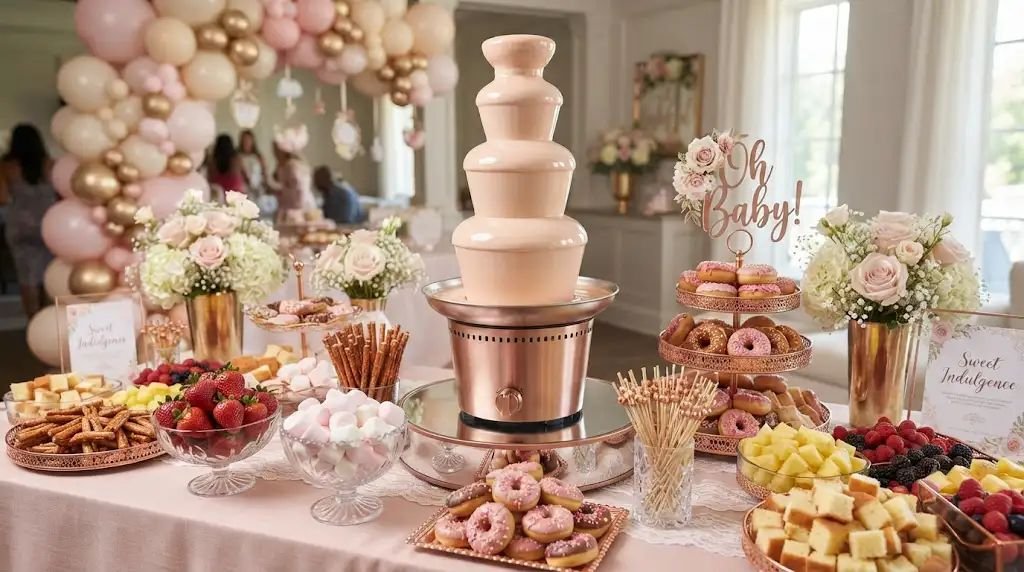
The Concept:
A chocolate fountain instantly brings energy to the party because everyone enjoys choosing their own treats to dip. I like using pink-colored white chocolate for baby girl showers because it ties the whole dessert table together.
Estimated Budget: High ($140–$260)
Materials Needed:
- Chocolate fountain
- White melting chocolate
- Pink candy coloring
- Strawberries
- Marshmallows
- Rice cereal treats
- Pretzel sticks
- Mini donuts
- Pineapple chunks
- Pound cake cubes
- Wooden skewers
- Serving plates
- Paper napkins
How to Set It Up (Step-by-Step):
- Test the chocolate fountain at home before the event if you’ve never used it. It helps you understand how much chocolate you’ll need and how quickly it flows.
- Melt the white chocolate slowly according to the manufacturer’s instructions.
- Add oil or cocoa butter if needed to create a smooth consistency that flows easily through the fountain.
- Mix in pink candy coloring gradually until you achieve a soft blush shade.
- Position the fountain at the center of the dessert table where guests can comfortably access it from multiple sides.
- Arrange dipping foods in separate sections around the fountain, placing taller items toward the back and shorter treats near the front.
- Insert wooden skewers into containers so guests don’t need to search for them.
- Place plenty of napkins nearby because chocolate fountains are always a little messy—in the best possible way.
- Monitor the chocolate level during the party and refill it before it becomes too low to circulate properly.
- Replace fruit trays halfway through the event so everything stays fresh and appealing.
9. Teddy Bear Picnic Dessert Board
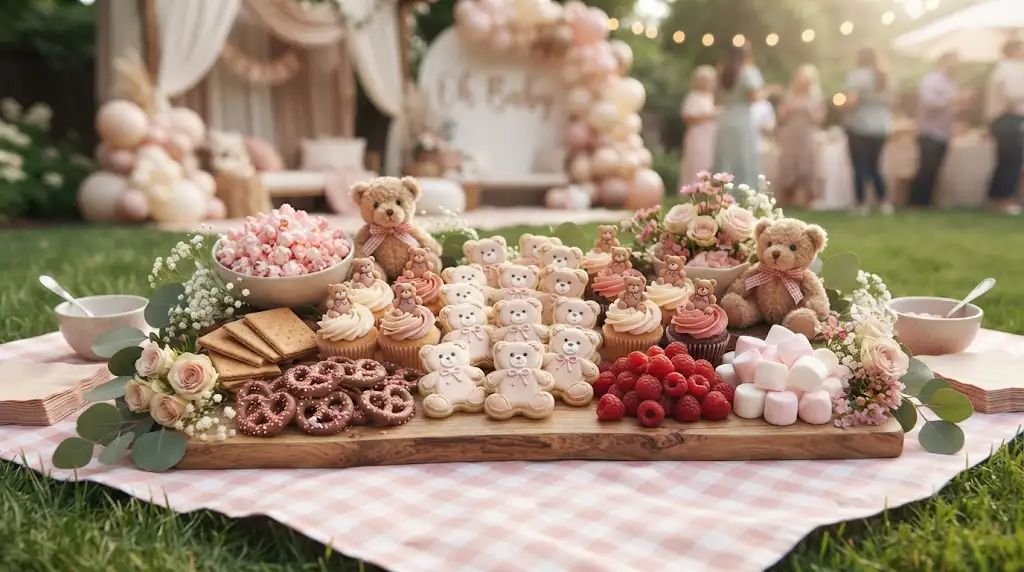
The Concept:
A teddy bear theme feels sweet without being over-the-top. I especially love this idea for backyard baby showers because it combines picnic charm with adorable desserts that fit the baby girl celebration perfectly.
Estimated Budget: Medium ($65–$130)
Materials Needed:
- Wooden grazing board
- Teddy bear cookies
- Honey graham crackers
- Mini cupcakes
- Pink popcorn
- Chocolate-covered pretzels
- Fresh raspberries
- Mini marshmallows
- Small teddy bear decorations
- Gingham napkins
- Artificial greenery
How to Set It Up (Step-by-Step):
- Cover the dessert table with a gingham tablecloth or runner to create a picnic-inspired setting.
- Place teddy bear cookies in several areas instead of keeping them together in one section.
- Arrange cupcakes in groups around the board to create natural stopping points for the eye.
- Fill bowls with pink popcorn and position them near the corners of the display.
- Scatter chocolate-covered pretzels between desserts for extra texture.
- Add raspberries and mini marshmallows into open spaces to soften the overall appearance.
- Place tiny teddy bear decorations toward the back of the board where they won’t interfere with serving.
- Frame the edges with artificial greenery to make the display feel like an outdoor picnic.
- Keep serving tongs available for cookies and cupcakes to help maintain a clean presentation throughout the party.
10. Pink Dessert Charcuterie Table with Mini Cakes
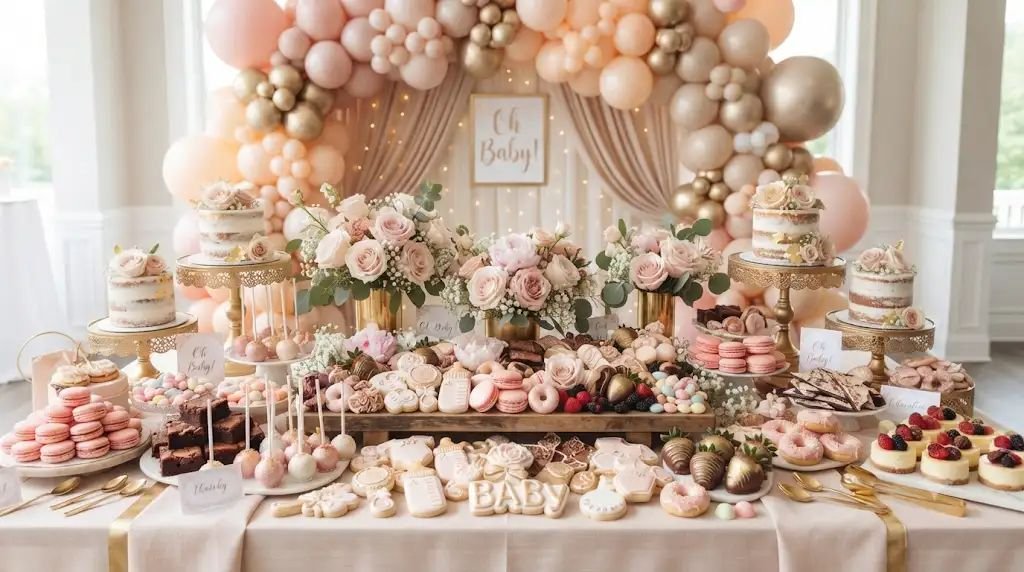
The Concept:
Whenever I’m hosting a larger shower, I skip a single dessert board and create an entire dessert charcuterie table instead. Guests love wandering around and sampling different sweets at their own pace, and the variety makes the table feel abundant without repeating the same desserts.
Estimated Budget: High ($180–$350)
Materials Needed:
- Several wooden serving boards
- Mini cakes
- Cake pops
- Macarons
- Decorated sugar cookies
- Chocolate-covered strawberries
- Donuts
- Brownie bites
- Mini cheesecakes
- Pink candies
- Fresh flowers
- Cake stands
- Dessert labels
- Serving tongs
- Decorative table runner
How to Set It Up (Step-by-Step):
- Measure your dessert table before the event so you know exactly how many serving boards and stands will fit comfortably.
- Lay down a long table runner to visually connect every dessert section.
- Position cake stands first to create different heights across the table. This helps guests notice every dessert instead of only those at the front.
- Place mini cakes toward the center because they’ll naturally become focal points.
- Arrange macarons, brownies, cookies, and cake pops on surrounding boards, alternating colors and textures to avoid repeating similar desserts beside each other.
- Fill remaining spaces with chocolate-covered strawberries, donuts, candies, and mini cheesecakes.
- Add fresh flowers between serving boards instead of directly on them. This creates a garden-inspired look while keeping food areas practical.
- Label desserts whenever possible, especially if some contain nuts, fruit fillings, or other common allergens.
- Place serving tongs at multiple points around the table so guests don’t need to reach across other desserts.
- Leave enough open space for plates near both ends of the table. This simple detail prevents guests from crowding into one area.
- About every 20 to 30 minutes, walk around the dessert table with a clean cloth. Wipe away frosting smudges, remove empty wrappers, straighten dessert labels, and refill trays before they look picked over. I’ve found that keeping the table looking fresh throughout the celebration makes it feel just as inviting at the end of the party as it did when guests first arrived.
11. Cotton Candy Clouds Dessert Board
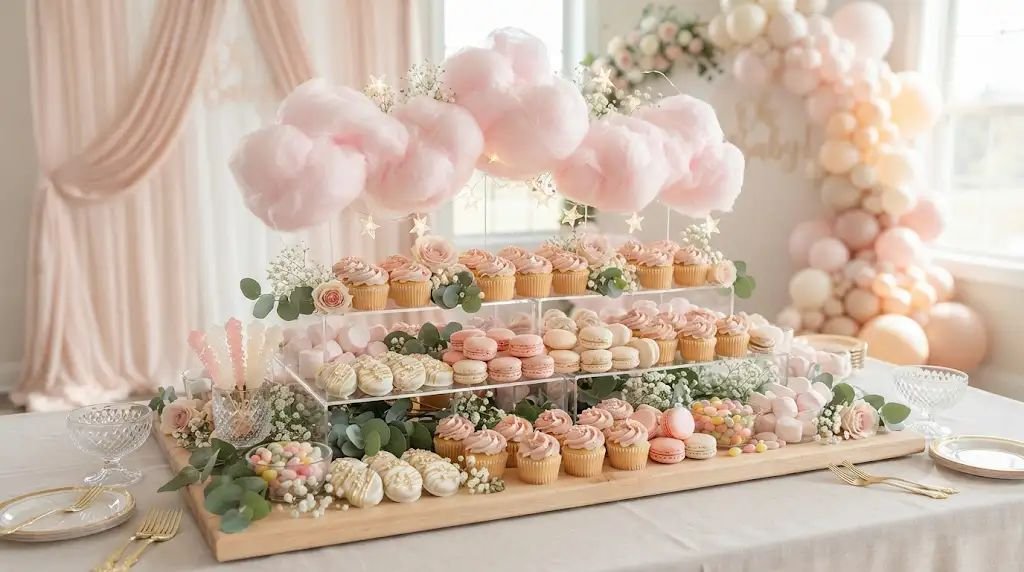
The Concept:
If you want guests to stop and say, “Wow!” the moment they walk into the room, this is the board I would recommend. Fluffy cotton candy looks like little pink clouds floating above the desserts, giving the entire setup a dreamy, storybook feel that’s perfect for celebrating a baby girl.
Estimated Budget: Medium ($70–$140)
Materials Needed:
- Large wooden dessert board
- Individually wrapped pink cotton candy
- Mini cupcakes
- Pink macarons
- White chocolate-covered Oreos
- Strawberry marshmallows
- Rock candy sticks
- Pink jelly beans
- Mini meringues
- Acrylic risers or small cake stands
- Clear treat bags (optional)
- Food-safe parchment paper
How to Set It Up (Step-by-Step):
- Set the dessert board on a sturdy table away from direct sunlight or fans. Cotton candy shrinks quickly if exposed to heat or humidity.
- Cover sections of the board with food-safe parchment if you’re placing sticky desserts directly on the wood. It keeps cleanup much easier without affecting the appearance.
- Position acrylic risers or small cake stands near the center to create different heights throughout the display.
- Arrange cupcakes and macarons around the risers, leaving several open spaces for decorative elements.
- Add white chocolate-covered Oreos in small overlapping groups. Their bright white color helps break up all the pink.
- Fill smaller gaps with strawberry marshmallows, jelly beans, and mini meringues.
- Open the cotton candy only 15–20 minutes before guests arrive. This is one trick I’ve learned after watching cotton candy slowly disappear during humid afternoons.
- Gently fluff each piece before placing it on top of the acrylic risers so it looks like floating clouds.
- Add rock candy sticks standing upright in small jars to create extra height and sparkle.
- If guests will be taking treats home, place clear treat bags nearby so they can safely package cotton candy before it begins to melt.
- Keep unopened cotton candy sealed until you need it. You can easily replace any pieces that start to shrink during the party.
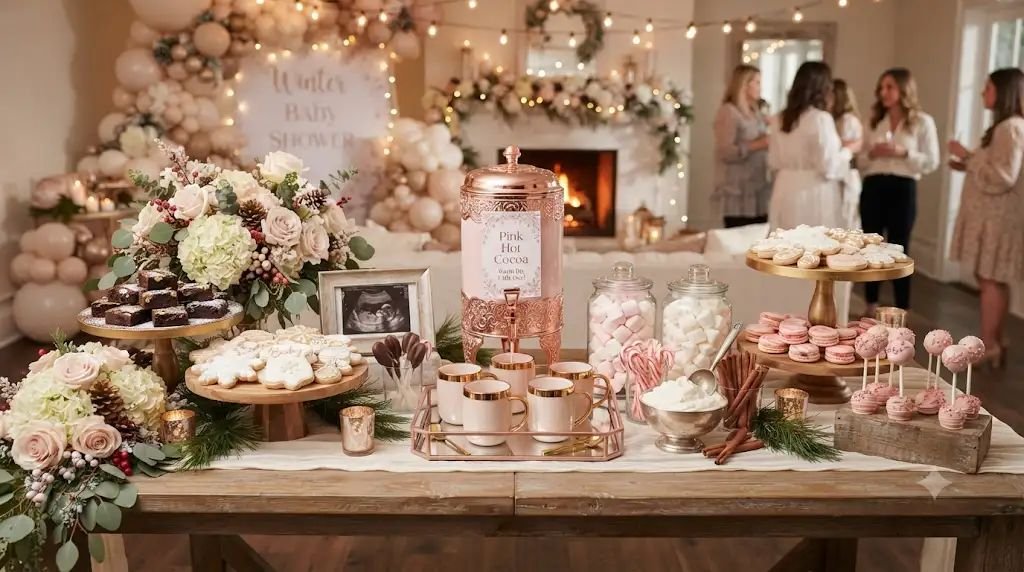
12. Pink Hot Cocoa & Dessert Board (Perfect for Winter Showers)
The Concept:
I’ve hosted a winter baby shower with this setup, and guests talked about it for weeks afterward. A cozy hot cocoa station paired with pretty pink desserts makes everyone want to slow down, chat, and enjoy the celebration together.
Estimated Budget: Medium ($90–$170)
Materials Needed:
- Large wooden serving board
- Hot cocoa dispenser or slow cooker
- White hot chocolate mix
- Pink marshmallows
- Whipped cream
- Candy canes
- Chocolate spoons
- Pink cookies
- Mini brownies
- Cake pops
- Cinnamon sticks
- Decorative mugs
- Small bowls
- Dessert napkins
How to Set It Up (Step-by-Step):
- Prepare the hot chocolate shortly before guests arrive so it stays warm throughout the event.
- Pour it into an insulated beverage dispenser or slow cooker set to the “warm” setting.
- Arrange decorative mugs beside the drink station so guests naturally move from drinks to desserts.
- Fill small bowls with marshmallows, crushed candy canes, chocolate spoons, and whipped cream toppings.
- Build the dessert board beside the cocoa station using cookies, brownies, cake pops, and sweet treats that pair well with chocolate.
- Add cinnamon sticks inside small jars. Some guests enjoy stirring them into their drinks for extra flavor.
- Place small signs beside each topping so guests know exactly what they’re choosing.
- Refill whipped cream and marshmallows throughout the shower to keep everything looking fresh.
- Keep paper towels nearby for quick cleanup around the beverage station.
- Just before serving, sprinkle a little cocoa powder over brownies and lightly dust cookies with powdered sugar for a warm winter finish.
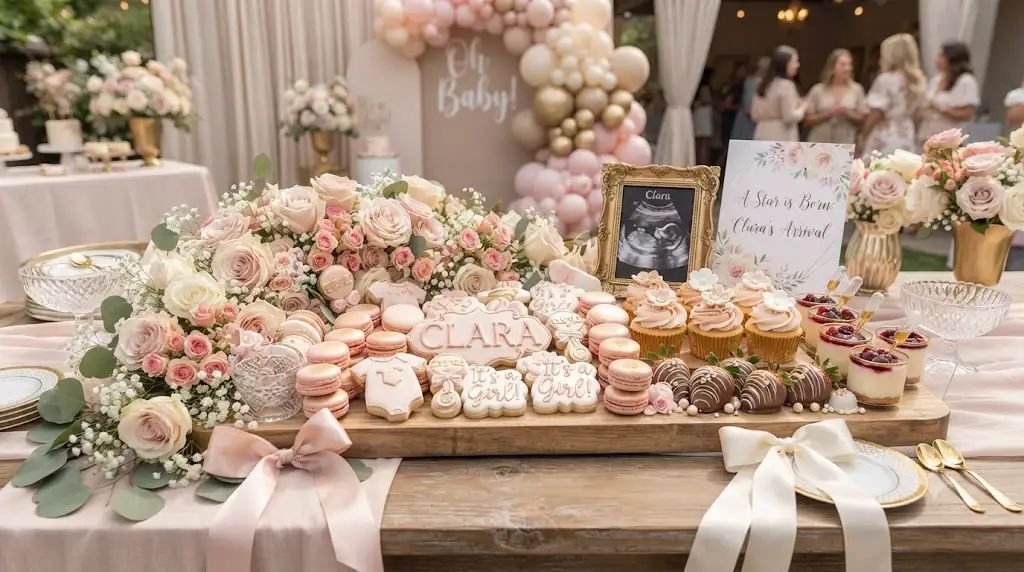
13. Personalized “Sweet Baby Girl” Dessert Board
The Concept:
This is always my favorite board because it’s completely personal. Instead of simply filling a tray with desserts, you include little details that celebrate the mom-to-be and her growing family. Guests spend just as much time admiring the thoughtful touches as they do enjoying the sweets.
Estimated Budget: Medium to High ($120–$220)
Materials Needed:
- Extra-large grazing board
- Personalized sugar cookies with the baby’s name or initials
- Pink macarons
- Mini cupcakes
- Chocolate-covered strawberries
- Mini cheesecakes
- Fresh flowers
- Baby-themed cookie cutters
- Printed ultrasound photo (display only)
- Framed baby quote
- Personalized cake topper
- Small decorative signs
- Ribbon
- Dessert tongs
How to Set It Up (Step-by-Step):
- Decide on the overall layout before placing any desserts. I usually sketch a quick plan on paper so I know where the personalized pieces will go.
- Place the framed baby quote and ultrasound photo toward the back of the table where guests can admire them without them coming into contact with food.
- Position personalized cookies near the center of the board since they’ll naturally become one of the first things people notice.
- Arrange cupcakes, cheesecakes, macarons, and strawberries around the personalized cookies, working outward in gentle curves instead of straight rows.
- Create color balance by mixing darker pink desserts with lighter ones rather than grouping similar shades together.
- Add fresh flowers around the outer edge of the board, making sure they never touch desserts that guests will be eating.
- Tie soft pink ribbon around serving utensils or decorative jars to carry the theme across the table.
- Place small signs identifying special desserts, especially if you’ve included homemade family recipes or favorite sweets requested by the mom-to-be.
- Walk around the table from every angle and look for empty spaces. Fill only the areas that truly need it with berries, candies, or mini cookies instead of overcrowding the display.
- Wipe serving boards, stands, and dessert plates one final time to remove fingerprints before guests enter.
- During the shower, quietly replace desserts as needed rather than bringing out everything at once. The board stays beautiful longer, and guests arriving later still get to enjoy a full, welcoming display.
- Before everyone heads home, invite guests to take a final photo of the dessert table. After spending so much time creating it, those pictures often become some of the sweetest memories from the entire celebration.
Conclusion
Planning a baby shower for a little girl doesn’t have to mean spending hundreds of dollars or hiring a professional event stylist. In my experience, the dessert table is where people naturally gather, laugh, snap photos, and share stories while celebrating the mom-to-be. A thoughtfully arranged board filled with beautiful treats can make even a simple gathering feel incredibly special.
Whether you choose a romantic floral display, a playful candy board, a cozy hot cocoa station, or a personalized dessert spread filled with meaningful details, the most memorable part will always be the love behind it. Start with one idea that fits your budget, add your own personal touches, and don’t be afraid to mix a few themes together. By the end of the day, your guests won’t just remember the desserts—they’ll remember how warm and welcoming the entire celebration felt.