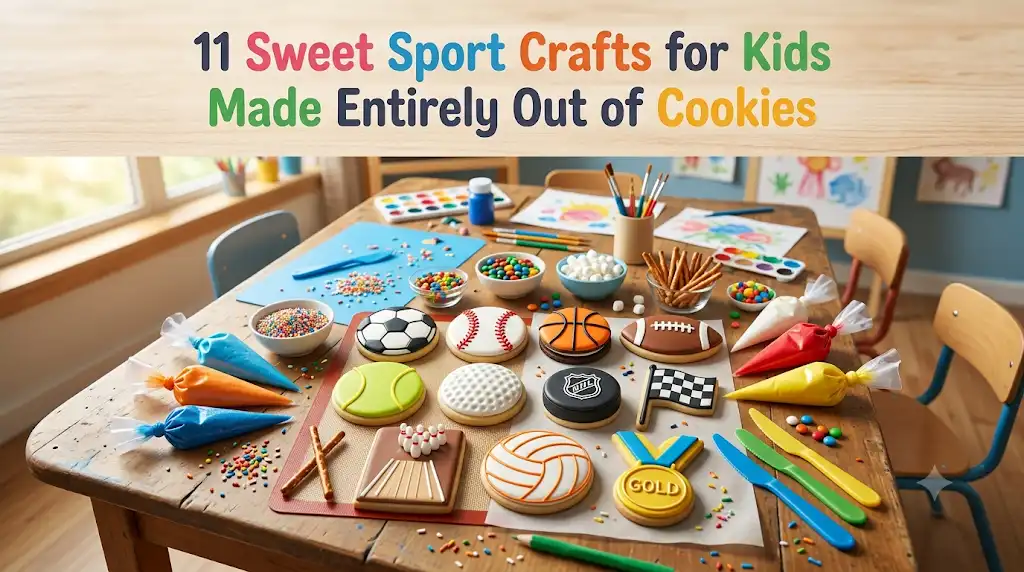
Parents and teachers know that some afternoons feel especially long. When little ones are full of energy but need a calm, screen-free activity, edible crafts can turn an ordinary snack into a memorable learning experience. I’ve found that combining simple cookies with colorful decorating supplies keeps preschoolers happily focused far longer than expected, even if a few sprinkles end up on the floor.
These cookie sports crafts have been favorites during classroom celebration days, rainy afternoons, and family activity time at home. They’re wonderfully hands-on, encourage creativity, and give children plenty of chances to practice fine motor skills while chatting, laughing, and proudly showing off their delicious creations. Expect a little mess—that’s usually the sign everyone is having a great time.
Safety First
Even though these crafts use edible ingredients, adult supervision is always recommended. Preschoolers should only use child-safe plastic knives or small spreading spatulas when applying frosting. Keep a close eye on younger children whenever working with small candies, mini marshmallows, sprinkles, or other bite-sized decorations, as these can present a choking hazard. Be sure everyone washes their hands before decorating, and always check for food allergies before gathering ingredients.
1. Chocolate Cookie Soccer Ball
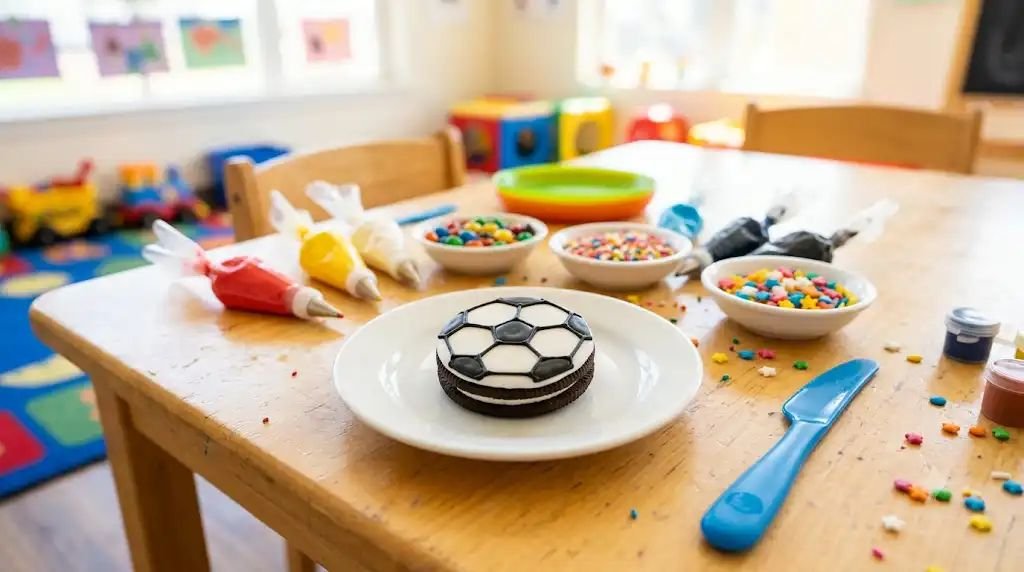
A soccer ball is one of the easiest sports-themed cookie crafts for preschoolers, making it a perfect first project. Kids love watching a plain cookie slowly transform into something that looks just like the ball they kick around outside.
Skill Developed: Fine motor skills, pattern recognition, hand-eye coordination, concentration, and color matching.
Materials Needed:
- Round chocolate sandwich cookies
- White decorating icing
- Black decorating icing or black edible food marker
- Small plate
- Paper towel
- Plastic butter knife or small icing spatula
Step-by-Step Instructions
- Place one cookie on a clean plate. Give each child enough workspace so elbows don’t bump into one another. In my preschool group, spreading children around the table always reduced accidental smudges.
- Cover the cookie with white icing. Use the plastic knife to gently spread a smooth layer across the top. Encourage children to move slowly from the center toward the edges. It doesn’t need to look perfect because real soccer balls have seams that help hide little bumps.
- Allow the icing to rest for about two minutes. Slightly firm icing makes drawing easier and prevents black icing from blending into the white.
- Create the center pentagon. Using black decorating icing, carefully pipe or draw a small five-sided shape in the middle of the cookie. Younger children can simply make a small circle if drawing a pentagon feels difficult.
- Add surrounding panels. Draw several connected shapes around the center to imitate the familiar soccer ball pattern. Let children know that every soccer ball design ends up a little different, and that’s perfectly okay.
- Fix any mistakes with a toothpick handled by an adult. Small adjustments can clean up lines without disturbing the rest of the decoration.
- Let the cookie sit for several minutes. This allows the icing to set before little hands proudly carry it around to show family members.
- Enjoy together. Children are always excited to compare their soccer balls and notice how unique each one looks.
Pro-Tip / Teacher’s Note: If decorating with a large preschool class, prepare the white icing layer before the activity begins. Little ones stay much more engaged when they can jump straight into drawing the soccer ball design.
2. Baseball Cookie with Red Stitching
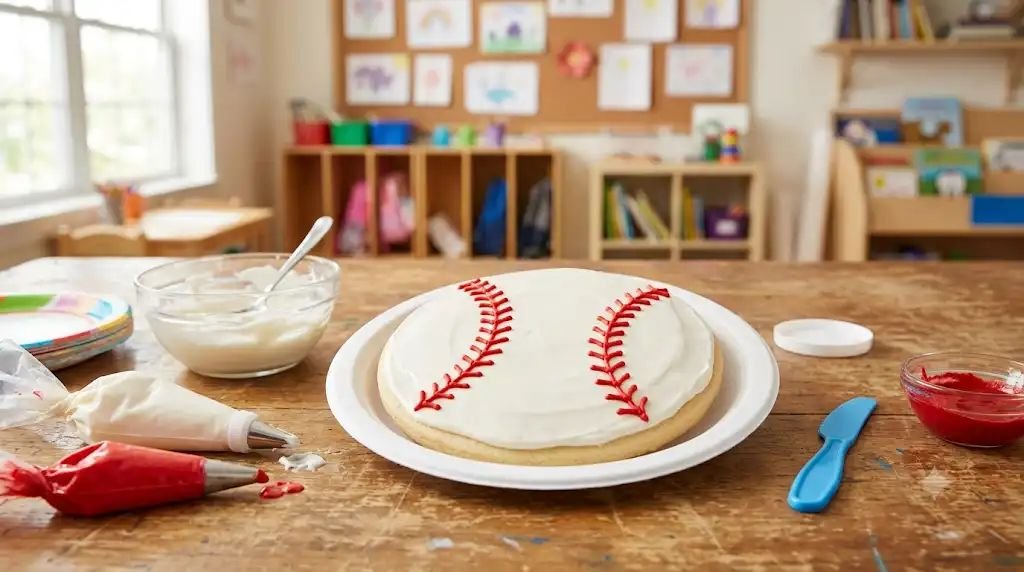
This simple baseball cookie always sparks conversations about favorite teams and family trips to the ballpark. Even children who have never watched a baseball game quickly recognize the classic red stitching.
Skill Developed: Hand control, visual tracking, creative confidence, and bilateral coordination.
Materials Needed:
- Large round sugar cookies
- White frosting
- Red decorating icing
- Plastic spreading knife
- Small paper plates
- Wet wipes for cleanup
Step-by-Step Instructions
- Spread white frosting evenly across the cookie. Encourage children to cover every edge while keeping the frosting relatively smooth.
- Talk about baseballs while decorating. Ask simple questions like, “What color is a baseball?” or “Have you ever played catch?” These conversations naturally build vocabulary while everyone works.
- Draw the first curved stitching line. Starting near the top edge, gently pipe one curved line toward the bottom.
- Draw a second curved line. Leave enough space between the two lines so the cookie resembles a real baseball.
- Add small diagonal stitches. Pipe tiny red lines across each curve. Children enjoy counting the stitches as they decorate.
- Check for empty spaces. If any frosting still shows through, carefully add a few more stitches while avoiding overcrowding the design.
- Allow the icing to set for five to ten minutes. This keeps the decoration from smearing when the cookie is picked up.
- Celebrate every finished cookie. One thing I’ve noticed over the years is that children rarely compare perfection—they simply beam with pride over something they created themselves.
Pro-Tip / Teacher’s Note: Keep a damp paper towel nearby so children can quickly wipe sticky fingers before touching the next decorating bag.
3. Basketball Oreo Cookie
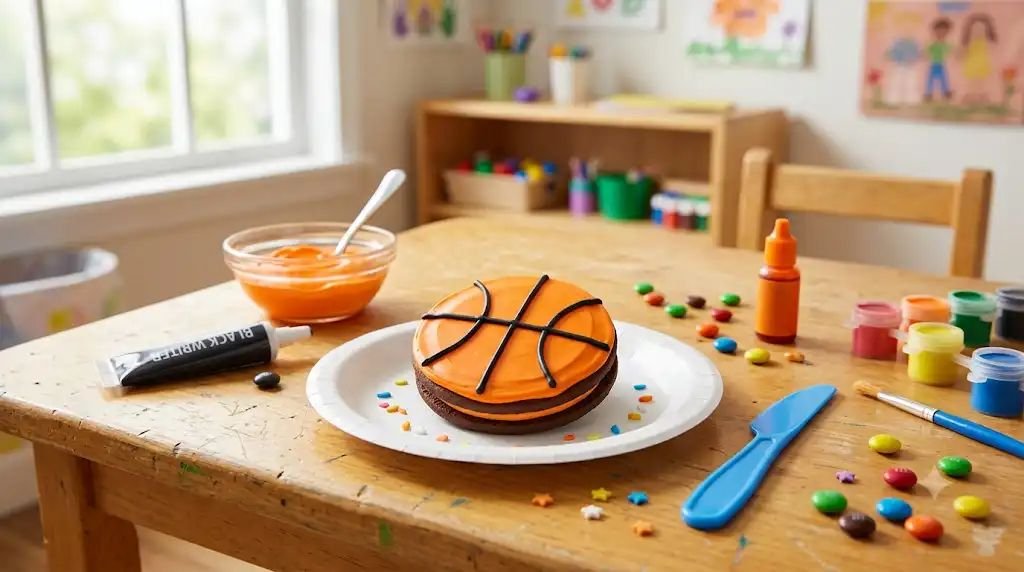
Bright orange frosting instantly turns an ordinary chocolate sandwich cookie into a tiny basketball. Preschoolers especially enjoy adding the black court lines because they feel like real artists.
Skill Developed: Fine motor precision, color recognition, patience, and spatial awareness.
Materials Needed:
- Chocolate sandwich cookies
- Orange frosting
- Black decorating gel
- Plastic knife
- Small decorating plate
- Napkins
Step-by-Step Instructions
- Spread orange frosting across the cookie. Work slowly from the center outward until the chocolate top is completely covered.
- Smooth the frosting gently. Explain that basketballs have rounded surfaces, so a smooth finish makes the design look more realistic.
- Wait a minute or two. Slightly settled frosting keeps the black decorating lines neat.
- Draw one vertical line down the middle. Children may need a gentle reminder to move slowly rather than squeezing too hard.
- Add one horizontal curved line. Curve it gently from one side to the other.
- Repeat with another curved line. This creates the familiar basketball pattern.
- Encourage careful observation. Hold up a real basketball or picture so children can compare the lines with their cookies.
- Set aside until the frosting firms slightly. During this waiting time, kids usually enjoy pretending they’re tiny basketball coaches showing off their edible game balls.
Pro-Tip / Teacher’s Note: If orange frosting isn’t available, mix a few drops of red and yellow food coloring into white frosting before the activity begins.
4. Football Cookie with Candy Laces
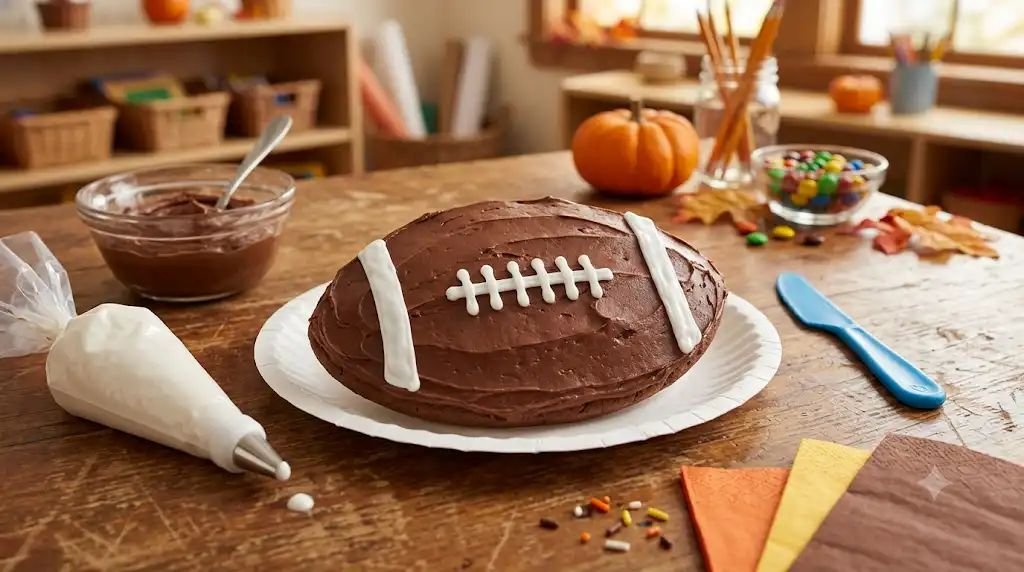
This football cookie is always a favorite during autumn classroom parties and family game-day celebrations. The oval shape gives preschoolers a fun decorating challenge without becoming frustrating.
Skill Developed: Hand-eye coordination, shape recognition, finger strength, and creative problem-solving.
Materials Needed:
- Oval-shaped cookies or oval shortbread cookies
- Chocolate frosting
- White decorating icing
- Plastic knife
- Small paper plate
- Napkins
Step-by-Step Instructions
- Cover the cookie with chocolate frosting. Spread it evenly until the entire surface resembles the rich brown color of a football.
- Smooth the edges. Children often enjoy taking extra care here because the football shape becomes much easier to recognize.
- Let the frosting rest for two to three minutes. This creates a better surface for adding the white laces.
- Pipe one short white line across the middle. Keep it horizontal.
- Add several tiny vertical lines crossing the center line. These become the football laces.
- Pipe a thin white stripe near each end of the cookie. Explain that many footballs have white stripes, making the cookie look even more authentic.
- Invite children to inspect their football. Ask questions like, “Does it look ready for the big game?” These simple conversations keep children engaged while encouraging descriptive language.
- Allow the icing to harden slightly before serving. Some little decorators get excited and immediately want to pick up their cookie, so a short waiting period helps preserve all their hard work.
- Enjoy the finished treat together. Watching children proudly hold up their football cookies is one of those small classroom moments that never gets old.
Pro-Tip / Teacher’s Note: Have extra chocolate frosting available. Preschoolers almost always ask for “just a little more,” and a thicker layer makes spreading much easier for tiny hands.
5. Tennis Ball Sugar Cookie
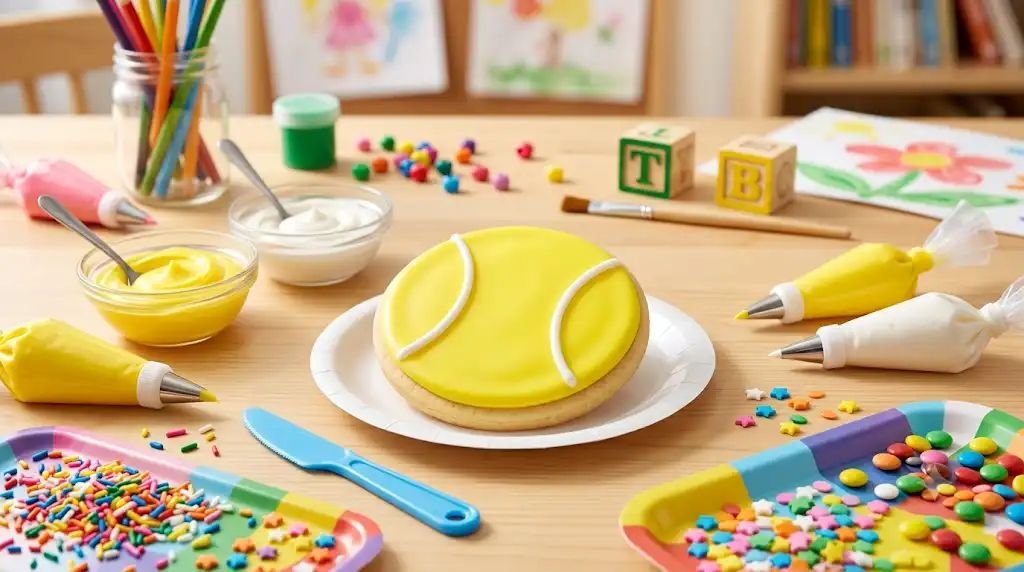
This cheerful tennis ball cookie is bright, simple, and perfect for little hands. The curved white lines are easy enough for preschoolers to make on their own, which gives them a wonderful confidence boost.
Skill Developed: Fine motor control, color recognition, visual perception, hand-eye coordination, and concentration.
Materials Needed:
- Round sugar cookies
- Yellow frosting
- White decorating icing
- Plastic butter knife
- Paper plate
- Small damp cloth for sticky fingers
Step-by-Step Instructions
- Place the cookie on a flat plate. Give each child enough personal space so decorating bags don’t bump into each other. I’ve learned that even a few extra inches between children helps everyone stay calmer.
- Spread the yellow frosting. Using the plastic knife, gently cover the cookie from the center outward. Encourage children to rotate the plate instead of twisting their wrists. This usually creates a smoother finish.
- Check that no cookie is showing. Tiny uncovered spots are perfectly fine, but most children enjoy making the cookie completely yellow like a real tennis ball.
- Allow the frosting to rest for two or three minutes. Slightly firm frosting helps keep the white lines crisp instead of sinking into the surface.
- Draw the first curved line. Pipe a gentle curve from the top edge to the bottom edge of the cookie.
- Add the second matching curve. Leave a narrow gap between the two lines. Show children that the curves should look like they are gently hugging each other rather than crossing.
- Make small adjustments. If a line wiggles, use the tip of a clean toothpick while an adult assists to smooth it carefully.
- Compare cookies together. Every tennis ball ends up looking slightly different, and children love pointing out their favorite details.
- Let the icing dry before eating. This helps preserve all the hard work that went into decorating.
Pro-Tip / Teacher’s Note: If yellow frosting stains little fingers, keep a damp washcloth nearby instead of baby wipes. It removes food coloring much more easily during classroom craft time.
6. Golf Ball Cookie with Mini Marshmallow “Tee”
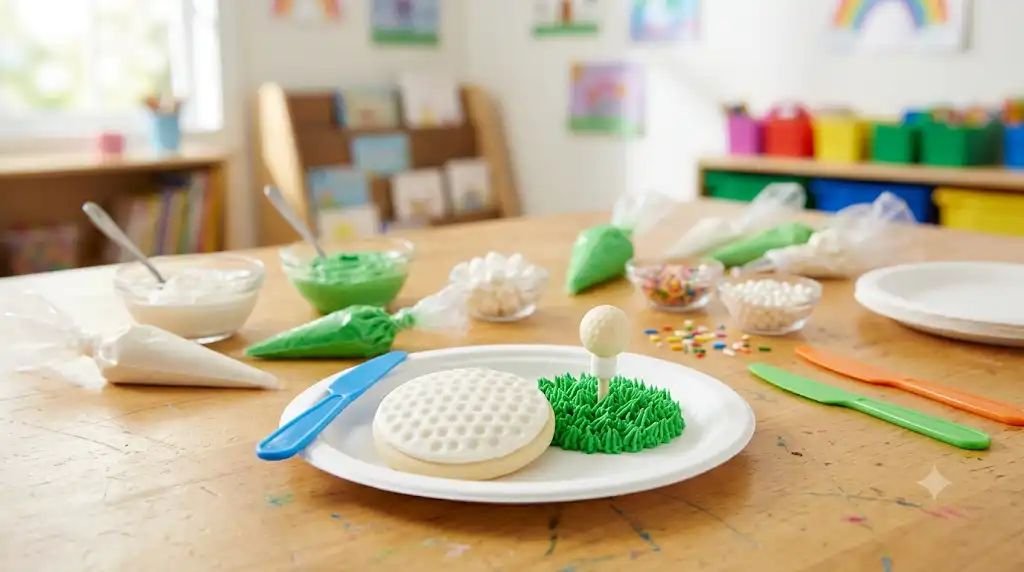
This cookie combines decorating with imaginative play. Once finished, many preschoolers pretend they’re tiny golfers before happily eating their creation.
Skill Developed: Creative thinking, sequencing, fine motor development, imaginative play, and observation skills.
Materials Needed:
- Round vanilla cookies
- White frosting
- Mini marshmallows
- Green frosting
- Plastic knife
- Paper plate
- Small spoon
Step-by-Step Instructions
- Spread white frosting evenly across the cookie. Cover every edge so the cookie resembles a clean white golf ball.
- Create gentle dimples. Use the rounded end of a clean spoon to lightly press tiny marks into the frosting. Explain that real golf balls have lots of little dimples that help them travel through the air.
- Add a small patch of green frosting. Place a little green frosting near one edge of the cookie to represent grass.
- Place one mini marshmallow on the green frosting. This becomes the golf tee.
- Add another tiny dot of white frosting on top of the marshmallow. This acts like edible glue.
- Carefully place a small candy or frosting dot on top if desired. Older preschoolers enjoy balancing this tiny “golf ball,” but it’s completely optional for younger children.
- Talk about golf while decorating. Ask children if they’ve ever seen someone hit a golf ball or watched golf on television. These conversations naturally build background knowledge.
- Allow everything to settle for several minutes. The marshmallow will stay in place much better once the frosting begins to firm.
- Celebrate everyone’s creativity. Some children will invent entire golf courses with extra frosting, and that’s part of the fun.
Pro-Tip / Teacher’s Note: Skip the extra candy golf ball for younger preschoolers if you’re concerned about choking hazards. The marshmallow tee alone still looks adorable.
7. Hockey Puck Cookie with Pretzel Stick
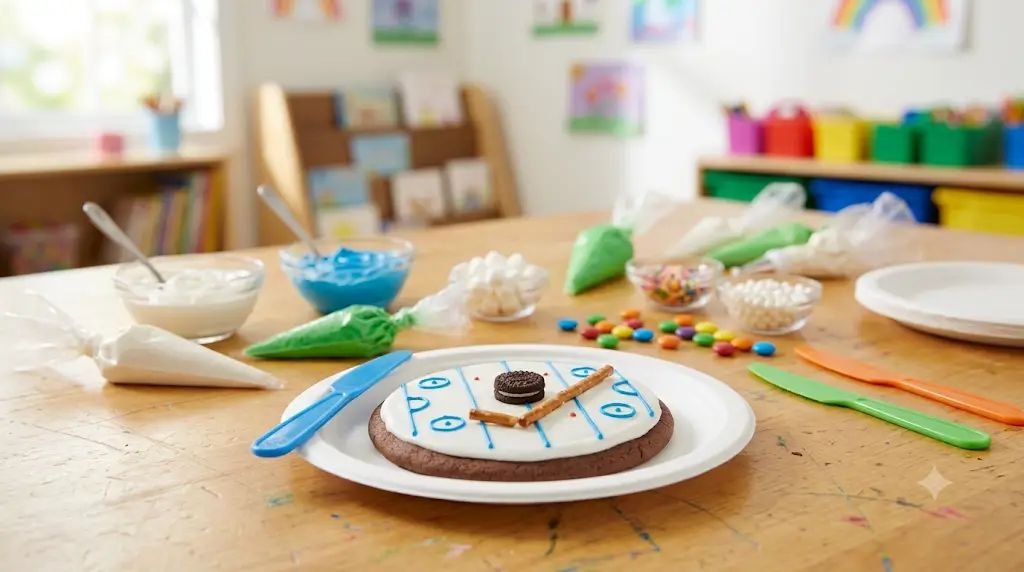
This sporty snack is especially popular during winter-themed classroom activities. Children enjoy turning a simple chocolate cookie into a tiny hockey scene using just a few inexpensive ingredients.
Skill Developed: Fine motor skills, creative storytelling, problem-solving, and hand-eye coordination.
Materials Needed:
- Large chocolate cookies
- White frosting
- Pretzel sticks
- Mini chocolate sandwich cookie
- Blue decorating gel (optional)
- Plastic knife
- Paper plate
Step-by-Step Instructions
- Spread a thin layer of white frosting across the plate or directly onto a larger cookie. Explain that this represents the ice rink.
- Place the large chocolate cookie on top. This forms the main playing surface.
- Position the mini chocolate sandwich cookie near one side. Tell children this tiny cookie is the hockey puck.
- Lay one pretzel stick beside the puck. Angle it slightly so it looks like a hockey stick ready to hit the puck.
- Add a tiny amount of frosting beneath the pretzel if needed. This helps hold everything in place.
- Decorate the “ice.” Older children can pipe blue lines around the edge using decorating gel to imitate markings on a hockey rink.
- Encourage imaginative storytelling. Ask questions like, “Who is about to score the winning goal?” The answers are often hilarious and wonderfully creative.
- Check that everything is secure before moving the plate. Pretzel sticks can roll easily if carried too quickly.
- Enjoy the finished scene together. Preschoolers usually spend almost as much time pretending with this cookie as they do eating it.
Pro-Tip / Teacher’s Note: Keep extra pretzel sticks nearby. They occasionally snap during decorating, especially when enthusiastic little hands press a bit too firmly.
8. Racing Flag Checkerboard Cookie
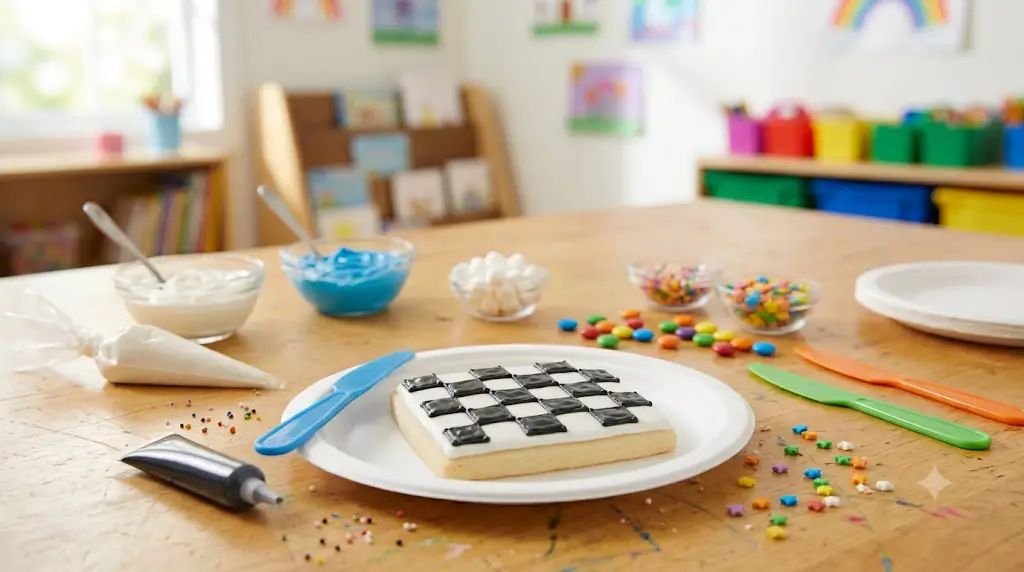
This racing-inspired cookie always creates excitement because children love making the black-and-white checkerboard pattern. It looks impressive but is surprisingly easy to decorate.
Skill Developed: Pattern recognition, color sequencing, visual discrimination, fine motor control, and patience.
Materials Needed:
- Square sugar cookies
- White frosting
- Black decorating icing
- Plastic spreading knife
- Ruler or craft stick (optional for guiding lines)
- Paper plate
Step-by-Step Instructions
- Spread white frosting smoothly across the square cookie. Cover every corner while keeping the surface as even as possible.
- Allow the frosting to settle for a few minutes. This helps prevent the black icing from spreading into the white background.
- Draw several evenly spaced vertical lines. Older preschoolers may enjoy counting each line as they go.
- Add horizontal lines across the cookie. These create the checkerboard grid.
- Color every other square black. Encourage children to move slowly and skip one square each time. This step is wonderful for practicing simple patterns.
- Step back and inspect the design. If a square isn’t perfectly filled, simply add a little more icing. Preschool crafts are never about perfection.
- Talk about race cars while decorating. Many children love pretending their cookies are waving at the finish line as race cars zoom past.
- Allow the icing to dry completely. The checkerboard design stays much cleaner once it has set.
- Display everyone’s cookies before snack time. One of my favorite classroom traditions is lining them up so every child can admire the entire collection before anyone takes a bite.
Pro-Tip / Teacher’s Note: Younger preschoolers may find tiny squares difficult. Make a larger checkerboard with fewer squares so they can decorate successfully without becoming frustrated.
9. Bowling Lane Cookie
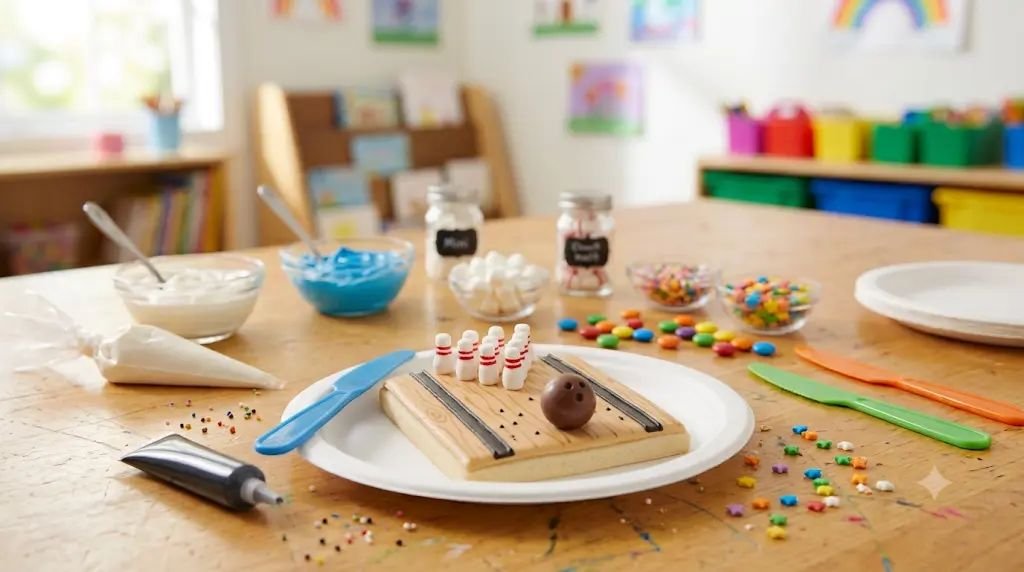
This bowling-themed cookie always gets preschoolers giggling because they can create both the bowling lane and tiny “pins” using simple treats. It’s a wonderful conversation starter for children who have visited a bowling alley with their families.
Skill Developed: Fine motor skills, counting, spatial awareness, hand-eye coordination, and imaginative play.
Materials Needed:
- Large rectangular sugar cookies
- Light brown or tan frosting
- White mini marshmallows
- Red decorating icing
- Plastic butter knife
- Paper plate
- Small spoon
Step-by-Step Instructions
- Place the rectangular cookie on a paper plate. Explain that the cookie will become the bowling lane.
- Spread the tan frosting evenly. Using the plastic knife, gently cover the entire cookie from one end to the other. Encourage children to make long, smooth strokes to imitate polished wooden bowling lanes.
- Create lane boards. Lightly drag the edge of the knife through the frosting to make several thin, straight lines. They don’t have to be perfectly even.
- Prepare the bowling pins. Place six or ten mini marshmallows near one end of the cookie in a triangle formation. Younger children can use six pins to make placement easier.
- Add red stripes. Pipe a tiny red band around the top of each marshmallow to resemble real bowling pins.
- Make the bowling ball. Place a small chocolate candy or chocolate frosting circle at the opposite end of the lane.
- Tell a bowling story together. Ask children how many pins they think their ball will knock down. This naturally encourages counting and prediction skills.
- Leave the cookie undisturbed for several minutes. The marshmallows will stay in place better once the frosting firms slightly.
- Enjoy the edible bowling lane. Some children carefully eat one pin at a time, while others pretend to bowl before taking the first bite.
Pro-Tip / Teacher’s Note: If mini marshmallows are unavailable, small white frosting dots work just as well for the bowling pins.
10. Volleyball Cookie with Pretzel Net
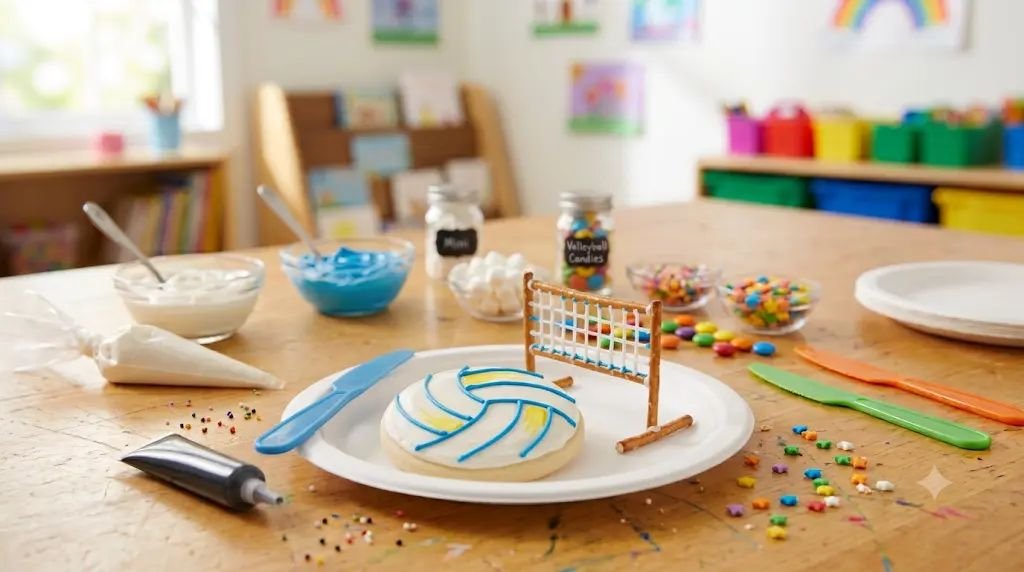
This cheerful volleyball cookie gives children a chance to decorate both the ball and a tiny volleyball net. It often becomes a favorite during summer camp themes or Olympic-inspired classroom weeks.
Skill Developed: Fine motor development, pattern recognition, creative thinking, and bilateral coordination.
Materials Needed:
- Round sugar cookies
- White frosting
- Yellow frosting
- Blue decorating icing
- Pretzel sticks
- Plastic knife
- Paper plate
Step-by-Step Instructions
- Cover the cookie with white frosting. Spread it smoothly across the surface until no cookie is showing.
- Add volleyball sections. Pipe several gently curved blue lines that meet in the center, creating the familiar volleyball panel design.
- Add small yellow sections. Fill a few panels with yellow frosting if you’d like a colorful beach volleyball instead of a traditional white one.
- Create the volleyball net. Break two pretzel sticks into equal lengths and place them beside the cookie.
- Pipe thin white frosting lines between the pretzel sticks. Draw horizontal and vertical lines to resemble the strings of a volleyball net.
- Invite children to compare their cookies with photos of real volleyballs. They enjoy spotting the curved panel lines they recreated.
- Allow the icing to dry. This keeps the pretzel net from shifting while moving the plate.
- Celebrate each creation. I love hearing preschoolers proudly announce that their cookie is ready for “the biggest volleyball game ever.”
- Serve and enjoy. The combination of crunchy pretzels and sweet cookies is always a hit.
Pro-Tip / Teacher’s Note: Don’t worry if the volleyball lines aren’t perfectly symmetrical. Young children gain far more confidence when creativity is celebrated over perfection.
11. Olympic Medal Cookie
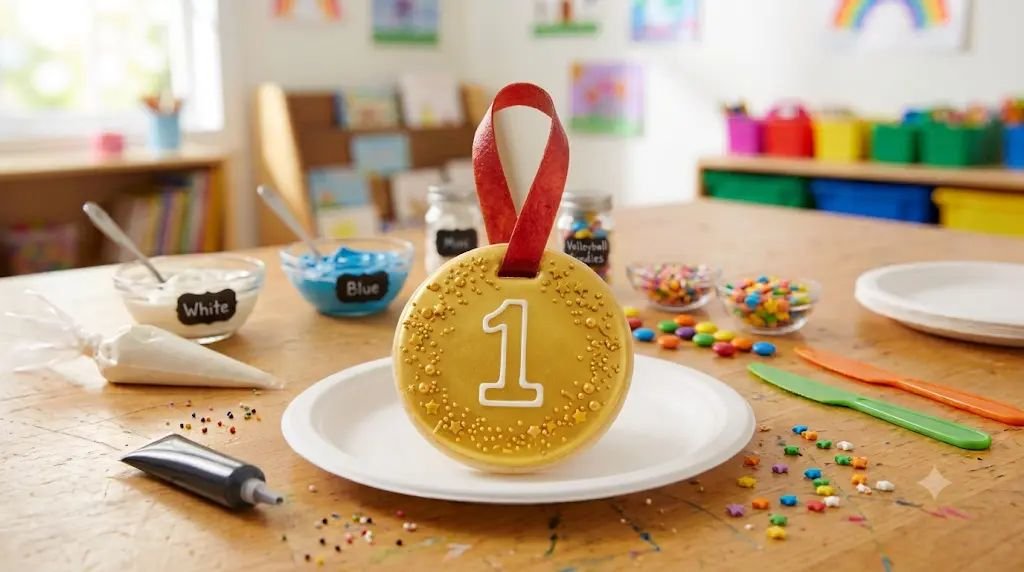
This final craft always feels extra special because every child finishes with their own edible gold medal. I’ve used this activity after field days, obstacle courses, and classroom sports weeks, and it never fails to make children feel proud of their efforts.
Skill Developed: Self-confidence, fine motor skills, creativity, color recognition, and positive social-emotional development.
Materials Needed:
- Large round sugar cookies
- Yellow or gold-colored frosting
- Red fruit leather or red licorice lace
- White decorating icing
- Plastic spreading knife
- Paper plate
- Edible gold sprinkles (optional)
Step-by-Step Instructions
- Spread yellow frosting over the cookie. Cover every edge so it resembles a shiny gold medal.
- Smooth the frosting carefully. Encourage children to rotate the plate while spreading instead of turning the cookie with sticky fingers.
- Add decorative details. Pipe a simple star, the number “1,” or a smiling face using white decorating icing.
- Sprinkle edible gold decorations if using them. A light sprinkle adds sparkle without overwhelming the design.
- Prepare the medal ribbon. Cut a short strip of fruit leather or licorice lace.
- Place the ribbon at the top of the cookie. Attach it with a tiny dot of frosting so it looks like the medal can be worn around someone’s neck.
- Celebrate each child’s accomplishment. I always tell preschoolers that everyone earns a medal for trying their best, helping friends, and having fun together.
- Take a moment to admire everyone’s work. Children absolutely love holding up their edible medals for a quick class photo before snack time.
- Enjoy the sweet reward together. The smiles at this stage are usually just as memorable as the crafts themselves.
Pro-Tip / Teacher’s Note: Let children write their initials or first letter with icing. It makes each medal feel extra personal and encourages early letter recognition.
FAQs
1. What is the best icing for preschool cookie crafts?
Ready-to-use decorating icing or canned frosting works wonderfully because it’s soft, easy to spread, and available in many colors. For younger children, slightly softened canned frosting is usually the easiest to control with a plastic knife.
2. How can I minimize the mess during cookie decorating?
Cover the table with disposable paper or a washable tablecloth before starting. Give each child their own plate, decorating supplies, and damp washcloth. Expect a few sprinkles on the floor—that’s completely normal when crafting with preschoolers!
3. Can these cookie crafts be made ahead of time?
Yes. You can bake or purchase the cookies a day or two in advance and organize all the decorating supplies before children arrive. Preparing everything ahead of time makes the activity run much more smoothly and gives kids more time to decorate.
Conclusion
Some of my favorite preschool memories have happened around a craft table covered in frosting, sprinkles, and happy little smiles. These cookie sports crafts aren’t about making picture-perfect treats—they’re about creating moments where children can imagine, learn, laugh, and build confidence with their own hands.
Whether you’re planning a classroom celebration, a rainy-day activity, a birthday party, or a family sports night, these edible creations bring together creativity, conversation, and delicious fun. Don’t stress over a little frosting on the table or colorful fingers. Those beautifully messy moments are often the ones children remember the longest.