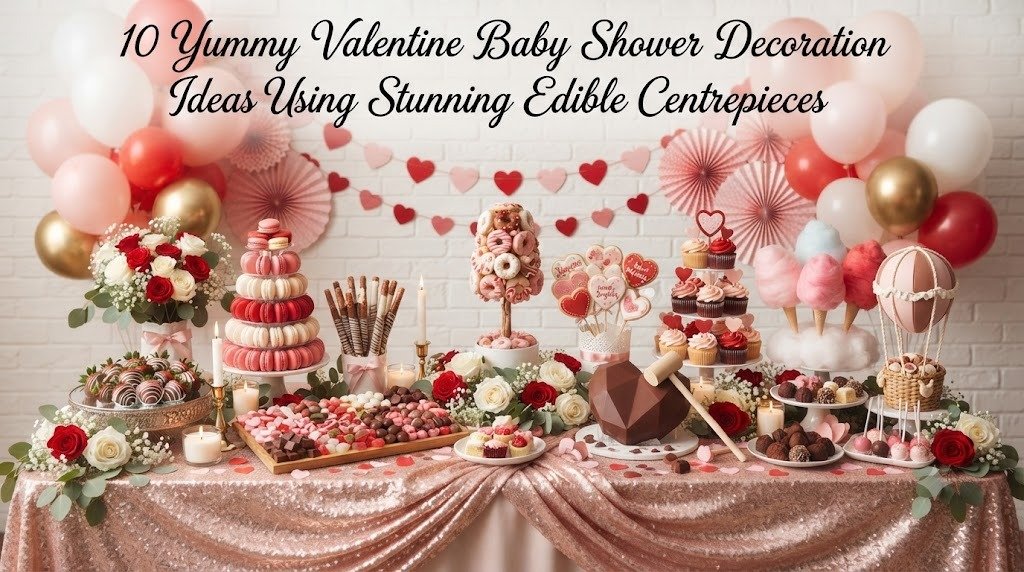
Valentine baby showers have such a warm, joyful feel. Soft pinks, rich reds, heart-shaped decorations, and sweet treats naturally create a celebration that feels both romantic and family-friendly. One thing I’ve learned after helping plan a few of these parties is that guests always gather around the food table first, so making the centrepieces edible gives everyone something beautiful to admire and something delicious to enjoy later.
I also love edible centrepieces because they reduce waste. Instead of packing away flowers that fade after a day or throwing away decorations, every display becomes part of dessert. It saves money, keeps the table looking full throughout the party, and gives guests another reason to smile. These ideas are simple enough for beginners but still look impressive in photos.
1. Strawberry Rose Bouquet Centrepiece
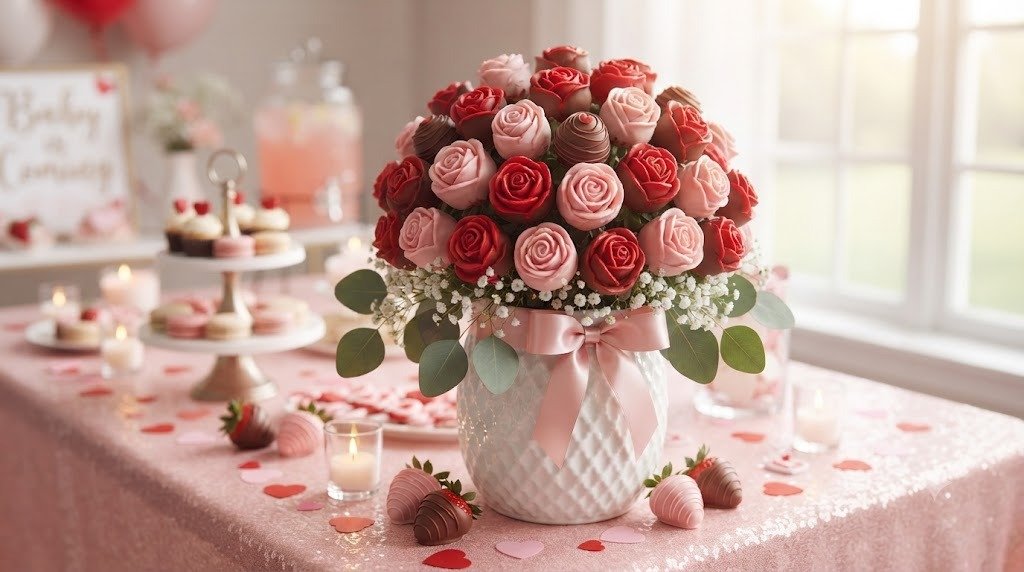
The Concept:
This is one of my favorite edible centrepieces because it looks surprisingly elegant without being difficult to make. Fresh strawberries dipped in chocolate are arranged to resemble blooming roses, then surrounded with real greenery and baby’s breath for a romantic Valentine’s display. Guests almost never realize they’re edible until someone reaches for one.
Estimated Budget: $30–$55 (Budget-Friendly)
Materials Needed:
- 2–3 pounds fresh large strawberries
- Pink candy melts
- White chocolate
- Red candy melts
- Wooden skewers
- Floral foam block
- Decorative flower pot, basket, or vase
- Tissue paper
- Fresh eucalyptus or greenery
- Baby’s breath flowers
- Ribbon
- Parchment paper
- Disposable piping bag
How to Set It Up (Step-by-Step):
- Wash every strawberry gently under cool water and dry them completely with paper towels. Leave them sitting for another 20–30 minutes. Even a little moisture can keep the chocolate from sticking smoothly.
- Melt the pink candy melts according to the package instructions. If they’re too thick, stir in a teaspoon of coconut oil until the chocolate coats smoothly.
- Hold each strawberry by its leafy top or place it on a skewer before dipping. Cover almost the entire berry, letting the excess drip away slowly.
- Lay the dipped strawberries on parchment paper until they’re almost set but still slightly soft.
- Melt the white chocolate and spoon it into a piping bag. Pipe thin curved lines around each strawberry to imitate delicate rose petals. If you’d like a deeper Valentine’s look, add tiny accents using melted red candy.
- Allow every strawberry to harden completely before arranging them. Refrigerate them for about 15 minutes if your kitchen is warm.
- Cover the floral foam with tissue paper or food-safe wrap so the strawberries never touch the foam directly.
- Push skewers into the foam at different heights. I usually start with the tallest berries in the center and work outward to create a rounded bouquet shape.
- Fill empty spaces with eucalyptus leaves and small clusters of baby’s breath. This makes the bouquet resemble a real floral arrangement while keeping the strawberries as the main attraction.
- Tie a satin ribbon around the container and place the bouquet in the center of your dessert table. It pairs beautifully with pink tablecloths, candles, and heart-shaped plates.
2. Heart Macaron Tower Centrepiece
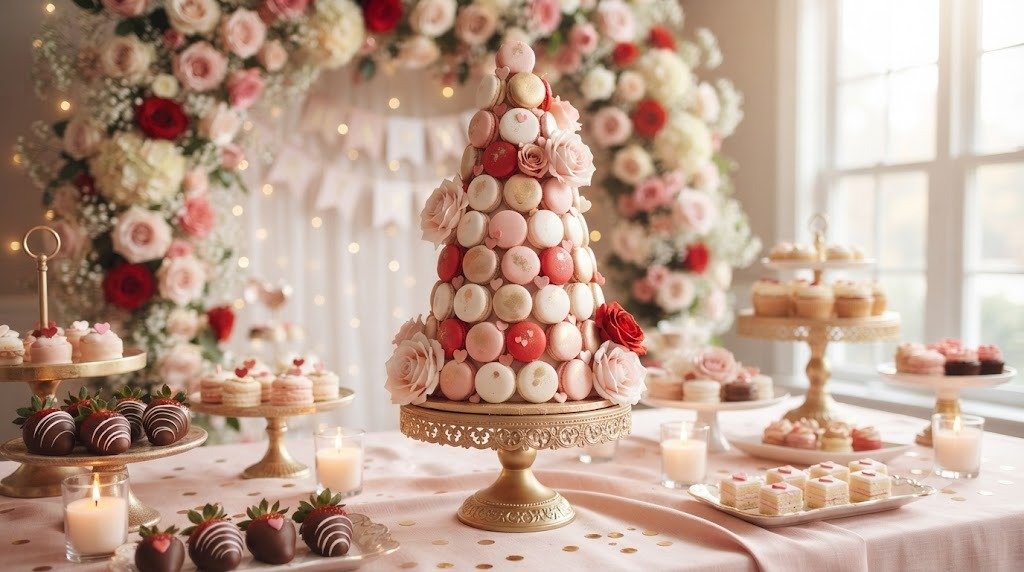
The Concept:
Whenever I want guests to say “wow” as soon as they walk in, I build a macaron tower. Soft pink, white, and red macarons stacked into a tall cone instantly become the centerpiece of the room. Adding tiny heart decorations makes it perfect for a Valentine’s baby shower.
Estimated Budget: $45–$85 (Medium Budget)
Materials Needed:
- 70–100 assorted macarons
- Styrofoam cone
- Food-safe plastic wrap
- Low-temperature glue dots (for wrapped cone only)
- Decorative ribbon
- Artificial silk roses
- Mini heart picks
- Cake stand
- Small LED fairy lights (optional)
How to Set It Up (Step-by-Step):
- Wrap the entire Styrofoam cone tightly with food-safe plastic wrap so none of the macarons touch the foam directly.
- Place the wrapped cone securely on a sturdy cake stand before adding any macarons. This prevents movement later.
- Begin attaching macarons from the bottom row upward. Leave very little space between them so the cone looks completely full.
- Alternate colors instead of grouping similar shades together. Mixing blush pink, white, raspberry red, and pale cream creates a softer Valentine’s palette.
- Continue building upward one ring at a time. Check every few rows to make sure the tower remains balanced.
- Place your prettiest macaron at the top as the finishing piece.
- Tuck small silk roses into a few open gaps near the bottom and middle. Don’t overdo it—just enough to soften the design.
- Add tiny heart picks around the base of the tower.
- Wrap a satin ribbon around the cake stand and scatter rose petals around it for extra elegance.
- If your venue lighting is dim, carefully weave battery-operated fairy lights around the base instead of the macarons themselves for a subtle evening glow.
3. Chocolate-Covered Pretzel Heart Vase
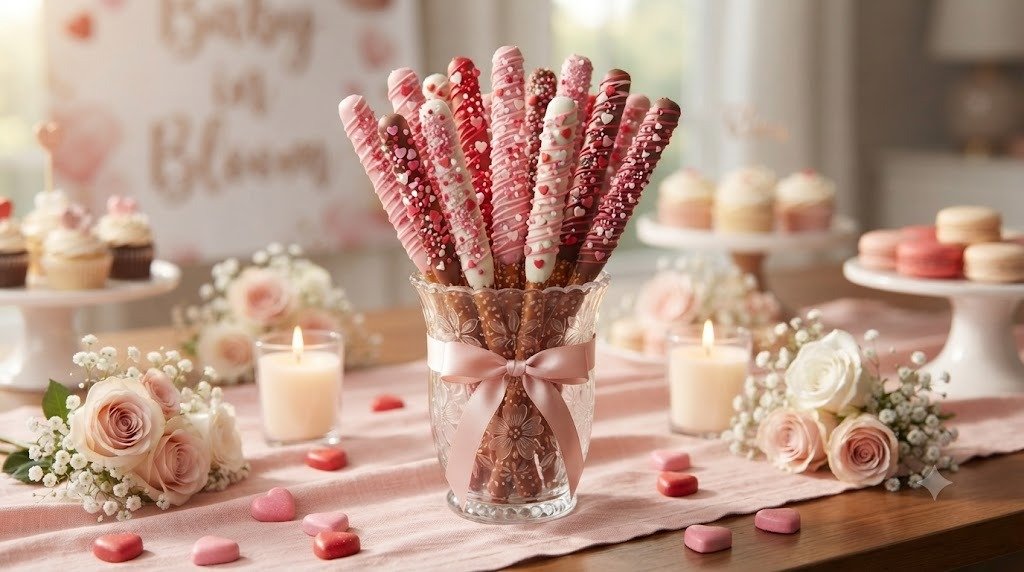
The Concept:
This is one of the easiest centrepieces I’ve ever made, yet guests always think it took hours. Chocolate-covered pretzel rods stand upright inside a decorative vase, creating a colorful bouquet that’s completely edible. It’s affordable, fun, and perfect if you’re decorating several tables.
Estimated Budget: $20–$40 (Budget-Friendly)
Materials Needed:
- Pretzel rods
- White candy melts
- Pink candy melts
- Red candy melts
- Valentine’s sprinkles
- Decorative glass vase
- Floral foam
- Food-safe wrap
- Ribbon
- Decorative shredded paper
- Wooden skewers (optional for stability)
How to Set It Up (Step-by-Step):
- Melt each candy color separately so you can create different designs without mixing colors together.
- Dip every pretzel rod about three-quarters of the way into melted chocolate. Let the excess drip off before placing it onto parchment paper.
- Before the chocolate hardens, decorate each pretzel differently. Some can have pink drizzle, others white drizzle, heart sprinkles, edible pearls, or tiny sugar roses. Variety makes the finished bouquet much prettier.
- Allow the pretzels to harden completely. Refrigerating them for 10 minutes speeds up the process.
- Wrap the floral foam securely with food-safe plastic before placing it inside the vase.
- Cover the wrapped foam with decorative shredded paper so none of it is visible.
- Insert the pretzel rods into the foam, placing taller ones toward the middle and shorter ones around the edges to create a rounded arrangement.
- If a pretzel feels loose, slide a wooden skewer beside it inside the foam for extra support.
- Finish the vase with a large satin ribbon tied into a bow. I usually choose blush pink or deep red depending on the rest of the decorations.
- Place the vase on a mirrored tray with scattered chocolate hearts around the base. It instantly turns a simple arrangement into a beautiful Valentine’s table centerpiece that guests can snack on throughout the party.
4. Cupid’s Candy Charcuterie Centrepiece
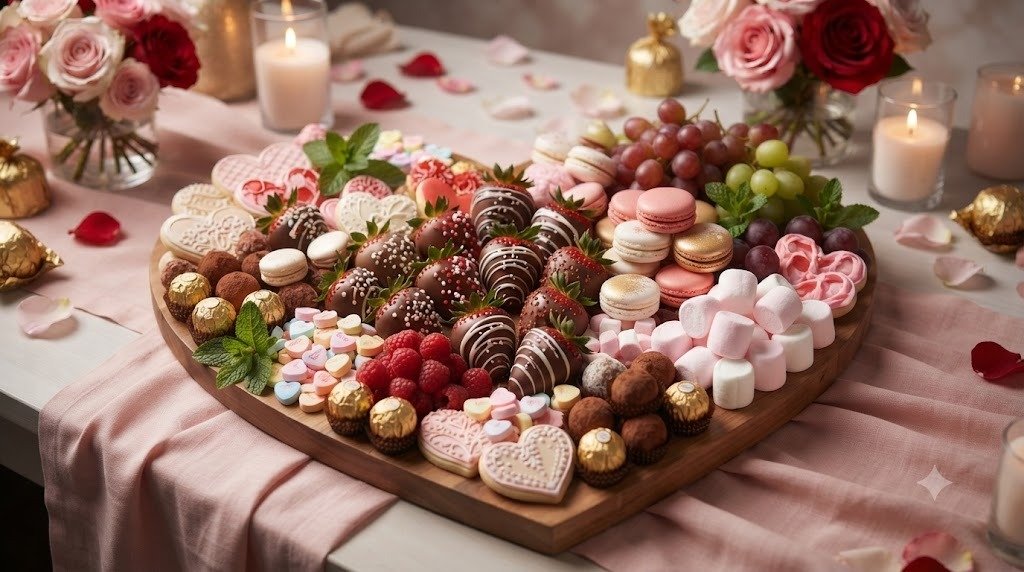
The Concept:
This centerpiece doubles as decoration and a grazing station, which is why I keep coming back to it. Instead of placing bowls of candy around the room, everything is arranged into one gorgeous heart-inspired display. Guests naturally gather around it, making it one of the most photographed spots at the shower.
Estimated Budget: $40–$70 (Medium Budget)
Materials Needed:
- Large round wooden serving board or heart-shaped tray
- White chocolate-covered strawberries
- Red grapes
- Fresh raspberries
- Strawberries
- Pink and white macarons
- Chocolate truffles
- Conversation heart candies
- Pink marshmallows
- Chocolate-covered almonds
- Mini cookies
- Heart-shaped chocolates
- Fresh mint leaves
- Small decorative bowls
- Cake stand (optional for height)
How to Set It Up (Step-by-Step):
- Choose a serving board that’s large enough to allow plenty of variety without feeling overcrowded. Wipe it clean and make sure it’s completely dry before arranging any food.
- If you’re using a cake stand in the middle, place it first. Adding height gives the arrangement more dimension and helps it stand out on the dessert table.
- Start by placing the largest items first. Arrange bowls of chocolates or macarons toward the center, then work outward with fresh fruit.
- Build small clusters instead of spreading everything evenly. I usually group strawberries together, then raspberries, followed by grapes. These little sections make the board look much fuller.
- Tuck conversation hearts and chocolate truffles into any empty spaces. Filling small gaps is what makes the display look professionally styled.
- Scatter fresh mint leaves between fruit clusters. They add a fresh pop of green that balances all the pink and red colors.
- Arrange chocolate-covered strawberries around the outer edge so guests can easily grab one without disturbing the entire display.
- Add mini cookies and marshmallows wherever you notice open areas. Rotate the board as you work so you can see it from every angle.
- Finish by placing a few heart-shaped chocolates on top of the tallest sections and lightly sprinkle edible glitter over the fruit if you’d like a subtle sparkle.
- Keep the completed centerpiece refrigerated until about 20 minutes before guests arrive so everything stays fresh while still tasting its best.
5. Heart-Shaped Donut Topiary
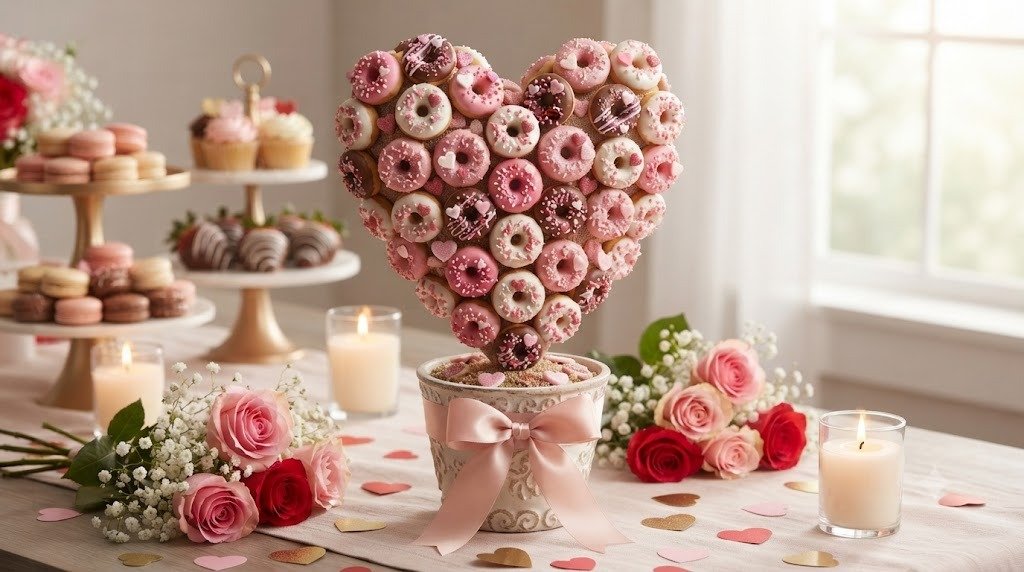
The Concept:
I made this for a brunch baby shower once, and it disappeared faster than any other decoration. Soft glazed donuts arranged into a heart-shaped tree create a playful centerpiece that’s perfect for Valentine’s Day. It looks impressive but is surprisingly simple to assemble.
Estimated Budget: $35–$60 (Budget-Friendly)
Materials Needed:
- 30–40 mini donuts
- Heart-shaped Styrofoam form
- Food-safe plastic wrap
- Decorative wooden dowel
- Flower pot
- Floral foam
- Pink tissue paper
- Satin ribbon
- Artificial roses
- White chocolate drizzle
- Valentine’s sprinkles
How to Set It Up (Step-by-Step):
- Wrap the heart-shaped Styrofoam form tightly with food-safe plastic wrap so the donuts never touch the foam directly.
- Secure the wooden dowel into the bottom of the heart and anchor it firmly inside floral foam placed in a decorative flower pot.
- Cover the foam with pink tissue paper, shredded paper, or decorative moss until the base looks neat and polished.
- If your donuts aren’t already decorated, drizzle them with melted white chocolate and sprinkle on pink, red, and gold Valentine’s sprinkles. Allow them to set completely.
- Starting around the outside edge of the heart, attach the donuts closely together using food-safe picks or by gently sliding them onto short skewers attached to the wrapped form.
- Continue filling the middle until the entire heart is covered. Alternate plain, pink, and chocolate donuts to create a balanced color pattern.
- Step back every few minutes to check for empty spots. Fill any visible gaps with small artificial roses or ribbon loops.
- Tie a large satin bow where the dowel meets the flower pot for a finished look.
- Place a few heart-shaped candies around the base along with scattered rose petals to make the display feel complete.
- Set the topiary near the entrance or beside the cake table where guests can admire it before everyone begins helping themselves to the donuts.
6. Valentine’s Cookie Bouquet Centrepiece
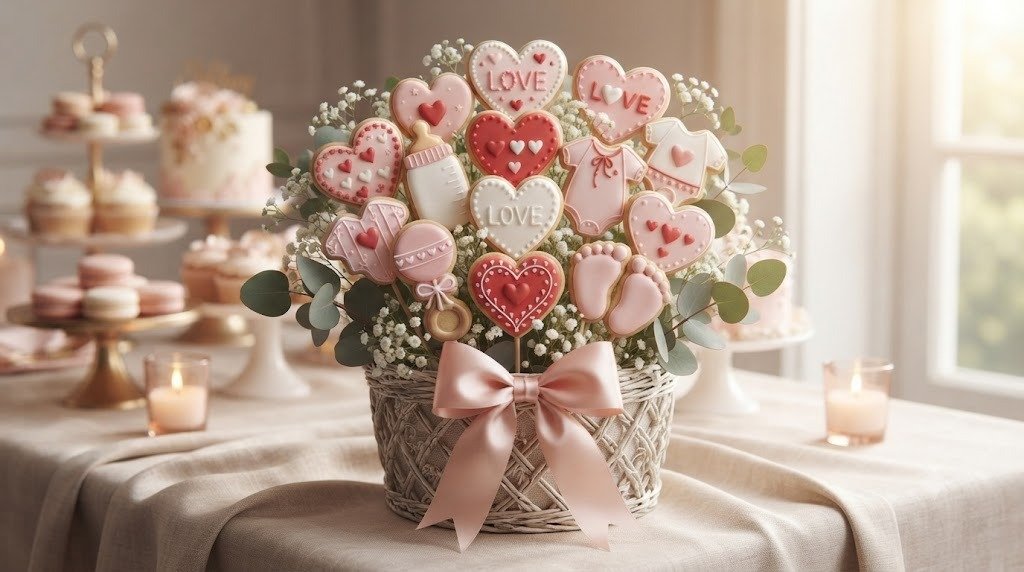
The Concept:
Decorated sugar cookies have a way of making every table feel cheerful. Instead of laying them flat on serving trays, I love arranging them into colorful bouquets that look almost like fresh flowers. Each guest can simply pull out a cookie to enjoy, making cleanup wonderfully easy.
Estimated Budget: $30–$55 (Budget-Friendly)
Materials Needed:
- Heart-shaped sugar cookies
- Baby-themed cookie cutters (onesies, rattles, bottles, baby feet)
- Royal icing
- Pink, red, and white food coloring
- Wooden cookie sticks
- Floral foam
- Decorative flower pot or basket
- Food-safe wrap
- Tissue paper
- Ribbon
- Cellophane treat bags (optional)
How to Set It Up (Step-by-Step):
- Bake the cookies at least one day before the shower so they’re completely cooled and sturdy enough for decorating.
- Insert cookie sticks before baking if your recipe allows, or carefully attach them afterward using melted candy coating for a secure hold.
- Decorate each cookie with royal icing using Valentine’s colors. Mix hearts, baby bottles, tiny footprints, onesies, rattles, and simple messages like “Sweet Baby,” “Love,” or “Baby Love.”
- Allow the icing to dry completely. Royal icing often needs several hours, so I usually leave the cookies overnight.
- Wrap the floral foam securely in food-safe plastic and place it inside your decorative container.
- Cover the foam with tissue paper, crinkle paper, or decorative fabric so no mechanics are visible.
- Begin inserting the cookie sticks into the foam. Place the tallest cookies toward the back and gradually work forward with shorter ones.
- Turn each cookie slightly in different directions instead of lining them up perfectly. This creates a bouquet that feels fuller and more natural.
- Fill any gaps with ribbon curls, silk flowers, baby’s breath, or greenery. Be careful not to hide the cookies—you want them to remain the main attraction.
- If guests will be taking cookies home, loosely wrap individual cookies in clear treat bags before arranging them. They still look beautiful while staying fresh and hygienic throughout the celebration.
- Place the completed bouquet in the center of each dining table or use one larger arrangement as the focal point of the dessert station. Pair it with matching Valentine’s table runners and soft candlelight for an extra cozy atmosphere.
7. Pink or Blue Chocolate Smash Heart Centrepiece
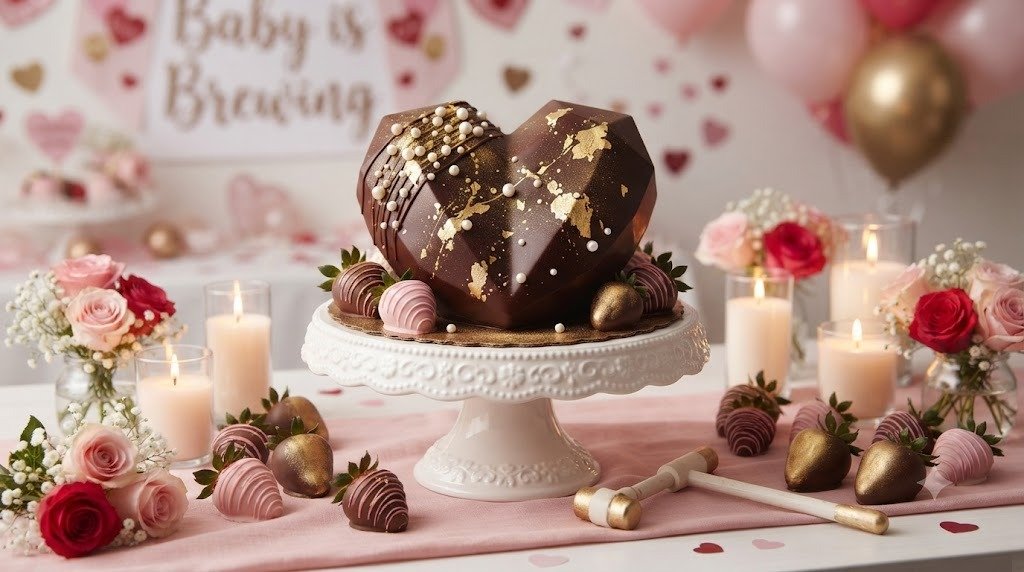
The Concept:
If you want one unforgettable moment during the party, this is it. A large chocolate heart sits proudly in the middle of the table, looking like a beautiful decoration. When it’s time for the reveal, the parents-to-be gently break it open to reveal pink or blue candies hidden inside. Every time I’ve seen this done, guests immediately pull out their phones to capture the surprise.
Estimated Budget: $35–$65 (Budget-Friendly)
Materials Needed:
- Large heart-shaped chocolate mold
- Milk, white, or dark melting chocolate
- Pink or blue chocolate candies (kept secret until reveal)
- Mini marshmallows
- Chocolate truffles
- Chocolate-covered strawberries
- Decorative cake stand
- Small wooden mallet
- Ribbon
- Fresh flowers or greenery
- Gold edible glitter (optional)
How to Set It Up (Step-by-Step):
- Melt the chocolate according to the package directions until completely smooth.
- Coat the inside of the heart mold with a generous layer of chocolate. Chill it until firm, then repeat with a second layer so the shell is strong enough to hold the candy.
- Carefully remove the chocolate heart from the mold once it’s completely hardened.
- Fill one half of the heart with pink or blue candies, mini marshmallows, or chocolate-coated treats. Keep the filling hidden from guests if you’re planning a surprise reveal.
- Warm the edge of the empty chocolate half slightly with a warm plate, then gently press both halves together to seal them.
- Pipe decorative chocolate swirls, drizzle, or edible pearls around the seam to hide it completely.
- Place the finished heart on a cake stand surrounded by chocolate-covered strawberries, truffles, and fresh flowers.
- Scatter rose petals around the base and tie a ribbon around the stand to coordinate with your party colors.
- Keep the centerpiece in a cool place until reveal time to prevent melting.
- During the celebration, invite the parents-to-be to gently tap the chocolate heart with the wooden mallet. As the shell breaks open and colorful candies spill out, everyone gets to enjoy the exciting reveal before sharing the treats together.
8. Surprise Cupcake Tower Centrepiece
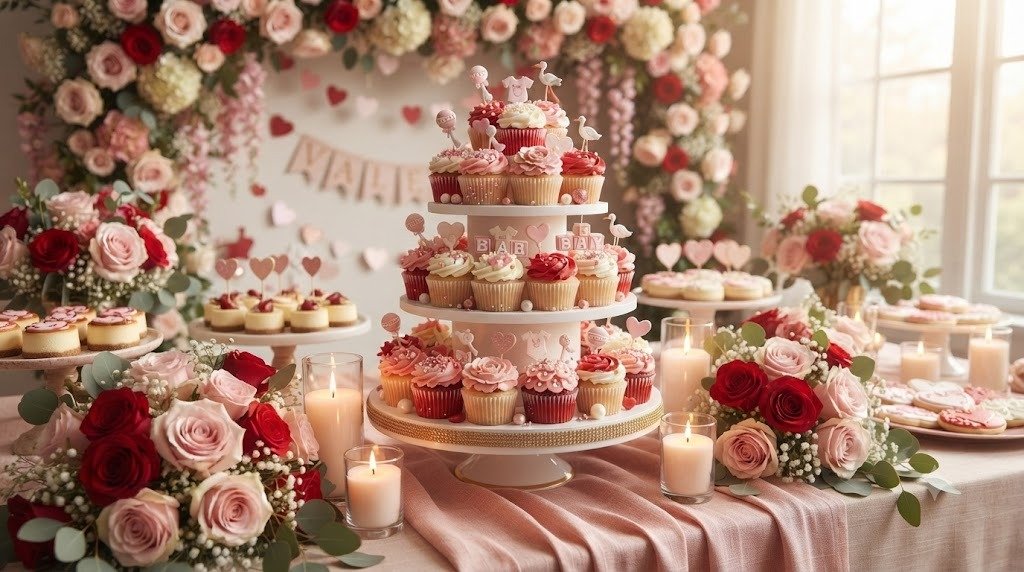
The Concept:
Cupcakes are already a party favorite, so turning them into a centerpiece makes perfect sense. One cupcake—or all of them—can hide pink or blue filling inside, creating a fun gender reveal while decorating the dessert table beautifully.
Estimated Budget: $30–$55 (Budget-Friendly)
Materials Needed:
- 24–36 cupcakes
- Buttercream frosting
- Pink, white, and red food coloring
- Pink or blue filling
- Cupcake tower stand
- Valentine’s sprinkles
- Heart toppers
- Fresh flowers
- Cake liner wrappers
How to Set It Up (Step-by-Step):
- Bake the cupcakes a day before the shower so they have enough time to cool completely.
- Use a cupcake corer or small knife to remove the center from each cupcake you’ll use for the reveal.
- Fill the centers with pink or blue buttercream, candy, or sprinkles, then replace the small cake piece on top.
- Frost every cupcake using swirls of white, blush pink, and soft red buttercream to match the Valentine’s theme.
- Decorate each cupcake with heart sprinkles, edible pearls, or tiny fondant baby decorations.
- Arrange the cupcakes on a tiered stand, beginning with the largest layer at the bottom and finishing with the prettiest cupcake on top.
- Tuck small flower stems or greenery around the edges of each tier without touching the frosting.
- Place the tower in the center of the dessert table with matching plates and napkins nearby.
- Add a decorative sign inviting guests to guess the baby’s gender before the cupcakes are served.
- When it’s time for dessert, announce the reveal and let the parents-to-be cut into the special cupcake or invite everyone to bite into theirs together if every cupcake contains the surprise.
9. Cotton Candy Cloud Centrepiece
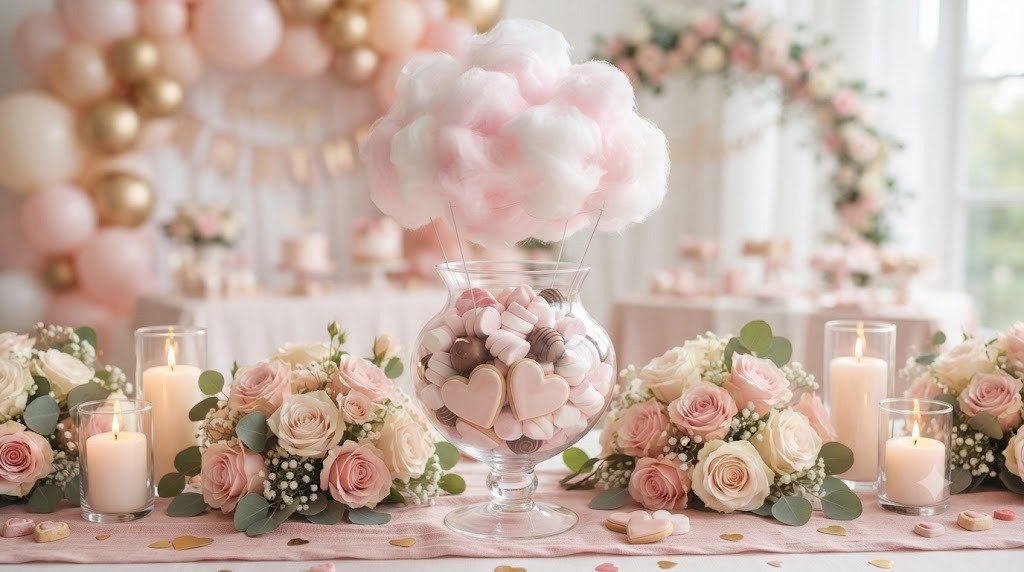
The Concept:
This centerpiece always makes guests smile because it looks soft, dreamy, and almost magical. Fluffy cotton candy arranged above sweet treats creates the illusion of floating clouds, making it perfect for a Valentine’s baby shower with a whimsical theme.
Estimated Budget: $25–$45 (Budget-Friendly)
Materials Needed:
- Pink and white cotton candy
- Decorative glass vase or clear bowl
- Floral foam
- Food-safe wrap
- Wooden skewers
- Mini marshmallows
- Heart-shaped cookies
- Wrapped chocolates
- Ribbon
- Artificial clouds or white tulle (optional)
How to Set It Up (Step-by-Step):
- Wrap the floral foam with food-safe plastic and secure it inside the vase.
- Insert wooden skewers into the foam at different heights to create the shape of floating clouds.
- Gently attach pieces of cotton candy to the tops of the skewers shortly before guests arrive. Cotton candy absorbs moisture quickly, so waiting until the last hour keeps it fluffy.
- Fill the bottom of the vase with individually wrapped chocolates and mini marshmallows to hide the foam completely.
- Slide heart-shaped cookies onto a few skewers so they appear to be floating beneath the cotton candy.
- Tie a wide satin ribbon around the vase and add a small Valentine’s gift tag if desired.
- Place the centerpiece away from direct sunlight and heat to prevent the cotton candy from shrinking.
- Scatter a few heart confetti pieces around the base for extra sparkle.
- After the party begins, encourage guests to enjoy the chocolates and cookies while leaving the cotton candy in place until the end.
10. Balloon Basket Dessert Centrepiece
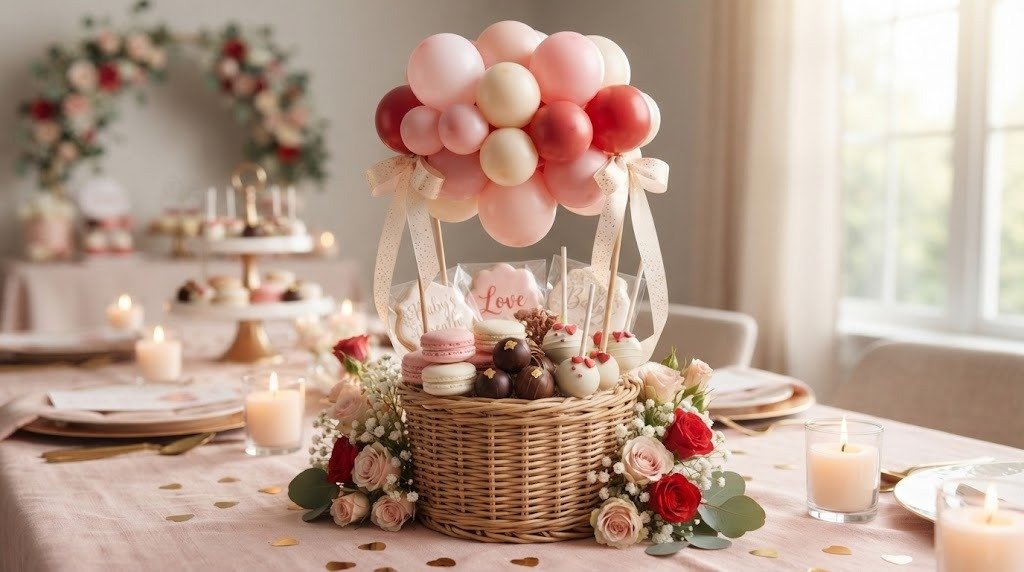
The Concept:
This is one of the cutest edible displays I’ve ever made because it resembles a miniature hot air balloon. A basket filled with desserts sits beneath floating balloons, making it both a decoration and an easy dessert station. It works beautifully for both Valentine’s baby showers and gender reveal celebrations.
Estimated Budget: $40–$75 (Medium Budget)
Materials Needed:
- Small wicker basket
- Helium balloons in pink, white, red, or reveal colors
- Wooden dowels or balloon sticks
- Ribbon
- Individually wrapped cookies
- Chocolate truffles
- Cake pops
- Macarons
- Decorative shredded paper
- Artificial flowers
- Mini stuffed teddy bear (optional)
How to Set It Up (Step-by-Step):
- Line the inside of the basket with decorative shredded paper to create a soft base for the desserts.
- Arrange the heaviest treats, such as cake pops and wrapped cookies, toward the bottom so the basket stays balanced.
- Fill remaining spaces with macarons, chocolate truffles, and individually wrapped candies until the basket looks full from every angle.
- Secure four wooden dowels inside the corners of the basket using floral foam or a sturdy support hidden beneath the paper.
- Attach helium balloons to the tops of the dowels using matching ribbon so they resemble a hot air balloon.
- Decorate the basket handle with silk flowers, greenery, or heart-shaped ribbon bows.
- If you’d like an extra sweet touch, place a tiny teddy bear peeking out between the desserts.
- Position the basket in the center of the gift table or dessert station where guests can admire it from every side.
- As the party continues, invite guests to help themselves to the treats without disturbing the balloon arrangement.
- At the end of the celebration, send the basket home with the parents-to-be or use it as a prize for one of the shower games.
Conclusion
One thing I’ve learned from planning Valentine’s baby showers is that the decorations people remember most are the ones they can actually enjoy. Edible centerpieces bring everyone together, spark conversations, and add an extra layer of excitement because guests know they’ll eventually get to taste the display they’ve been admiring all afternoon.
Whether you choose a simple strawberry bouquet, a playful donut topiary, or an unforgettable chocolate smash heart for a gender reveal, each idea adds warmth, color, and plenty of delicious fun to the celebration. Mix a few of these centerpieces throughout your party, and you’ll create a baby shower that feels welcoming, looks beautiful in photos, and leaves guests talking long after the last dessert has disappeared.