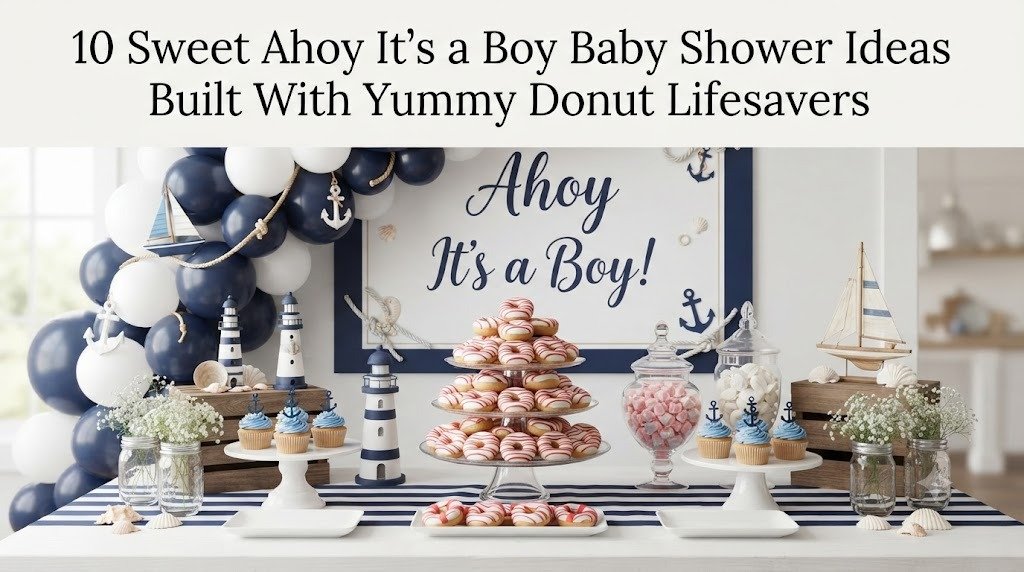
There’s something about a nautical baby shower that instantly feels cheerful and welcoming. I’ve helped decorate a few “Ahoy! It’s a Boy” celebrations over the years, and one thing guests always remember is the food display. Instead of spending a fortune on custom desserts, I started using donut holes as little edible lifesavers, and honestly, they became the highlight of the dessert table. They’re inexpensive, adorable, and surprisingly easy to turn into themed decorations.
What I love most about this idea is that it works for almost any budget. Whether you’re hosting a backyard gathering for close family or decorating a larger venue, donut lifesavers fit right in. With a little ribbon, some nautical colors, and a few simple DIY touches, you can create decorations and treats that look professionally styled without spending all weekend making them.
1. Donut Lifesaver Welcome Board
The Concept:
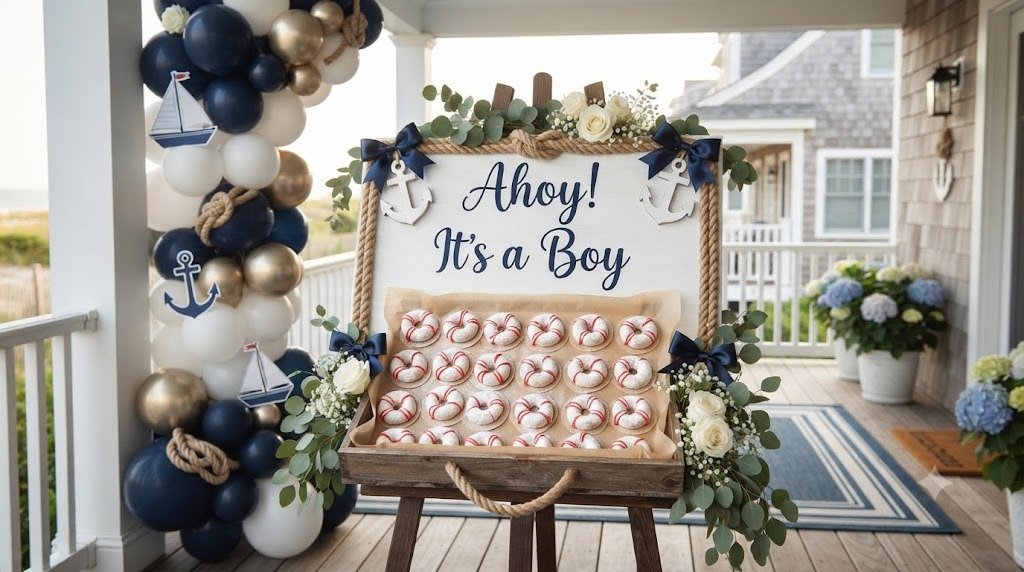
The first thing guests notice is the entrance, so I always like giving them something fun that immediately sets the theme. This welcome board features miniature powdered donuts arranged like lifesavers around a large “Ahoy! It’s a Boy” sign. It looks adorable in photos and instantly tells everyone they’re about to walk into a playful nautical celebration.
Estimated Budget: $25–$45 (Budget-Friendly)
Materials Needed:
- Foam board or wooden welcome sign
- Vinyl lettering or printable “Ahoy! It’s a Boy” design
- Mini powdered donuts
- White parchment circles
- Blue ribbon
- Hot glue gun
- Small wooden dowels
- Decorative rope
- Faux greenery
- Anchor cutouts
- Small easel
- Disposable gloves
How to Set It Up (Step-by-Step):
- Begin by designing your welcome board before decorating anything else. Place your main wording in the center and leave enough room around the edges for the donut decorations. I usually sketch everything lightly with pencil first so I can adjust spacing before attaching anything permanently.
- Since real donuts shouldn’t touch glue, cut small parchment paper circles slightly larger than each donut. Glue the parchment to the board first, creating food-safe resting spots where every donut will sit.
- Arrange the mini powdered donuts evenly around the border of the sign. I like keeping them about two inches apart so the display feels balanced without looking crowded.
- Tie small navy blue ribbon bows between every few donuts. These little accents break up the white color and add a nice nautical feel without overwhelming the design.
- Wrap decorative rope around the outside edge of the board. Secure it with hot glue every few inches so it stays firmly attached throughout the party.
- Add small anchor cutouts and a few pieces of faux greenery around the corners. Keeping decorations mostly in the corners helps the welcome message remain the center of attention.
- Place the finished board on a sturdy easel near the entrance. If you’re hosting outdoors, weigh the easel down with sandbags or decorative baskets so the wind doesn’t knock it over.
- Wait until about thirty minutes before guests arrive to place the fresh donuts on their parchment circles. This keeps them looking soft and fresh instead of drying out during setup.
2. Lifesaver Donut Dessert Tower
The Concept:
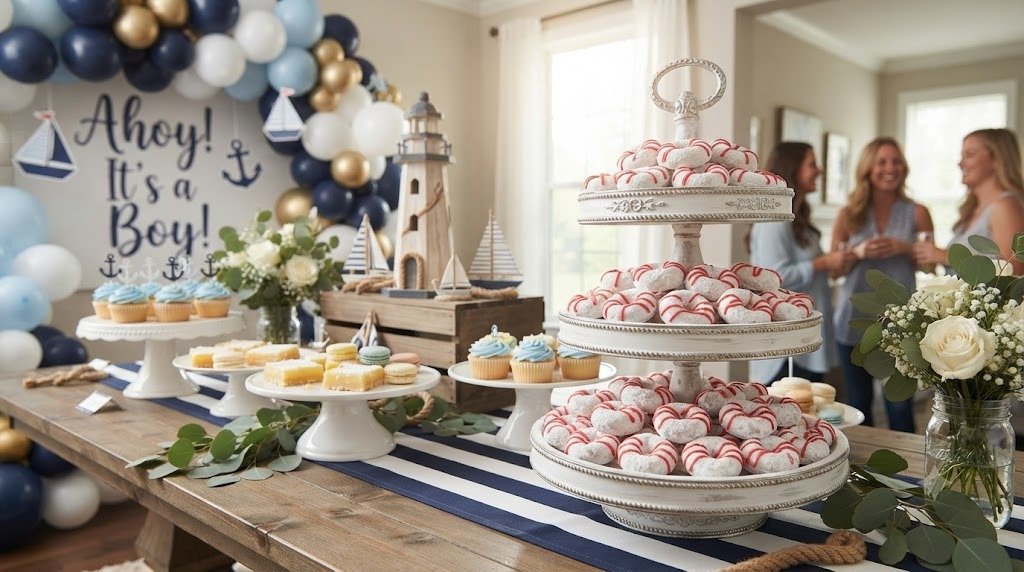
Every baby shower deserves a centerpiece, and this donut tower always gets compliments. By stacking donuts on tiered trays and decorating with rope, anchors, and tiny sailboats, the entire display resembles a fun nautical lighthouse filled with edible lifesavers.
Estimated Budget: $40–$70 (Medium Budget)
Materials Needed:
- Three-tier dessert stand
- Powdered mini donuts
- Cake stands
- Blue table runner
- White cake pops
- Decorative rope
- Small sailboat decorations
- Mini anchor picks
- Fresh greenery
- White serving tongs
- Dessert labels
How to Set It Up (Step-by-Step):
- Cover your dessert table with a crisp white tablecloth before adding a navy runner down the center. This simple color combination immediately creates a clean coastal look.
- Place the three-tier stand in the middle of the table where it becomes the focal point. Make sure it’s stable before adding any desserts.
- Arrange donut holes in neat circular patterns on every tier. I like placing each donut so the hole faces upward because it naturally resembles a lifesaver ring.
- Fill any empty spaces with white cake pops standing upright in decorative holders. Their height makes the display feel fuller and more interesting.
- Wind natural rope loosely around the base of the stand without covering the desserts. The rope adds texture while reinforcing the nautical theme.
- Add miniature sailboats and anchor picks throughout the tower. Keep decorations small enough that guests can easily remove donuts without disturbing the display.
- Place matching dessert labels beside each section so guests know exactly what they’re picking up. Even simple labels make the table feel thoughtfully organized.
- Scatter fresh greenery lightly around the bottom of the stand. I prefer eucalyptus because it adds softness without overpowering the nautical colors.
- Refill missing donuts throughout the party instead of stacking extras beforehand. A freshly stocked display always photographs better than one that’s overflowing.
3. DIY Donut Lifesaver Garland
The Concept:
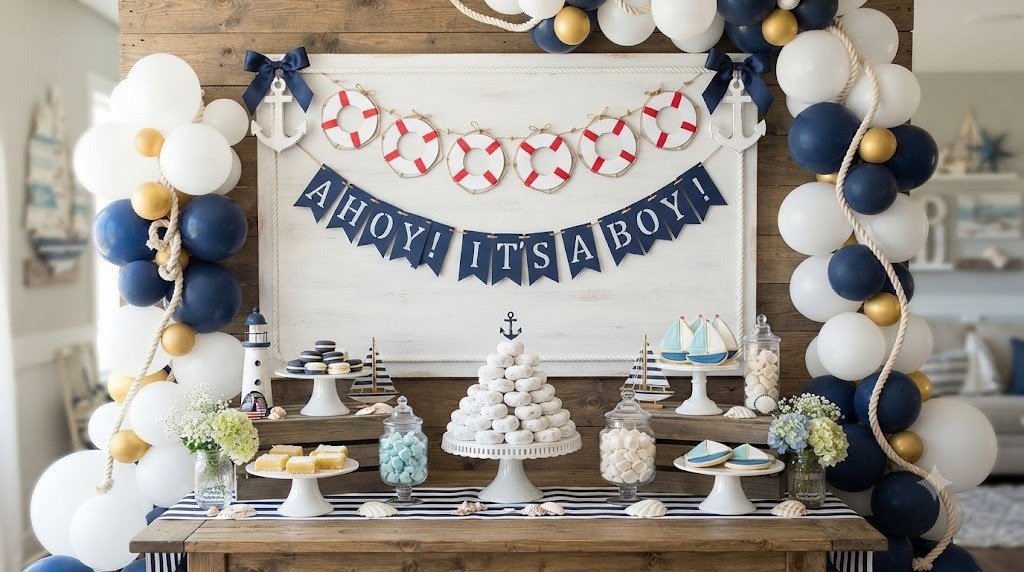
One of my favorite inexpensive decorations is a garland made from donut-shaped decorations inspired by lifesavers. I don’t recommend hanging real donuts for long periods, so I usually combine cardstock lifesavers with fresh donuts displayed underneath. Guests get the same cute look without wasting food.
Estimated Budget: $20–$35 (Budget-Friendly)
Materials Needed:
- White cardstock
- Red and navy markers
- Circle cutter
- Twine
- Mini clothespins
- Nautical flags
- Hole punch
- Scissors
- Tape
- Decorative anchors
How to Set It Up (Step-by-Step):
- Cut large white cardstock circles, then remove the centers so each piece resembles a lifesaver ring.
- Draw four evenly spaced red stripes around every ring using a thick marker. These simple stripes instantly give each decoration the classic lifesaver appearance.
- Punch two holes near the top of every cardstock ring.
- Thread twine through each hole, leaving equal spacing between decorations. Lay everything on the floor first so you can adjust the arrangement before hanging it.
- Alternate cardstock lifesavers with small nautical flags to create movement across the garland.
- Secure the garland above the dessert table, gift table, or photo backdrop using removable hooks or strong tape.
- Position trays of powdered donuts directly underneath the garland so the decorations naturally connect with the edible theme.
- Add a few anchor cutouts at each end of the garland to frame the entire display.
4. Captain’s Donut Lifesaver Snack Station
The Concept:
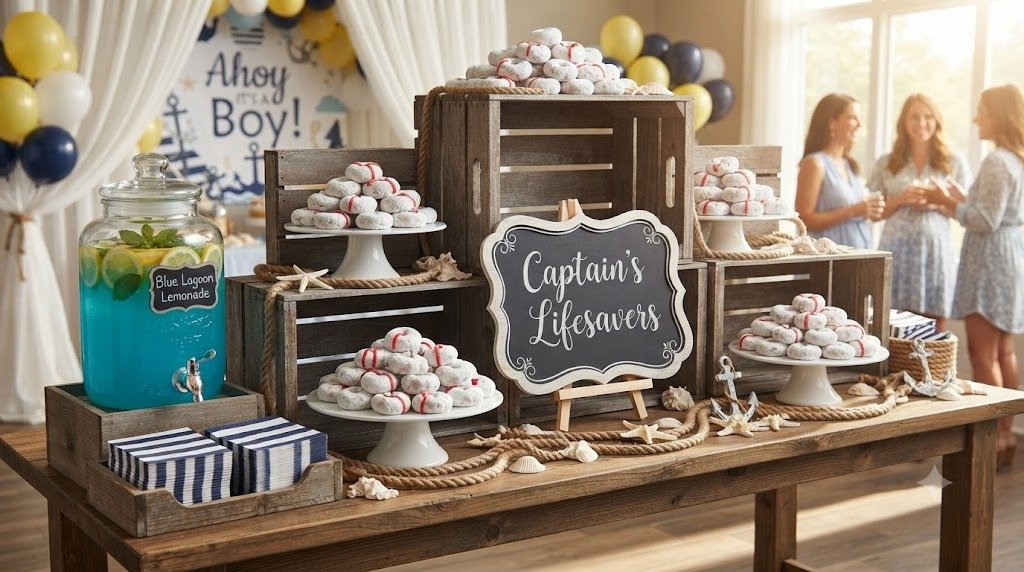
Instead of placing donuts in ordinary boxes, I like creating a self-serve snack station that feels like guests are visiting a captain’s refreshment dock. Everything is easy to grab, and the display encourages people to snack throughout the celebration instead of waiting until dessert.
Estimated Budget: $35–$60 (Medium Budget)
Materials Needed:
- Wooden crates
- Powdered mini donuts
- White cake stands
- Blue striped napkins
- Small chalkboard signs
- Anchor decorations
- Rope
- White serving baskets
- Beverage dispenser
- Disposable tongs
How to Set It Up (Step-by-Step):
- Arrange wooden crates upside down across one end of the table to create different serving heights. Varying the levels helps the snack station look professionally styled without much effort.
- Place cake stands on top of the crates and fill each one with neatly arranged powdered donuts. I usually group them in circles instead of random piles because the lifesaver shape becomes much more noticeable.
- Wrap thick rope around several crates, securing it underneath with removable tape. This adds a dockside feel while hiding plain wooden edges.
- Fill serving baskets with extra donuts and keep them behind the table for quick refills. Guests never notice when fresh trays quietly replace emptier ones.
- Set disposable tongs beside every serving platter. Besides keeping things hygienic, they also make it easier for guests to pick up powdered donuts without getting sugar everywhere.
- Add handwritten chalkboard signs with fun names like “Captain’s Lifesavers,” “Sweet Rescue Rings,” or “Dockside Donuts.” Little touches like this always make people smile.
- Position a beverage dispenser filled with blue lemonade nearby so guests naturally pair drinks with the snacks. The bright blue color ties beautifully into the nautical theme.
- Finish the station with folded striped napkins, tiny anchor decorations, and a few scattered seashells. Keep everything spaced out enough that guests can serve themselves comfortably without reaching across the table.
5. Sailor’s Donut Lifesaver Favor Bags
The Concept:
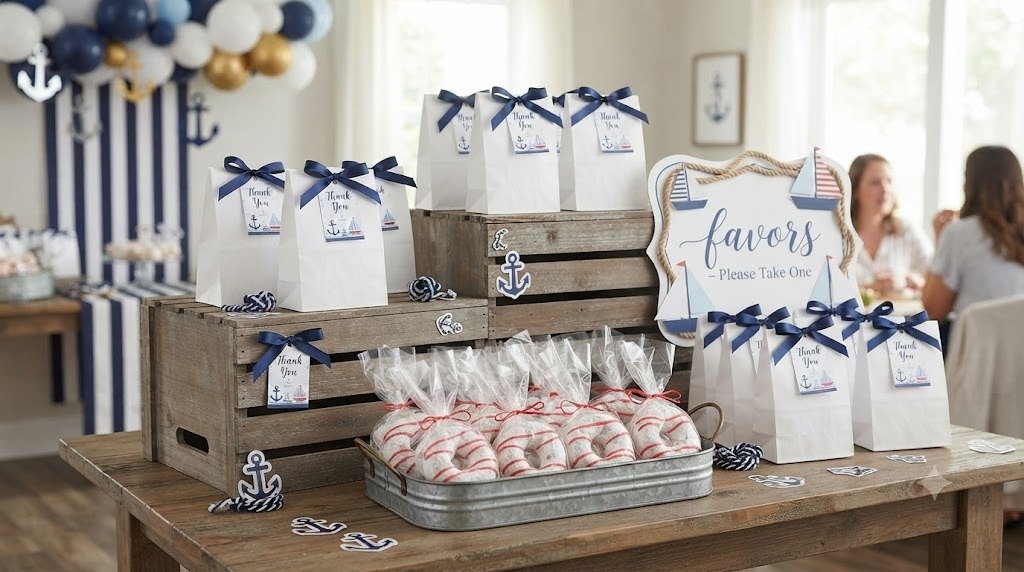
Party favors don’t have to be expensive to feel thoughtful. One thing I’ve learned is that guests genuinely appreciate something sweet they can enjoy on the drive home. These little sailor-inspired favor bags each hold a couple of powdered donuts that look just like lifesavers, making them perfectly on theme without requiring hours of crafting.
Estimated Budget: $20–$40 (Budget-Friendly)
Materials Needed:
- White paper treat bags
- Mini powdered donuts
- Clear food-safe treat bags
- Navy blue ribbon
- Personalized favor tags
- Mini anchor stickers
- Hole punch
- Twine
- Basket or wooden crate for display
- Tissue paper
How to Set It Up (Step-by-Step):
- Start by placing two or three fresh powdered donuts into clear food-safe treat bags. Keeping the donuts inside a separate sealed bag helps maintain freshness and prevents powdered sugar from coating the outside packaging.
- Fold the top of each treat bag neatly and secure it with a small twist tie or food-safe sticker before placing it inside the decorative paper bag.
- Fill the bottom of every paper bag with a small sheet of white or light-blue tissue paper. This gives the bag a fuller appearance and helps keep the treats from sliding around.
- Tie each bag closed using navy blue ribbon. I like making simple bows instead of elaborate knots because they look neat and are easy for guests to untie later.
- Attach personalized tags that say something cheerful like “Thanks for Sailing By!” or “You’re a Lifesaver!” Including the baby shower date on the back creates a nice keepsake.
- Add a tiny anchor sticker or nautical stamp to the front of each bag for one final themed detail.
- Arrange the finished favor bags inside a wooden crate or woven basket near the exit so guests naturally see them as they’re leaving.
- If the shower lasts several hours, keep the favor bags in a cool indoor space until the final hour of the party. Fresh donuts always taste better when they haven’t been sitting out all afternoon.
6. Build-Your-Own Donut Lifesaver Decorating Bar
The Concept:
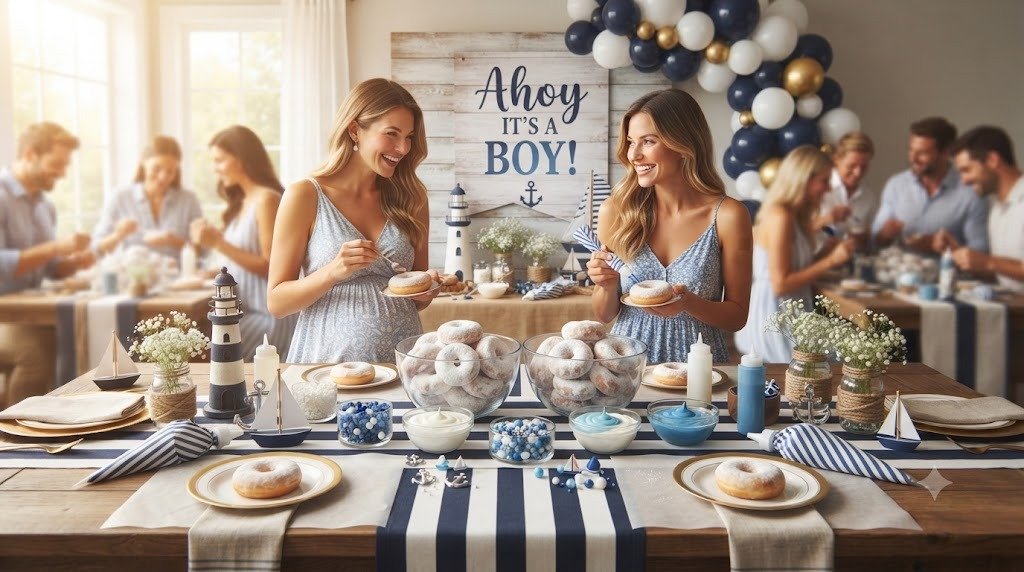
This is one of those activities that keeps everyone busy without feeling like an organized game. Adults enjoy it just as much as kids, and everyone leaves with a customized treat. Every time I’ve included a decorating station, guests have gathered around it almost immediately.
Estimated Budget: $45–$80 (Medium Budget)
Materials Needed:
- Powdered and plain mini donuts
- White icing
- Blue icing
- Sprinkles
- Small bowls
- Disposable decorating bags
- Plastic knives
- Wax paper
- Individual dessert plates
- Napkins
- Table sign with decorating instructions
How to Set It Up (Step-by-Step):
- Cover the decorating table with butcher paper or a disposable tablecloth to make cleanup quick and easy once the party ends.
- Divide the donuts into separate serving trays so guests can easily choose between powdered and plain varieties without crowding around one container.
- Spoon icing into disposable piping bags or squeeze bottles. Using smaller bags instead of large frosting tubs keeps everything cleaner throughout the event.
- Arrange sprinkles in individual bowls rather than leaving them in their original containers. It instantly makes the station feel more polished.
- Place wax paper sheets at each decorating spot so guests have a clean work surface for their creations.
- Add a small framed instruction card with fun suggestions like creating lifesaver stripes, anchors, waves, or tiny sailboat designs. I always include examples because they help people get started.
- Keep extra napkins and plastic knives within easy reach so everyone can spread icing comfortably without waiting for supplies.
- Check the station every fifteen to twenty minutes to refill icing and toppings. A full decorating bar stays inviting and prevents guests from thinking the activity is finished.
- Place a small trash bin underneath or beside the table. It’s a tiny detail, but it keeps wrappers and used napkins from piling up on the decorating surface.
7. Ahoy Dessert Charcuterie Board with Donut Lifesavers
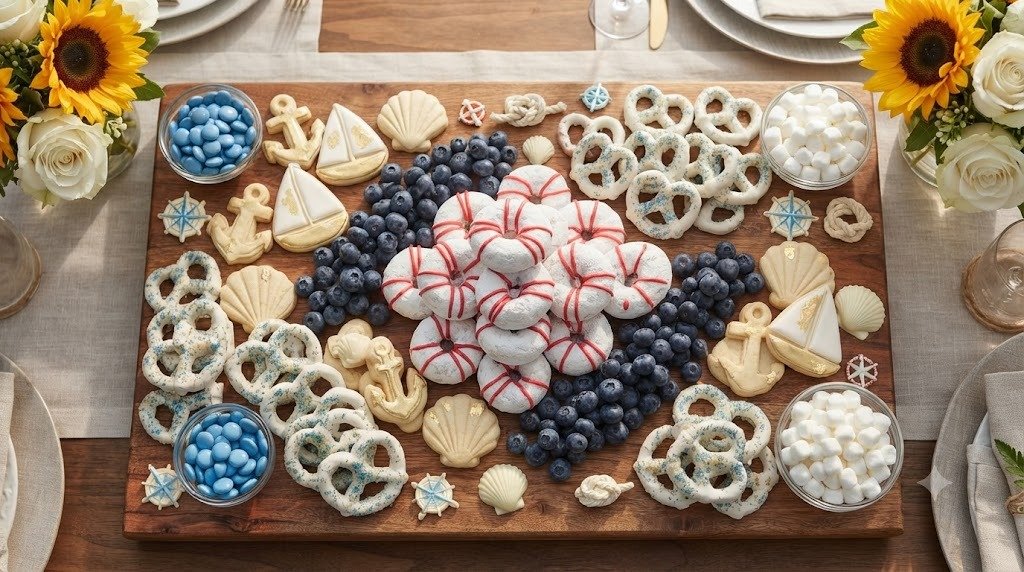
The Concept:
A dessert charcuterie board always feels a little special because guests can sample several treats at once. I love using donut lifesavers as the centerpiece, then filling the remaining space with blue candies, cookies, fruit, and chocolates for a dessert spread that looks abundant without being overly expensive.
Estimated Budget: $50–$90 (Medium Budget)
Materials Needed:
- Large wooden serving board
- Powdered mini donuts
- Blue candy-coated chocolates
- Vanilla sandwich cookies
- White chocolate pretzels
- Fresh blueberries
- Marshmallows
- Decorative shells (display only)
- Small serving tongs
- Mini bowls
How to Set It Up (Step-by-Step):
- Choose the largest serving board you have so the arrangement has plenty of room to breathe. Crowded boards often look messy instead of inviting.
- Place donut lifesavers in the center first, arranging them into loose circles or gentle waves. I always build around the donuts because they’re the main attraction.
- Fill small bowls with blue candy-coated chocolates and position them throughout the board. The bowls naturally break up the layout while adding color.
- Arrange vanilla cookies in overlapping rows along one edge, followed by white chocolate pretzels on another side for texture and variety.
- Tuck handfuls of fresh blueberries into any empty spaces. Besides adding freshness, they help create a soft ocean-inspired color palette.
- Scatter marshmallows in small clusters instead of spreading them everywhere. Keeping similar treats grouped together makes the board easier for guests to serve themselves.
- Place decorative seashells only around the outer border of the board where they clearly aren’t edible. This keeps everything food-safe while reinforcing the beach theme.
- Set serving tongs near the donuts and small spoons beside candy bowls so guests can serve themselves neatly.
- Prepare the board no more than an hour before the shower begins. Fresh fruit and donuts always look their best when assembled shortly before guests arrive.
8. Nautical Photo Booth with Donut Lifesaver Props
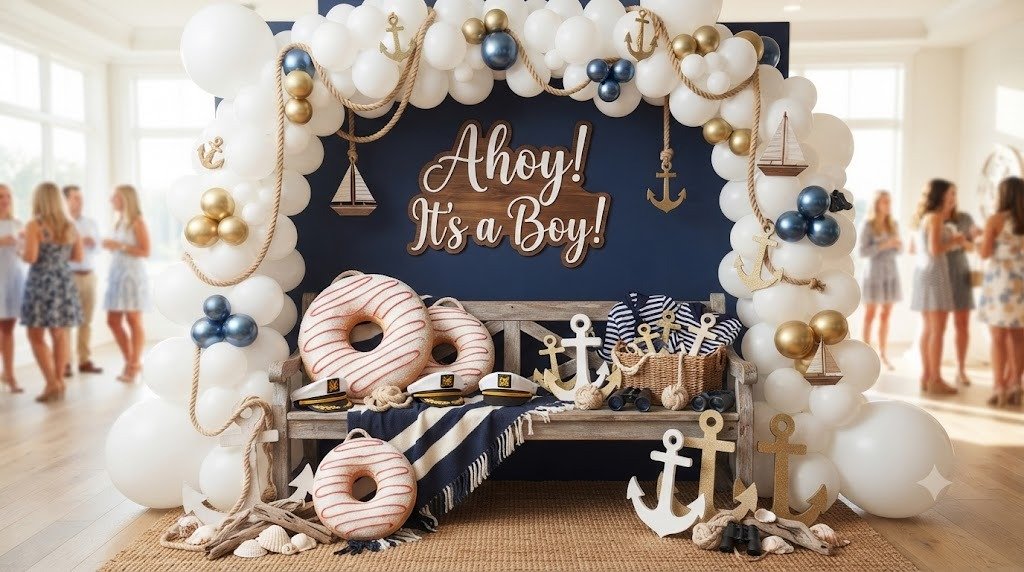
The Concept:
Some of my favorite baby shower memories come from the silly photos everyone takes together. Instead of buying expensive custom props, I like incorporating oversized donut-inspired lifesaver decorations into a simple nautical backdrop. They photograph beautifully and instantly become conversation starters.
Estimated Budget: $40–$75 (Medium Budget)
Materials Needed:
- Blue backdrop curtain
- White balloon garland
- Cardboard circles
- White paint
- Red paint
- Wooden sticks
- Hot glue gun
- Rope
- Anchor cutouts
- Captain’s hats
- Sailor scarves
- Small bench or stools
How to Set It Up (Step-by-Step):
- Hang a navy or ocean-blue backdrop against a clean wall where guests have plenty of room to gather for photos.
- Build a white balloon garland around one side of the backdrop. I usually leave the opposite side open so the display doesn’t feel too crowded.
- Cut large cardboard circles and paint them to resemble classic white-and-red lifesaver rings. These oversized props are lightweight, inexpensive, and easy to hold.
- Glue wooden sticks to the backs of several lifesaver props so guests can comfortably pose with them like handheld signs.
- Wrap rope loosely around part of the balloon display and attach a few anchor cutouts to strengthen the nautical theme.
- Place captain’s hats and sailor scarves in a small basket beside the backdrop so guests can quickly grab accessories before taking pictures.
- Add a small bench or two stools in front of the backdrop. Different seating heights make group photos look much more natural.
- Test the lighting before the party begins. If possible, face the backdrop toward natural window light or add a simple ring light nearby for brighter, clearer photos.
- Keep the area free from extra tables or decorations so people can move around easily while taking pictures. A little open space makes the booth feel much more inviting and encourages everyone to join in.
9. DIY Donut Lifesaver Centerpieces for Every Table
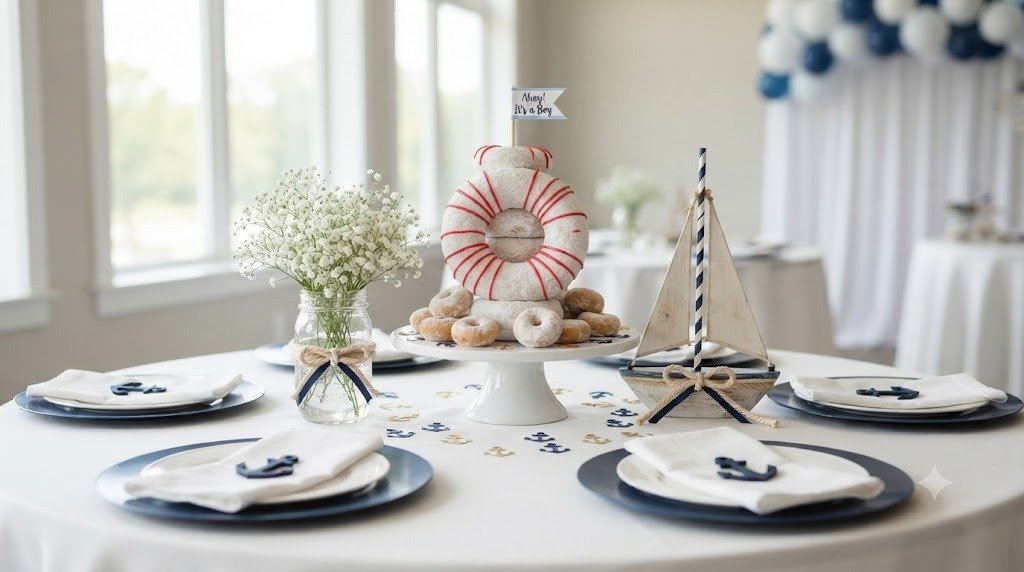
The Concept:
I always think the tables deserve just as much attention as the dessert station. These donut lifesaver centerpieces are one of my favorite ways to tie the whole theme together because they’re charming, affordable, and don’t block guests from talking to one another. They also double as edible decorations once everyone has admired them.
Estimated Budget: $30–$55 (Budget-Friendly)
Materials Needed:
- Mini powdered donuts
- Small white cake stands or wooden slices
- Glass jars or mason jars
- Blue and white striped paper straws
- Small paper sailboats
- Decorative rope
- White and navy ribbon
- Faux baby’s breath or white flowers
- Anchor table confetti
- Food-safe parchment circles
How to Set It Up (Step-by-Step):
- Place a small cake stand or wooden slice in the center of every guest table. I like using neutral bases because they work with almost any party décor.
- Cover the top with a food-safe parchment circle before arranging any donuts. This keeps everything clean while making it easy to remove the treats later.
- Arrange six to ten powdered donuts in a neat circle so they resemble floating lifesavers. Leave a small opening in the middle for the decorative accent.
- Fill a mason jar with white flowers or baby’s breath and place it in the center of the donut circle. The flowers add height without making conversation across the table difficult.
- Tuck a tiny paper sailboat into the flower arrangement using a striped paper straw as the mast. This instantly gives the centerpiece a playful nautical feel.
- Wrap a piece of decorative rope around the neck of the mason jar and finish it with a navy ribbon bow.
- Sprinkle a few anchor-shaped confetti pieces around the base. Don’t overdo it—a little sparkle goes a long way.
- Assemble the centerpieces the night before, but wait until about an hour before guests arrive to place the fresh donuts. That way they stay soft and picture-perfect.
- Once everyone has eaten, invite guests to enjoy the donuts from their table. It’s a fun surprise and saves leftover desserts from going to waste.
10. “Sweet Lifesavers” Donut Take-Home Box Station
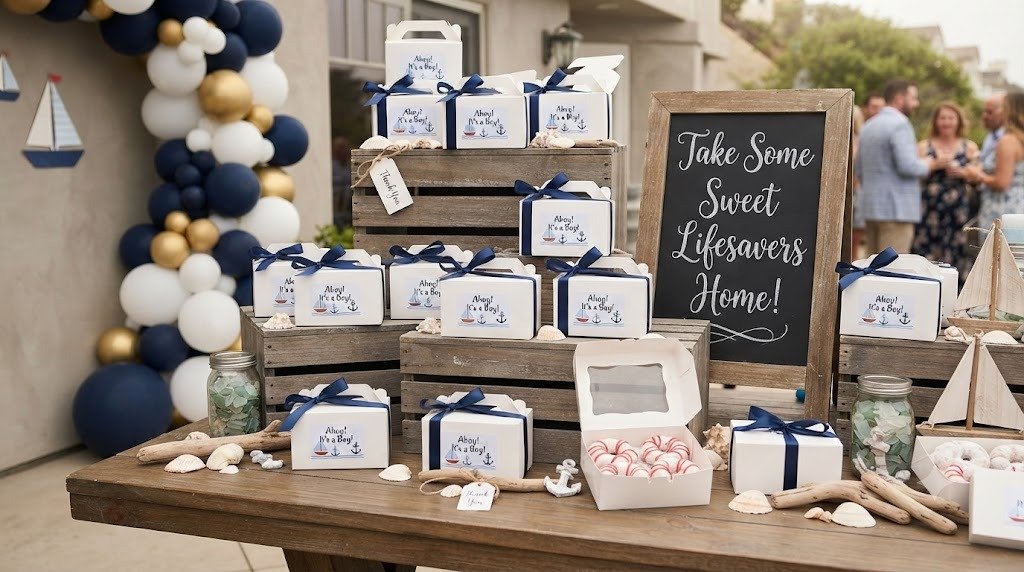
The Concept:
One thing I’ve noticed after almost every baby shower is that there are always a few extra treats left on the dessert table. Instead of letting them sit there, I love creating a take-home station where guests can pack a few donut lifesavers before they leave. It’s simple, practical, and everyone appreciates having a little sweet snack for later.
Estimated Budget: $25–$45 (Budget-Friendly)
Materials Needed:
- Small bakery boxes
- Food-safe tissue paper
- Mini powdered donuts
- Custom stickers
- Navy ribbon
- Thank-you tags
- Wooden crate
- Chalkboard sign
- Disposable gloves
- Extra napkins
How to Set It Up (Step-by-Step):
- Assemble the bakery boxes before the party starts and line each one with a sheet of food-safe tissue paper. This makes packing treats quick once guests begin leaving.
- Create a small display using a wooden crate or side table near the exit. Place the empty boxes, ribbons, and thank-you tags neatly together so everything is easy to find.
- Fill a few sample boxes with donut lifesavers to show guests how many comfortably fit inside. I usually recommend three or four donuts so the boxes close neatly.
- Add a chalkboard sign with a friendly message like, “Take Some Sweet Lifesavers for the Journey Home!” Small signs like this encourage guests without anyone having to announce it.
- Keep a pair of disposable gloves or serving tongs nearby so people can pack their donuts hygienically.
- Seal each filled box with a personalized sticker that includes the baby’s name (if shared) or a simple message like “Ahoy! It’s a Boy.”
- Tie a navy ribbon around each closed box and attach a thank-you tag. It only takes a minute, but it makes the treat feel like a thoughtful gift instead of leftovers.
- Check the station during the final part of the party and refill donuts as needed so every guest has plenty to choose from.
- As guests head home, remind them to grab a box. I always find this creates one last happy moment before everyone says goodbye, and it’s a lovely way to end the celebration.
Conclusion
After trying different baby shower themes over the years, I’ve found that the simplest ideas are often the ones people remember most. Donut lifesavers bring together adorable décor, delicious treats, and a playful nautical theme without stretching the budget. They’re easy to find, easy to decorate with, and they make guests smile the moment they spot them.
The best part about an “Ahoy! It’s a Boy” celebration is that it doesn’t need elaborate decorations to feel special. A few thoughtful DIY touches, fresh donuts, classic navy-and-white colors, and a welcoming atmosphere are enough to create a party that feels warm and personal. Whether you use one or two of these ideas or mix several together, you’ll end up with a celebration that’s full of sweet memories, plenty of photos, and happy guests who will be talking about your creative donut lifesavers long after the party sails into the sunset.