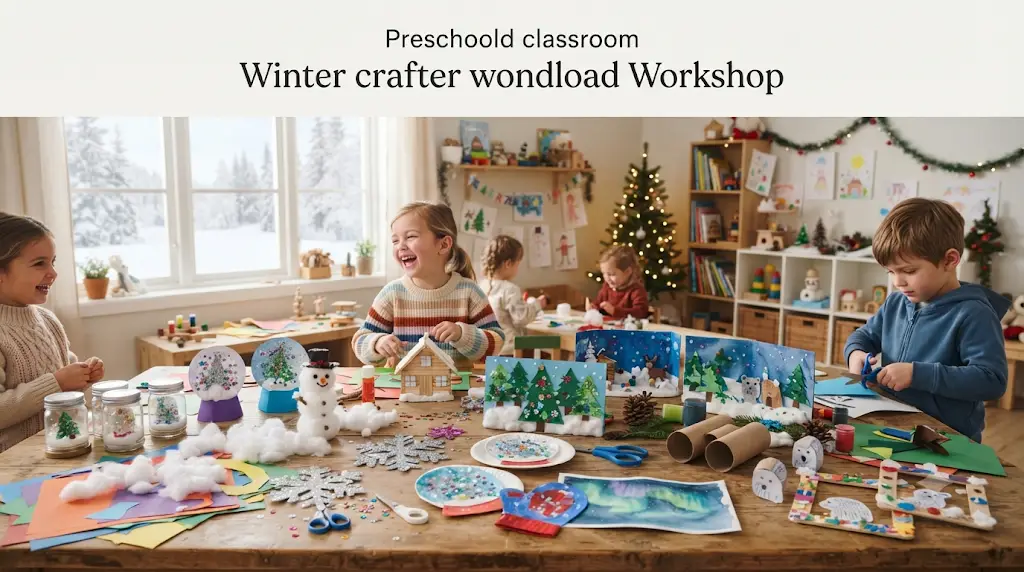
Winter always seems to arrive with a mix of excitement and restless energy. If you’ve ever heard little voices saying, “I’m bored!” while the weather keeps everyone indoors, you’re definitely not alone. Over the years, I’ve found that simple winter crafts can turn an ordinary afternoon into a joyful memory, giving children something fun to create while giving parents and teachers a much-needed break from screen time.
One of my favorite classroom themes has always been edible snow globes. The sparkling snow, tiny winter scenes, and cozy colors capture children’s imaginations instantly. While these crafts aren’t edible, they’re inspired by the same magical look and are designed with preschoolers in mind. Expect a little glitter on the table and plenty of proud smiles—that’s simply part of crafting with young children.
Safety First
Winter crafts are most enjoyable when everyone stays safe. An adult should always supervise children, especially when using child-safe scissors, small decorations like buttons or googly eyes, or any crafting tools that could become choking hazards. Choose non-toxic glue, washable paint, and age-appropriate supplies whenever possible. If you’re crafting with toddlers or younger preschoolers, prepare materials ahead of time so little hands can focus on creating instead of handling sharp tools.
1. Sparkling Paper Snow Globe
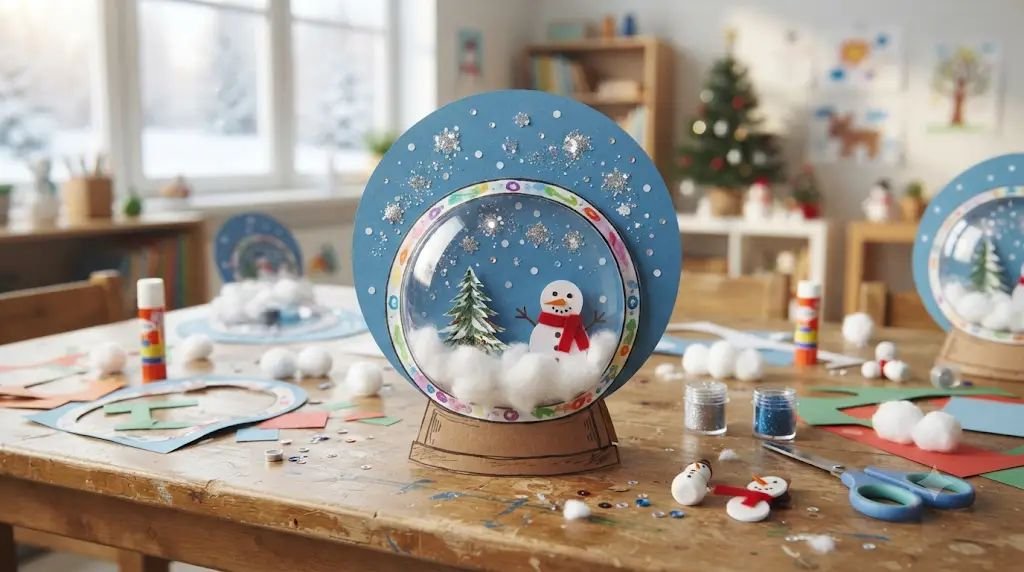
There’s something magical about shaking a snow globe, and this paper version brings that same excitement without the glass. This is one of the first winter crafts I introduce because even children who are still developing their cutting skills can enjoy decorating their own snowy world.
Skill Developed: Fine motor skills, creativity, hand-eye coordination, shape recognition.
Materials Needed:
- Blue construction paper
- White cardstock
- Black marker
- Cotton balls
- Silver or white glitter
- Washable school glue
- Child-safe scissors
- Paper plate (optional for tracing circles)
Step-by-Step Instructions
- Create the snow globe outline. Draw a large circle on white cardstock using a paper plate as a guide. Add a simple rectangle underneath to create the globe’s base. Older preschoolers can trace independently, while younger children may need help.
- Cut out the globe. Encourage children to carefully follow the outline using child-safe scissors. Don’t worry about perfectly smooth edges. In my classroom, every snow globe looked a little different, and that uniqueness made our bulletin board even more charming.
- Add the winter background. Glue the snow globe onto blue construction paper, leaving the top open for decorating. The blue background immediately creates the feeling of a cold winter sky.
- Build the snowy landscape. Tear cotton balls into smaller fluffy pieces instead of using them whole. Children love pulling them apart, and the uneven texture looks much more like real snowdrifts.
- Draw a winter scene. Using a black marker, draw a tiny pine tree, snowman, cozy cabin, or woodland animal. Encourage children to add details like scarves, stars, or tiny footprints in the snow.
- Create sparkling snowfall. Brush a thin layer of glue around the sky inside the globe. Sprinkle silver or white glitter over the glue before gently shaking away the excess. Expect glitter to travel everywhere—that’s simply part of winter crafting.
- Personalize the globe. Invite children to write their names or add a cheerful winter message near the base before displaying their finished artwork.
Pro-Tip / Teacher’s Note: Place a baking tray underneath each project while adding glitter. It catches most of the sparkle and makes cleanup much easier.
2. Marshmallow-Inspired Cotton Snowman
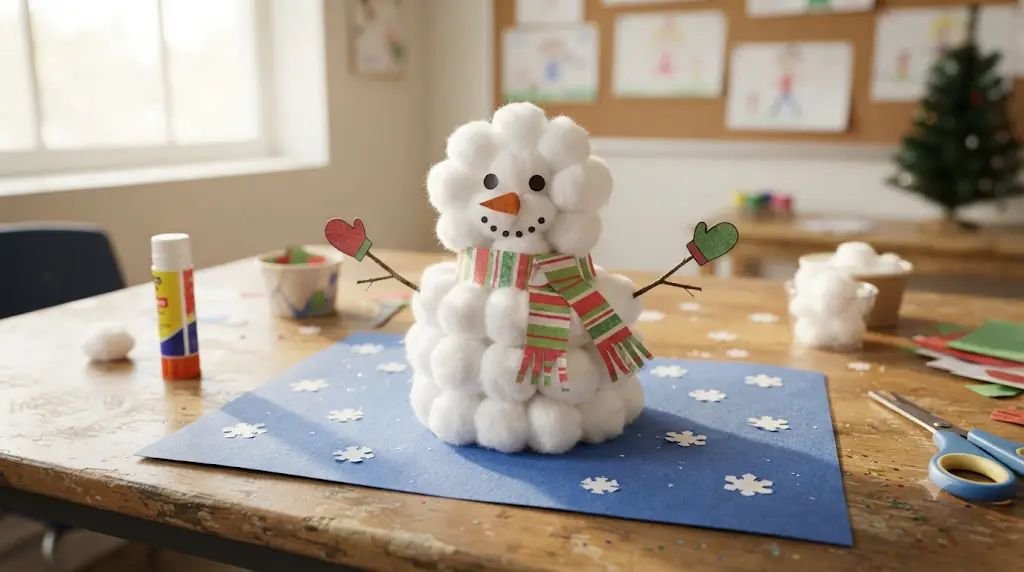
Inspired by the fluffy look of marshmallows inside edible snow globes, this adorable snowman uses soft cotton instead. Preschoolers especially enjoy building their snowmen layer by layer.
Skill Developed: Shape recognition, fine motor control, sequencing, creativity.
Materials Needed:
- Large cotton balls
- Blue cardstock
- Orange construction paper
- Black marker
- Brown paper strips
- Washable glue
- Child-safe scissors
- Small fabric scraps or colored paper
Step-by-Step Instructions
- Prepare the background. Give each child a sheet of blue cardstock to represent the winter sky.
- Build the snowman body. Glue three cotton balls vertically to form the snowman’s head, middle, and body. Allow children to gently press each cotton ball into place without flattening them completely.
- Create the face. Draw two tiny eyes, a smiling mouth, and carefully glue a small orange paper triangle for the carrot nose.
- Add the arms. Glue thin brown paper strips to both sides to resemble tree branches. Encourage children to bend the strips slightly for a more natural appearance.
- Dress the snowman. Wrap a small strip of colorful paper or fabric around the neck to create a scarf. Some children even enjoy adding tiny paper buttons or earmuffs.
- Finish the snowy scene. Add dots of white paint or tiny cotton pieces around the snowman to create falling snow.
Pro-Tip / Teacher’s Note: If cotton balls aren’t available, tissue paper rolled into soft balls creates a similar fluffy effect and gives children extra finger-strength practice.
3. Popsicle Stick Winter Cabin
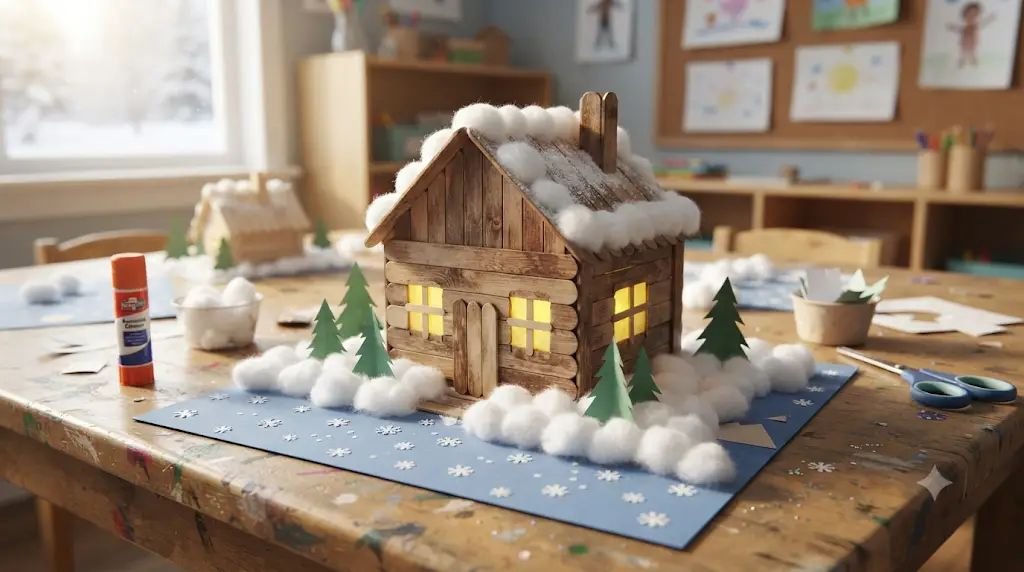
Every edible snow globe seems to have a cozy little cabin hidden inside. This simple craft lets children build one using popsicle sticks while practicing early engineering skills.
Skill Developed: Spatial awareness, problem-solving, hand-eye coordination, creativity.
Materials Needed:
- Craft sticks (popsicle sticks)
- Brown washable paint
- Paintbrushes
- Blue cardstock
- Cotton balls
- Glue
- Yellow paper
- Black marker
Step-by-Step Instructions
- Paint the craft sticks. Let children paint the sticks brown before beginning construction. Set them aside to dry completely.
- Build the cabin walls. Arrange the sticks horizontally and glue two sticks vertically across the back to hold everything together. Younger preschoolers may need adult assistance during this step.
- Add the roof. Glue two sticks diagonally across the top to form a simple peaked roof.
- Create windows and a door. Cut small yellow rectangles and glue them onto the cabin. Children love imagining warm lights glowing inside on a snowy evening.
- Attach the cabin to the background. Glue the completed cabin onto blue cardstock.
- Build snowy hills. Tear apart cotton balls and glue them around the cabin’s base to create deep snowbanks.
- Finish with winter details. Draw evergreen trees, stars, or tiny snowflakes using markers or white crayons.
Pro-Tip / Teacher’s Note: Lay out all the painted sticks before class begins if you’re crafting with younger preschoolers. They’ll stay engaged without waiting for paint to dry.
4. Snowy Pine Tree Collage
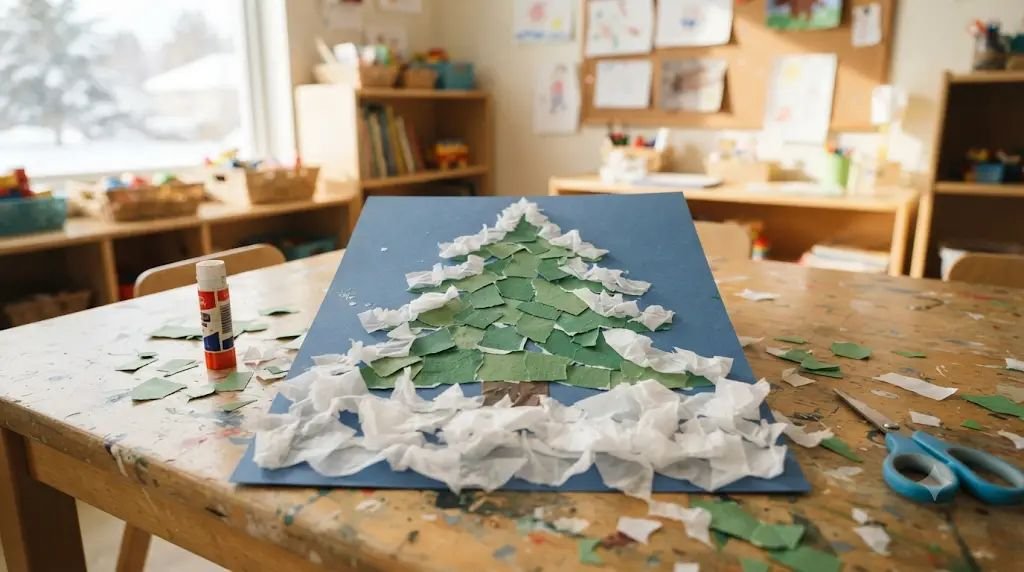
This textured collage reminds children of the tiny evergreen trees often seen inside decorative snow globes. It’s wonderfully forgiving and perfect for mixed-age groups.
Skill Developed: Texture exploration, fine motor skills, color recognition, creativity.
Materials Needed:
- Green construction paper
- Brown paper
- White tissue paper
- Glue
- Blue cardstock
- Child-safe scissors
- White paint (optional)
Step-by-Step Instructions
- Cut the tree shape. Older preschoolers can cut a large triangle from green paper, while younger children may use teacher-prepared shapes.
- Create the trunk. Cut a small brown rectangle and glue it beneath the tree.
- Make textured snow. Tear white tissue paper into tiny pieces. Tearing paper strengthens little fingers while creating a beautiful snowy texture.
- Decorate the branches. Glue the tissue pieces across the tree branches, leaving a few green areas visible.
- Create snowy ground. Add extra tissue paper around the bottom to form fluffy snowdrifts.
- Add falling snow. Dip a fingertip into white paint and gently stamp snowflakes around the tree. This simple step is always a classroom favorite.
Pro-Tip / Teacher’s Note: Don’t worry if children cover the entire tree with tissue paper. Every version turns out unique, and that’s exactly what makes preschool art special.
5. Winter Animal Snow Globe Scene
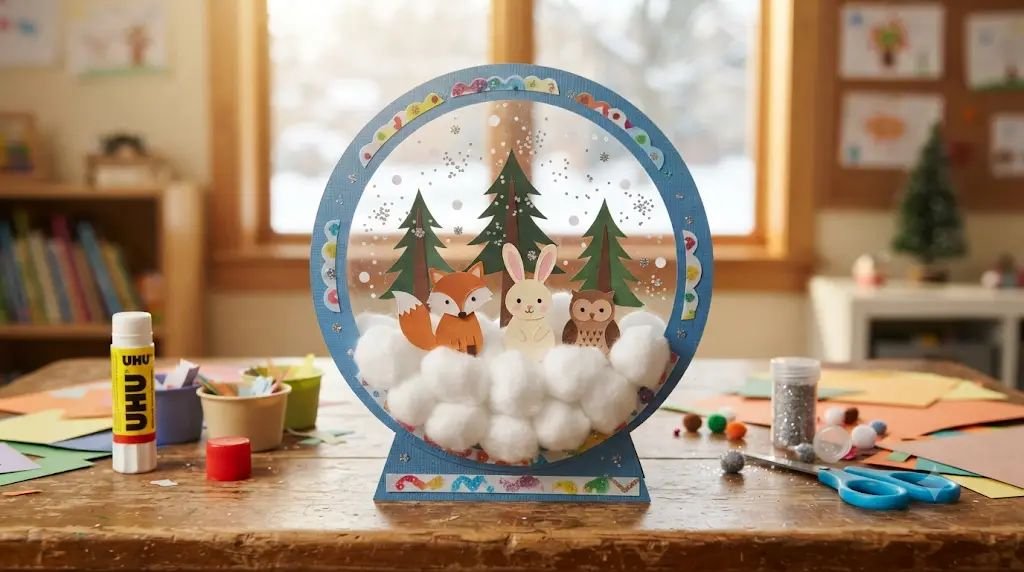
Children love imagining little woodland animals staying warm during winter. This craft encourages storytelling while creating an adorable snowy landscape inspired by decorative snow globes.
Skill Developed: Language development, imaginative thinking, fine motor skills, storytelling.
Materials Needed:
- White cardstock
- Blue construction paper
- Brown construction paper
- Animal stickers or printed animal cutouts
- Cotton balls
- Glue
- Silver glitter (optional)
- Markers
- Child-safe scissors
Step-by-Step Instructions
- Create the snow globe. Cut a large circle from white cardstock and glue it onto blue construction paper, adding a simple base underneath.
- Choose a woodland animal. Let each child select an animal such as a fox, rabbit, owl, deer, or penguin. Talking about where each animal lives adds a nice learning moment.
- Build the snowy ground. Tear cotton balls into soft pieces and glue them along the bottom of the globe to create snowbanks.
- Arrange the winter scene. Glue the animal onto the snowy landscape. Encourage children to think about where it would stand, hide, or play.
- Add background details. Draw evergreen trees, tiny bird tracks, snowflakes, or a cozy log for the animal to rest beside.
- Create sparkling snowfall. If using glitter, lightly brush glue across the sky and sprinkle just enough glitter to resemble gently falling snow.
- Tell the animal’s story. Invite each child to describe what their woodland friend is doing on a snowy day. These conversations often become the highlight of the activity.
Pro-Tip / Teacher’s Note: Keep extra animal stickers nearby. Children often change their minds halfway through, and having choices helps prevent frustration while encouraging creativity.
6. Snow Globe Mason Jar Lid Ornament
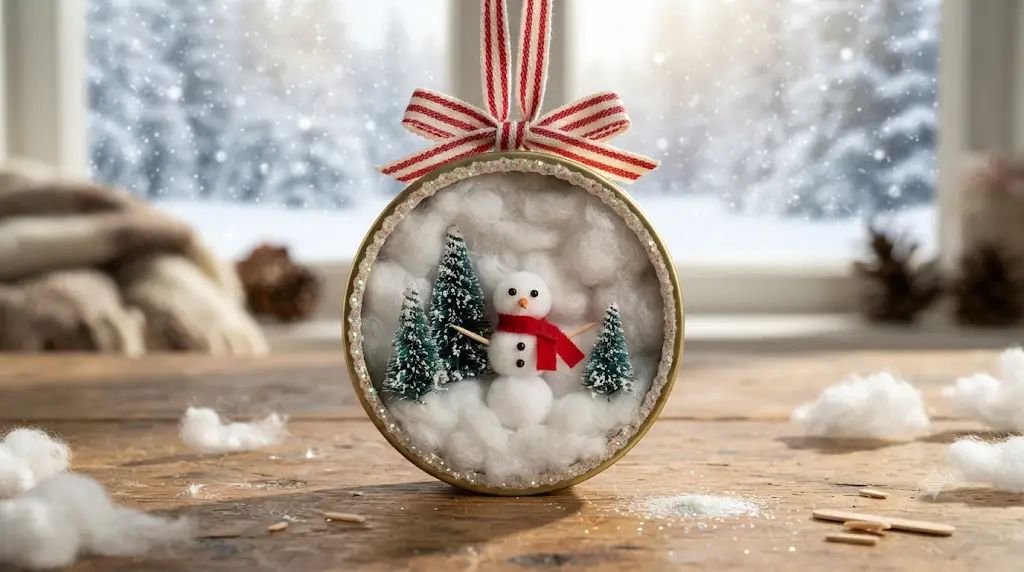
This craft captures the charm of a miniature snow globe by transforming an ordinary mason jar lid into a winter keepsake. I’ve made these with preschool classes before winter break, and families always loved hanging them on the tree or displaying them around the house.
Skill Developed: Fine motor skills, spatial awareness, creativity, hand-eye coordination.
Materials Needed:
- Clean mason jar lids (flat lids only)
- Blue cardstock
- Cotton balls
- Small paper tree cutouts
- Mini paper snowman or animal cutouts
- Washable glue
- White paint
- Ribbon or yarn
- Hole punch (adult use)
Step-by-Step Instructions
- Prepare the background. Trace the inside of the mason jar lid onto blue cardstock and carefully cut out the circle. Glue it inside the lid so it becomes the winter sky.
- Create snowy hills. Pull apart cotton balls into soft, uneven pieces and glue them across the bottom half of the circle. Avoid making the layer perfectly flat. Natural-looking snow always looks more realistic.
- Build the winter scene. Glue a small paper tree, snowman, or woodland animal onto the snowy landscape. Encourage children to think about where each item belongs before gluing.
- Add falling snow. Dip a fingertip or cotton swab into white paint and gently stamp tiny snowflakes around the background. Children love seeing the scene come to life with each dot.
- Decorate the edge. Wrap ribbon or colorful yarn around the outside of the lid using glue. This gives the ornament a finished appearance while hiding any rough edges.
- Prepare for hanging. An adult should punch a small hole near the top or securely tie ribbon around the lid to create a hanger.
- Display the ornament. Once everything has dried completely, children can proudly hang their tiny winter wonderland on a holiday tree or gift it to a family member.
Pro-Tip / Teacher’s Note: If mason jar lids aren’t available, sturdy cardboard circles work just as well and are much easier for large classroom groups.
7. Glittery Snowflake Window Craft
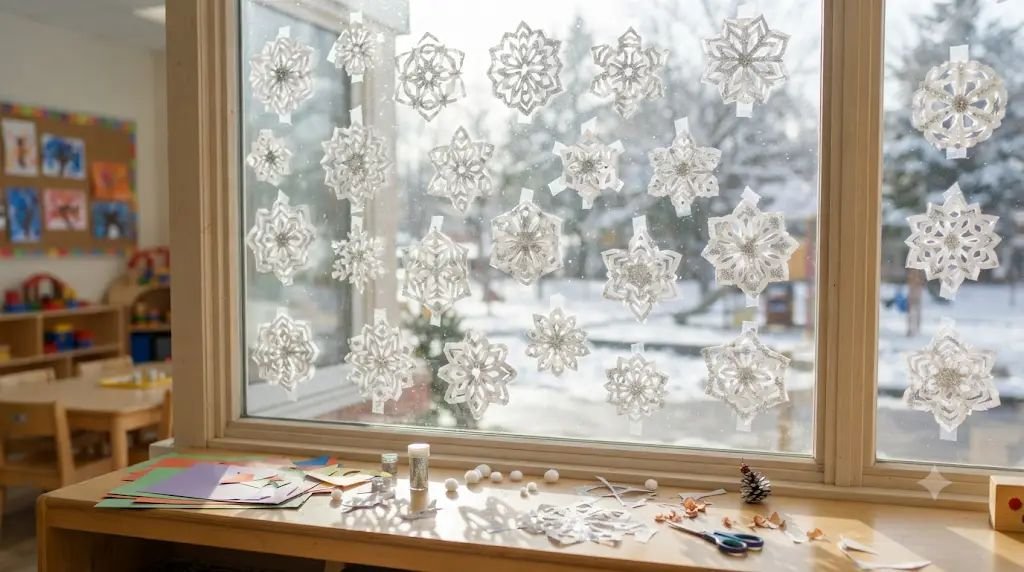
Snowflakes always become one of the biggest conversation starters during winter lessons. Every child notices that no two snowflakes look exactly alike, which makes this activity perfect for encouraging creativity instead of perfection.
Skill Developed: Scissor practice, symmetry awareness, fine motor control, creativity.
Materials Needed:
- White coffee filters or white paper
- Child-safe scissors
- Washable glue
- Silver glitter
- Blue construction paper
- White crayons
- Tape for displaying
Step-by-Step Instructions
- Fold the paper. Demonstrate how to fold a coffee filter or paper into smaller sections. Younger preschoolers may need help with this step.
- Cut simple shapes. Invite children to snip tiny triangles, half circles, and little squares from the folded edges. Remind them not to cut all the way through the center.
- Open the snowflake. Slowly unfold the paper together. This moment usually fills the classroom with excited smiles because every design is different.
- Add sparkle. Brush a thin layer of glue over parts of the snowflake and sprinkle on silver glitter. Shake off the extra glitter over a tray.
- Create a winter display. Mount the finished snowflake onto blue construction paper or tape it directly onto a classroom window where sunlight can shine through.
- Talk about nature. Spend a few minutes comparing the snowflakes and pointing out how every pattern is unique, just like real snowflakes.
Pro-Tip / Teacher’s Note: Place folded papers inside labeled envelopes before class if you’re working with younger children. It saves time and keeps everyone moving together.
8. Cozy Mitten Snow Globe Craft
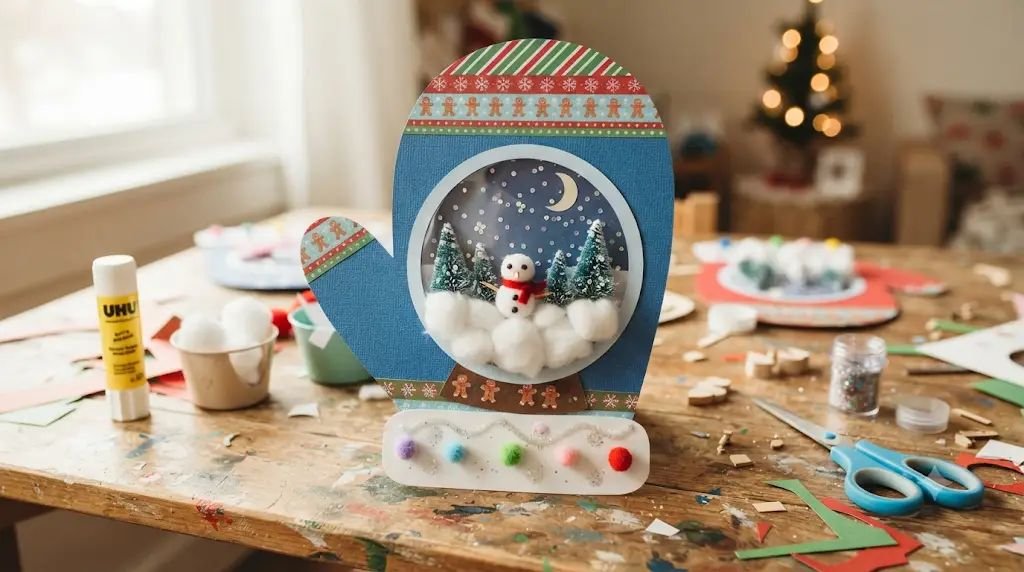
Warm mittens are a winter favorite, and this project combines them with the magical look of a snowy globe. It also gives children plenty of opportunities to decorate using colors and patterns.
Skill Developed: Pattern recognition, fine motor skills, color matching, creativity.
Materials Needed:
- Colored construction paper
- White cardstock
- Cotton balls
- Markers
- Glue
- Child-safe scissors
- White paint
- Optional sequins
Step-by-Step Instructions
- Cut out the mitten. Trace and cut a large mitten shape from colorful construction paper. Older preschoolers can practice tracing their own mitten template.
- Create the globe window. Cut a large circle from white cardstock and glue it onto the center of the mitten, leaving space around the edges.
- Build the snowy scene. Glue small pieces of cotton inside the circle to create fluffy snowbanks.
- Add winter decorations. Draw tiny evergreen trees, a cheerful snowman, or little winter birds inside the globe area.
- Decorate the mitten. Use markers to create stripes, zigzags, dots, or simple winter patterns around the edges.
- Finish with snowfall. Add tiny fingerprints of white paint or a few sequins to make it look as though snow is gently falling inside the mitten.
- Display together. Hang all the mittens across a classroom wall to create a colorful winter garland.
Pro-Tip / Teacher’s Note: Encourage children to choose their own color combinations instead of copying examples. Their unique choices always make the display more interesting.
9. Winter Wonderland Paper Plate Globe
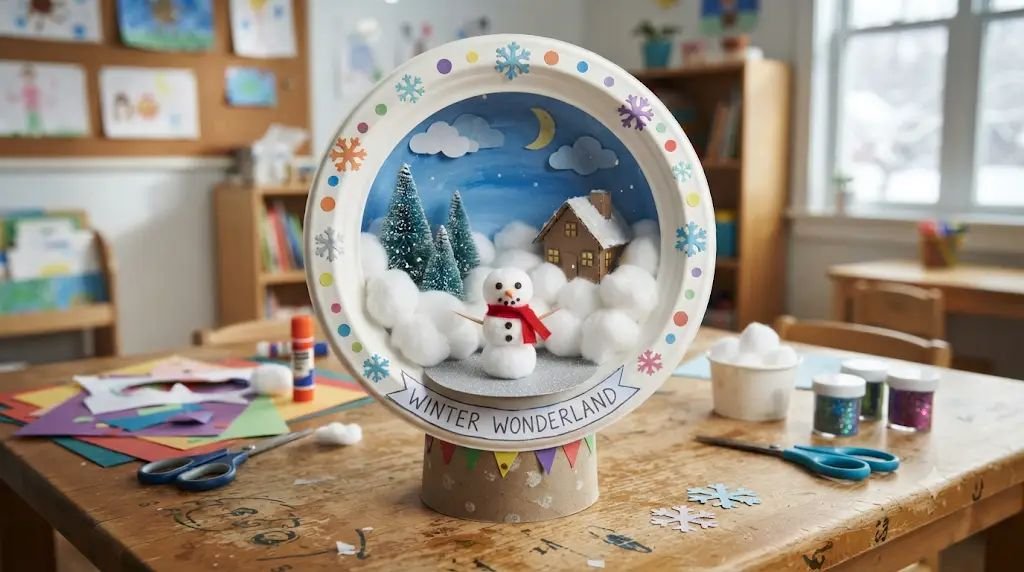
Paper plates are inexpensive, sturdy, and perfect for creating large snow globe crafts that preschoolers can decorate with plenty of winter details.
Skill Developed: Fine motor skills, planning, creativity, hand-eye coordination.
Materials Needed:
- Paper plates
- Blue paint
- Paintbrushes
- Cotton balls
- Construction paper
- Washable glue
- Markers
- White paint
- Child-safe scissors
Step-by-Step Instructions
- Paint the background. Paint the center of a paper plate blue, leaving the outer rim white if desired. Allow the paint to dry completely before continuing.
- Design the winter landscape. Glue cotton balls across the bottom of the plate to create rolling snowdrifts.
- Add buildings or trees. Cut simple paper houses, cabins, or evergreen trees from construction paper and glue them into the snowy scene.
- Include winter characters. Draw or glue small snowmen, penguins, woodland animals, or children playing in the snow.
- Create falling snow. Dip a cotton swab into white paint and dot snowflakes across the sky. This simple technique creates a beautiful snowy effect.
- Decorate the outer rim. Add silver dots, winter words, or colorful borders around the edge of the paper plate.
- Share the story. Invite children to explain what is happening inside their winter wonderland. Listening to their imaginative stories is often the best part of the lesson.
Pro-Tip / Teacher’s Note: Let children work at their own pace. Some finish quickly, while others enjoy adding tiny details for much longer.
10. Tissue Paper Northern Lights Snow Globe
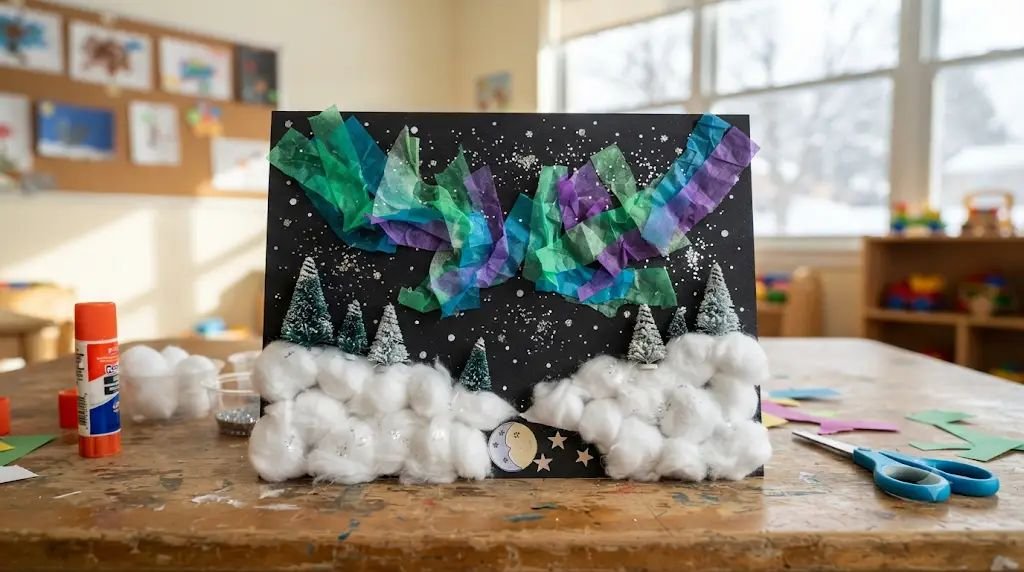
One winter afternoon after reading a story about the northern lights, my class couldn’t stop talking about colorful skies. This craft became an instant favorite because children loved seeing bright colors glow above their snowy landscapes.
Skill Developed: Color recognition, creativity, fine motor skills, artistic expression.
Materials Needed:
- Black cardstock
- Green tissue paper
- Blue tissue paper
- Purple tissue paper
- White tissue paper
- Glue stick
- Cotton balls
- White paint
- Child-safe scissors
- Silver stars (optional)
Step-by-Step Instructions
- Prepare the background. Give each child a sheet of black cardstock to represent the winter night sky.
- Create the northern lights. Tear green, blue, and purple tissue paper into long, wavy strips. Glue them across the upper half of the page, overlapping slightly to create flowing ribbons of color.
- Build the snowy landscape. Pull apart cotton balls and glue them across the bottom edge to create soft snowbanks.
- Add a winter scene. Cut simple paper trees, cabins, or woodland animals and glue them onto the snowy ground. Encourage children to arrange everything before gluing permanently.
- Paint falling snow. Dip a fingertip or cotton swab into white paint and stamp snowflakes across the dark sky. The contrast against the black background creates a beautiful winter effect.
- Add extra sparkle. If desired, glue a few silver paper stars into the sky. Preschoolers usually enjoy deciding where each star should shine.
- Review the colors together. Ask children which colors they used and where they have seen colorful skies in books or videos. These simple conversations naturally build vocabulary while celebrating each child’s artwork.
- Display as a classroom mural. Place everyone’s projects side by side. The different color choices create a stunning northern lights display that children are always excited to show their families.
Pro-Tip / Teacher’s Note: Encourage children to tear the tissue paper instead of cutting it. The soft, uneven edges create much more natural-looking northern lights and provide excellent fine motor practice.
11. Cardboard Tube Snow Globe Binoculars
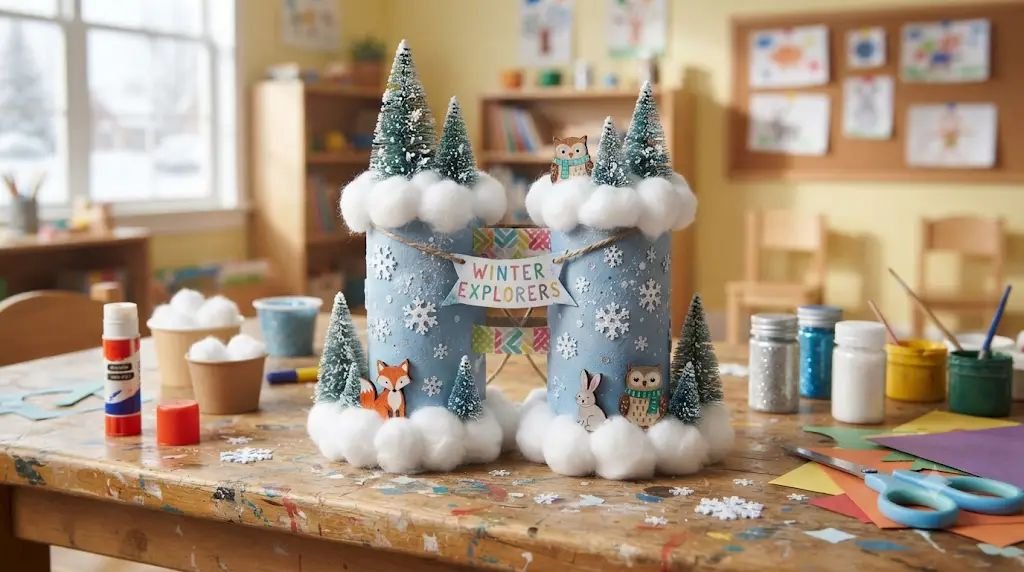
Preschoolers love pretending to explore snowy forests. These playful binoculars are inspired by tiny winter scenes inside edible snow globes and encourage imaginative play long after the craft is finished.
Skill Developed: Imaginative play, fine motor skills, creativity, hand-eye coordination.
Materials Needed:
- 2 cardboard paper tubes
- Blue construction paper
- Cotton balls
- Glue
- Child-safe scissors
- White paint
- Markers
- Ribbon or yarn
- Tape
Step-by-Step Instructions
- Attach the tubes. Place two cardboard tubes side by side and tape or glue them together securely. Explain that they will become pretend binoculars for spotting winter animals.
- Cover the tubes. Wrap each tube with blue construction paper and glue it in place. Encourage children to smooth the paper with their hands to prevent wrinkles.
- Decorate with snow. Tear cotton balls into fluffy pieces and glue small patches around the binoculars to resemble soft snow.
- Add winter details. Draw tiny snowflakes, pine trees, mittens, snowmen, or woodland animals using markers. Every child will decorate theirs differently, and that’s part of the fun.
- Paint snowy dots. Dip fingertips or cotton swabs into white paint to stamp gentle snowfall across the binoculars.
- Attach the neck strap. Punch small holes (adult only) or tape ribbon to each side so children can safely wear the binoculars.
- Go on a pretend winter adventure. Invite children to search the classroom for hidden paper snowflakes or stuffed woodland animals. They almost always stay engaged longer when the craft turns into a game.
Pro-Tip / Teacher’s Note: Skip the ribbon for younger toddlers and simply let them hold the binoculars while pretending to explore.
12. Fingerprint Snow Globe Keepsake
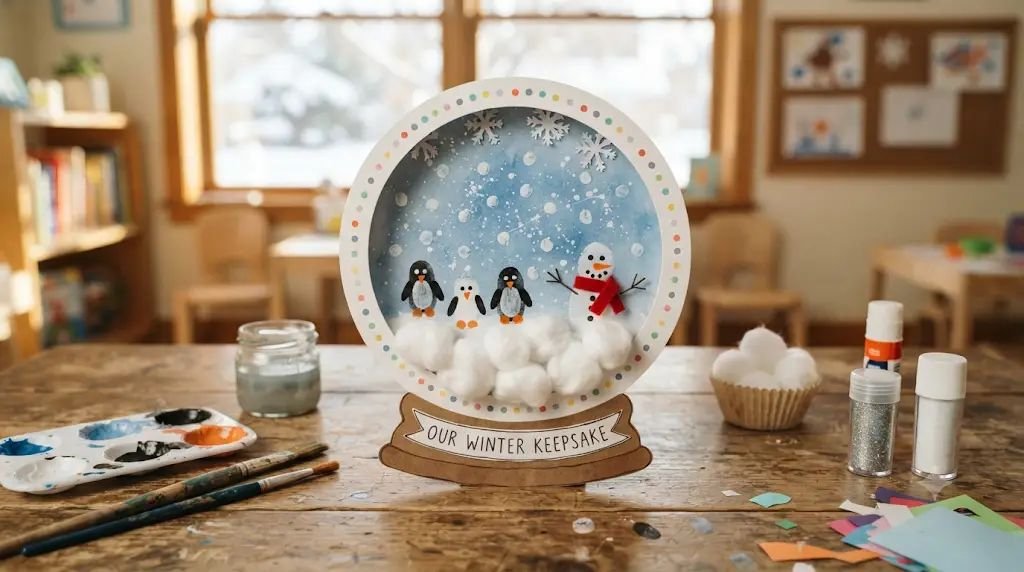
This simple keepsake often becomes a favorite family treasure. Parents love seeing tiny fingerprints transformed into winter characters, and children are always excited to point out which prints belong to them.
Skill Developed: Fine motor skills, sensory exploration, creativity, self-expression.
Materials Needed:
- White cardstock
- Blue paint
- White paint
- Washable paint in assorted colors
- Black fine-tip marker
- Glue
- Silver glitter (optional)
- Child-safe wipes or paper towels
Step-by-Step Instructions
- Create the snow globe outline. Draw a large globe with a sturdy base on white cardstock before class begins.
- Paint the background. Let children lightly paint the inside of the globe blue, leaving the base white. Allow it to dry.
- Make fingerprint characters. Dip one finger into washable paint and gently press fingerprints onto the paper. Once dry, turn them into tiny penguins, snowmen, robins, or mittens with a black marker.
- Add falling snow. Use fingertips dipped in white paint to stamp tiny snowflakes around the winter scene.
- Decorate the base. Invite children to color the base with cheerful winter patterns or write their name and the year.
- Finish with sparkle. If desired, brush a small amount of glue across the sky and lightly sprinkle silver glitter for extra sparkle.
Pro-Tip / Teacher’s Note: Keep baby wipes close by. Preschoolers almost always end up with colorful fingers—and sometimes colorful noses too!
13. Winter Wonderland Craft Stick Frame
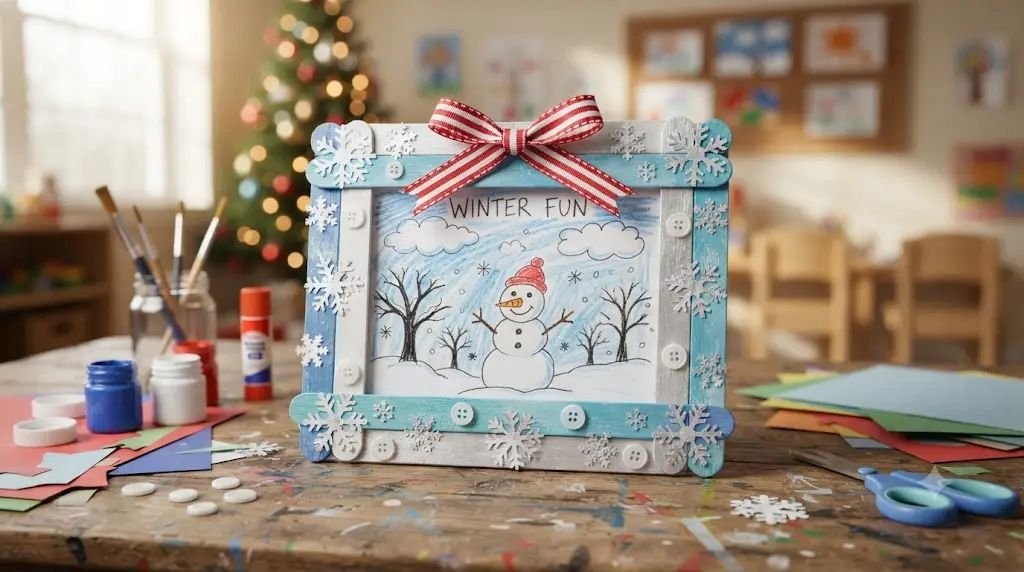
This final project lets children display their favorite winter drawing inside a handmade frame inspired by the cozy scenes found in decorative snow globes. It’s also a wonderful end-of-unit keepsake.
Skill Developed: Fine motor skills, creativity, design planning, confidence.
Materials Needed:
- Craft sticks
- Washable paint
- Paintbrushes
- Glue
- White buttons (adult supervision)
- Foam snowflakes or paper snowflakes
- Ribbon
- Markers
- Small piece of white cardstock
Step-by-Step Instructions
- Paint the craft sticks. Let children choose winter colors like blue, white, silver, or light purple. Set the sticks aside to dry completely.
- Build the frame. Glue four craft sticks into a square or rectangle. Adults may help hold the corners together until the glue begins to set.
- Decorate the frame. Glue on foam snowflakes, paper snowflakes, or a few white buttons. Encourage children to spread the decorations around the edges rather than placing everything in one corner.
- Create the artwork. Draw a favorite winter scene on the small piece of white cardstock. Some children may draw snowmen, while others create snowy forests or playful penguins.
- Attach the picture. Glue the artwork behind the frame so the drawing shows through the opening.
- Add a hanger. Tape or glue a loop of ribbon to the back so families can hang the finished project at home.
- Celebrate everyone’s work. Before sending the crafts home, invite each child to share one favorite part of their picture. These conversations build confidence and encourage language development.
Pro-Tip / Teacher’s Note: Write the child’s name and date on the back. Families often keep these handmade frames for years.
Frequently Asked Questions
1. What age group are these winter crafts best for?
Most of these activities are ideal for children between 3 and 7 years old. Younger children may need extra help with cutting and gluing, while older children can add more detailed decorations.
2. Are these crafts suitable for classrooms?
Yes. All of the projects were chosen because they use affordable supplies, simple techniques, and can easily be adapted for preschool classrooms, daycare centers, homeschool groups, or family craft afternoons.
3. Can I replace glitter with something less messy?
Absolutely. White tissue paper, washable paint, paper confetti, or small torn pieces of recycled paper create beautiful snowy effects without covering the entire room in glitter.
4. How long do these crafts usually take?
Most projects take 20–40 minutes, depending on the children’s ages and how much decorating they choose to do. In my experience, preschoolers love adding “just one more snowflake,” so it’s helpful to allow a little extra time.
5. What if I don’t have all of the materials?
That’s perfectly fine. One thing I’ve learned after many winters with preschoolers is that children care far more about creating than having perfect supplies. Cardboard, recycled paper, cotton pads, tissue paper, and even grocery flyers can often be transformed into wonderful winter masterpieces.
Conclusion
Winter crafting isn’t about making picture-perfect projects. It’s about giving children the freedom to imagine, create, and proudly say, “I made this!” Some snow globes may lean to one side, glitter may end up on your sleeves, and cotton balls might mysteriously appear under the table days later—but those little moments often become the memories children remember most.
Whether you’re planning a cozy afternoon at home or preparing activities for an entire preschool classroom, these Winter Wonderland crafts inspired by edible snow globes offer plenty of opportunities to build fine motor skills, encourage creativity, and enjoy meaningful screen-free time together. Gather a few simple supplies, embrace the beautifully messy process, and let every child create their own magical snowy world.