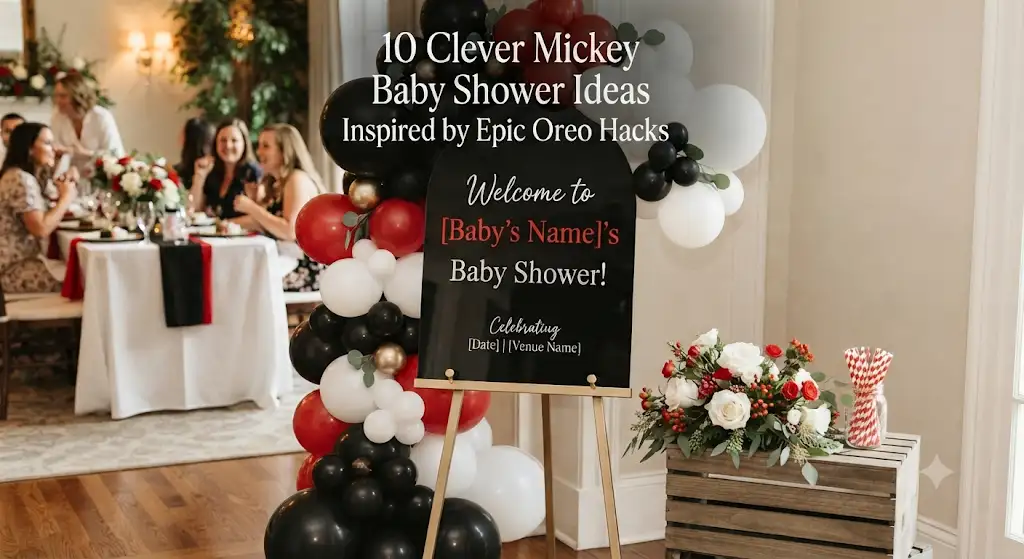
There’s something about Mickey-themed parties that instantly makes everyone smile. I helped plan one for a close friend who absolutely loved Disney, and instead of buying expensive custom decorations, we ended up using ordinary Oreo cookies in surprisingly creative ways. Those little cookie “ears” became the inspiration for so many decorations and treats that guests couldn’t stop talking about them.
What I loved most was how affordable everything turned out. With a few packs of Oreos, simple craft supplies, and a little imagination, we created decorations that looked professionally made without spending a fortune. If you’re planning a Mickey baby shower, these ideas are easy to recreate, beginner-friendly, and perfect whether you’re hosting at home, in a backyard, or at a community hall.
1. Oreo Mickey Dessert Pops
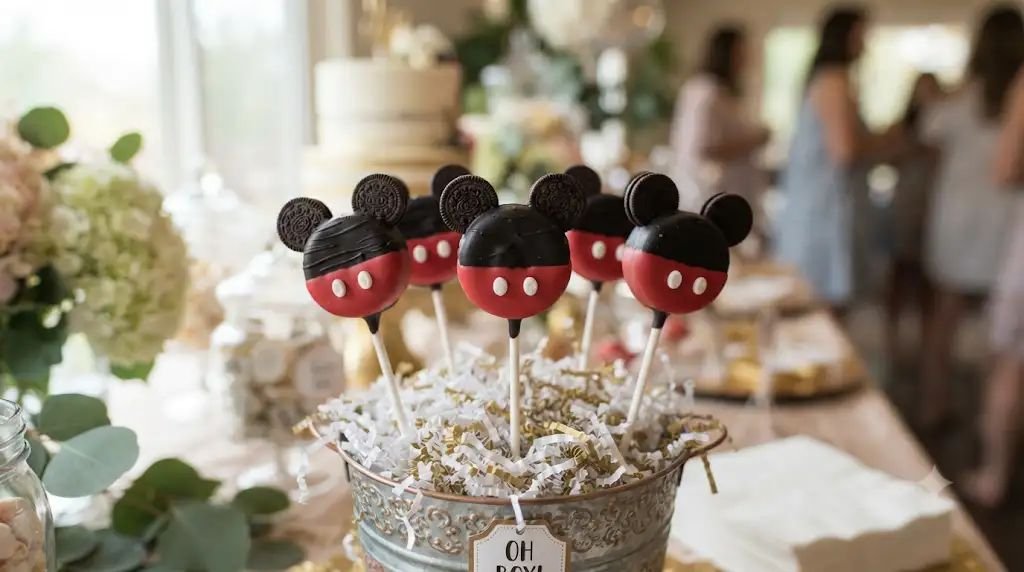
The Concept:
This was the very first thing guests noticed at our party. Regular Oreo cookies become adorable Mickey heads with chocolate-coated ears and colorful decorations. They’re easy to hold, photograph beautifully, and double as both dessert and décor.
Estimated Budget: Low ($20–$35)
Materials Needed:
- Double Stuf Oreo cookies
- Black candy melts
- Red candy melts
- White candy melts
- Lollipop sticks
- Mini Oreo cookies
- Parchment paper
- Sprinkles (optional)
- Disposable piping bags
- Microwave-safe bowls
- Cooling rack
How to Set It Up (Step-by-Step):
- Carefully separate each Oreo just enough to slide a lollipop stick into the cream filling. Add a tiny bit of melted chocolate before closing it again so the stick stays secure after chilling.
- Freeze the cookies for about 20 minutes. This small step helps prevent the cookie from falling apart while dipping.
- Melt the black candy melts according to the package directions. Stir until completely smooth so every cookie gets an even coating.
- Dip each Oreo into the melted chocolate. Tap the stick gently against the bowl to remove excess coating instead of shaking it, which can create cracks.
- Before the coating hardens, gently attach two mini Oreo cookies at the top to create Mickey ears. Hold them in place for a few seconds until they stick.
- Lay each pop on parchment paper and allow the chocolate to set completely.
- Melt the red and white candy melts separately. Pipe tiny red shorts near the bottom and add two white dots for Mickey’s classic buttons.
- Arrange the finished pops upright in a foam block hidden inside a decorative bucket filled with shredded paper. I usually place them at different heights to create a fuller display that doubles as the dessert centerpiece.
2. Mickey Oreo Balloon Centerpiece
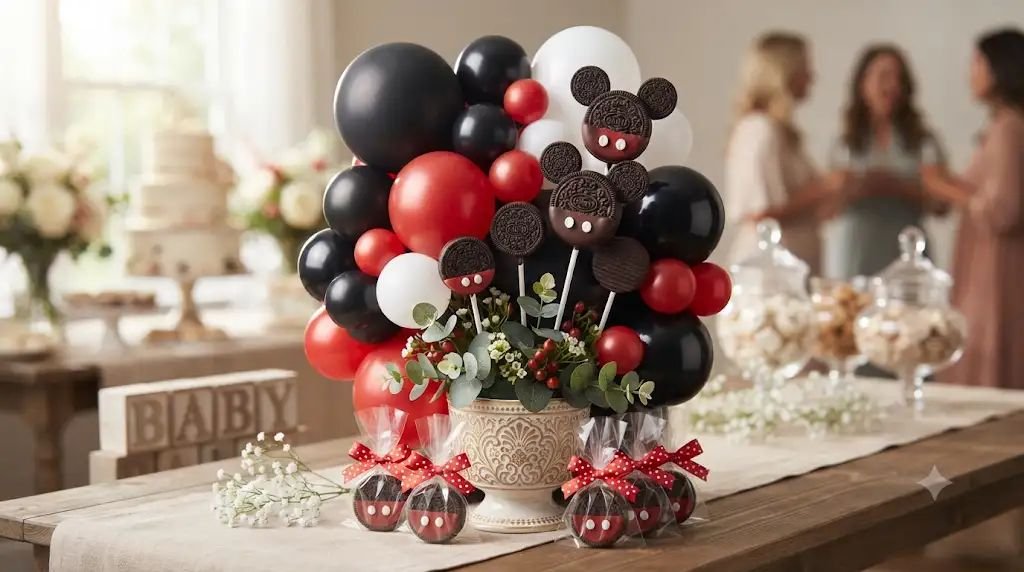
The Concept:
Instead of spending money on oversized balloon sculptures, I made a centerpiece that combined balloons with Oreo-inspired Mickey decorations. It looked playful without blocking conversations across the table.
Estimated Budget: Low to Medium ($30–$55)
Materials Needed:
- Black balloons
- Red balloons
- White balloons
- Balloon pump
- Balloon weights
- Wooden dowels
- Floral foam
- Small flower pot or bucket
- Mini Oreo cookies (wrapped)
- Ribbon
- Hot glue gun
- Artificial greenery (optional)
How to Set It Up (Step-by-Step):
- Fill the flower pot with floral foam so everything has a sturdy base.
- Inflate balloons in different sizes instead of making every balloon identical. The varied sizes give the arrangement a more professional look.
- Tie the balloons onto wooden dowels or balloon sticks and insert them into the foam, placing the tallest balloons toward the center.
- Attach wrapped Oreo cookies to decorative picks using ribbon or glue dots. Avoid gluing directly onto unwrapped food.
- Place the Oreo picks between the balloons so little Mickey-inspired surprises appear throughout the arrangement.
- Add small red ribbon bows around the balloon sticks for extra color.
- Cover the floral foam with shredded paper, tissue paper, or artificial greenery so none of the mechanics are visible.
- Position the centerpiece in the middle of the dessert or gift table. I like adding a small wooden sign with “Oh Boy!” or “Welcome Little Mouse” in front to complete the display.
3. Mickey Oreo Party Favor Bags
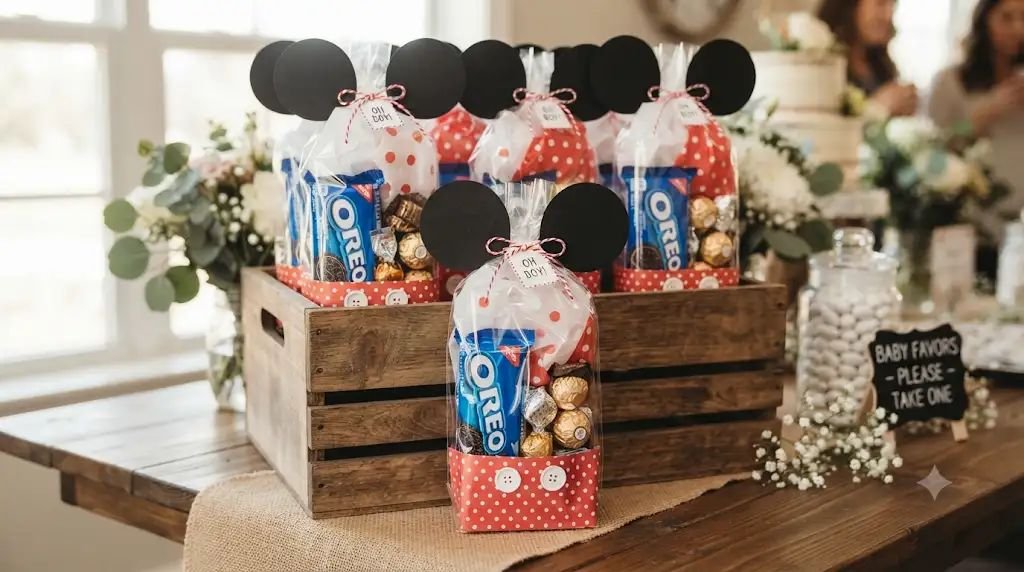
The Concept:
Party favors don’t have to be expensive. I filled simple treat bags with Oreo goodies and turned each one into a tiny Mickey-inspired gift that guests actually wanted to take home.
Estimated Budget: Low ($15–$30)
Materials Needed:
- Clear cellophane treat bags
- Mini Oreo snack packs
- Red tissue paper
- Black cardstock
- White circle stickers
- Ribbon
- Personalized thank-you tags
- Hole punch
- Scissors
- Double-sided tape
How to Set It Up (Step-by-Step):
- Place red tissue paper inside each clear bag first. It creates the signature Mickey color palette before anything else is added.
- Add a mini Oreo snack pack along with a few chocolate candies or cookies.
- Cut two black cardstock circles for every bag and attach them near the top to resemble Mickey ears.
- Add two white circle stickers near the lower front of the bag to mimic Mickey’s shorts.
- Close each bag neatly with black or red ribbon tied into a simple bow.
- Attach personalized thank-you tags using a hole punch and ribbon. Including the baby’s name and shower date makes the favors feel much more thoughtful.
- Arrange all the finished bags in wooden crates or baskets near the exit so guests remember to grab one before leaving.
4. Mickey Cookie Decorating Station
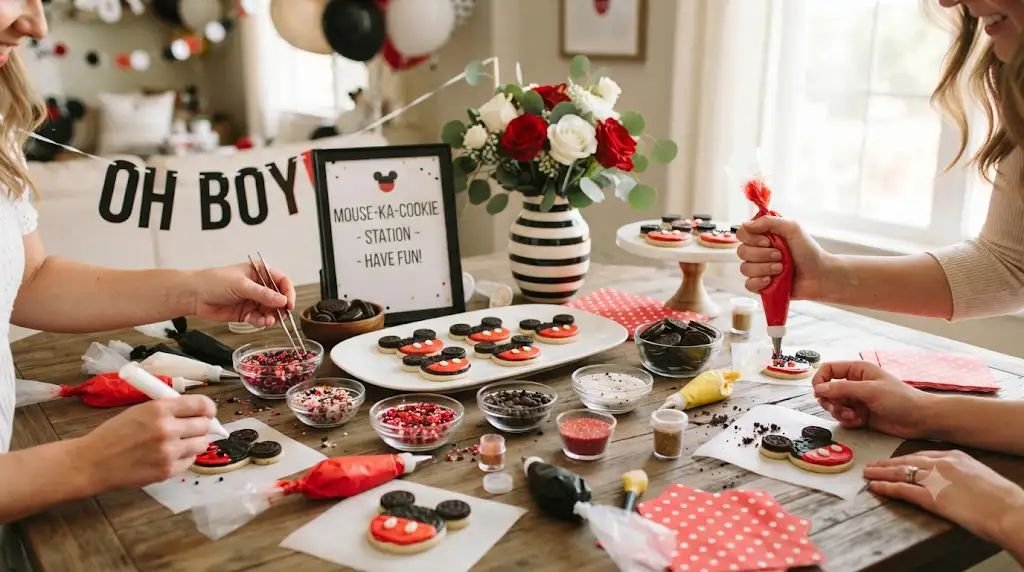
The Concept:
This activity became one of the biggest hits at our shower because guests of every age joined in. Instead of only serving dessert, everyone got to decorate their own Mickey cookies and take photos of their creations before eating them.
Estimated Budget: Medium ($45–$75)
Materials Needed:
- Large Oreo cookies
- Mini Oreo cookies
- Black frosting
- Red frosting
- White frosting
- Decorating bags
- Sprinkles
- Disposable gloves
- Small paper plates
- Wet wipes
- Table covering
- Display sign with decorating instructions
How to Set It Up (Step-by-Step):
- Cover the table with a disposable tablecloth for quick cleanup after the activity.
- Prepare decorating kits for each guest instead of placing everything in one large pile. I usually include one large Oreo, two mini Oreos, frosting bags, sprinkles, and a paper plate in every kit.
- Set frosting bags in small containers with the tips pointing upward so guests can grab them easily without making a mess.
- Display one finished sample cookie at the front of the table to give everyone inspiration while still encouraging creativity.
- Show guests how to attach the mini Oreos first using frosting before adding decorative details. Starting with the ears makes the rest much easier.
- Encourage everyone to personalize their cookies with different sprinkle combinations, edible glitter, or colorful icing instead of trying to make every cookie identical.
- Keep plenty of napkins and wet wipes nearby because frosting decorating can get messy, especially if children are participating.
- Once everyone finishes decorating, create a small photo area beside the station where guests can snap pictures of their Mickey cookie masterpieces before enjoying them.
5. Mickey Oreo Hot Chocolate Bar
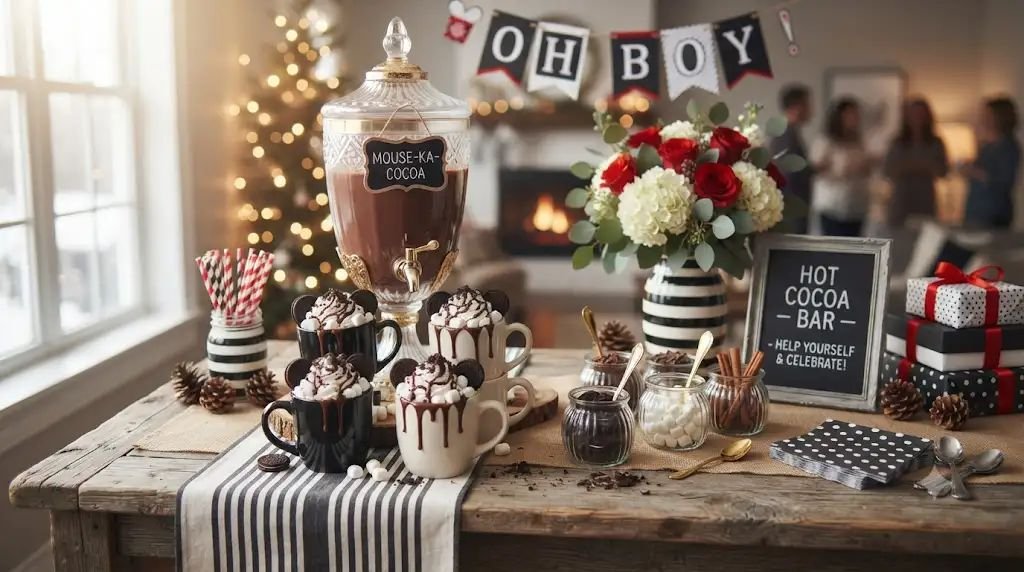
The Concept:
If you’re hosting a fall or winter baby shower, this was one of my favorite additions. Instead of serving plain hot chocolate, I created a Mickey-inspired drink station with Oreo toppings and Disney colors. Guests kept going back for refills because they could customize every cup.
Estimated Budget: Medium ($45–$70)
Materials Needed:
- Large hot chocolate dispenser or slow cooker
- Hot chocolate mix
- Milk or hot water
- Oreo cookies (regular and mini)
- Whipped cream
- Chocolate syrup
- Red and white sprinkles
- Mini marshmallows
- Candy melts (optional)
- Mickey-themed paper cups
- Stir sticks
- Small bowls or jars
- Chalkboard labels
How to Set It Up (Step-by-Step):
- Prepare the hot chocolate about 30 minutes before guests arrive so it’s hot without being boiling. If using a slow cooker, keep it on the warm setting throughout the party.
- Crush some Oreo cookies into small chunks while leaving others whole. The mix of textures gives guests more topping choices.
- Fill separate jars or bowls with mini marshmallows, crushed Oreos, chocolate chips, sprinkles, whipped cream, and chocolate syrup. Label each topping so guests can easily build their own drink.
- Arrange the toppings from lightest to heaviest. I learned this keeps the line moving because people naturally work from one end of the table to the other.
- Place stacks of Mickey-themed cups, napkins, and stir sticks at the beginning of the station so guests grab everything before pouring their drinks.
- Add a small framed sign with fun suggestions like “Top with Oreos + whipped cream” or “Try mini Oreos and chocolate drizzle.” It gives guests ideas without making the station feel complicated.
- Scatter a few Mickey figurines or red-and-black decorations around the table, leaving plenty of space so the drink station still feels practical.
- Refill toppings during the party instead of overloading the bowls from the start. Fresh-looking toppings always make the station more inviting.
6. DIY Mickey Oreo Centerpiece Tower
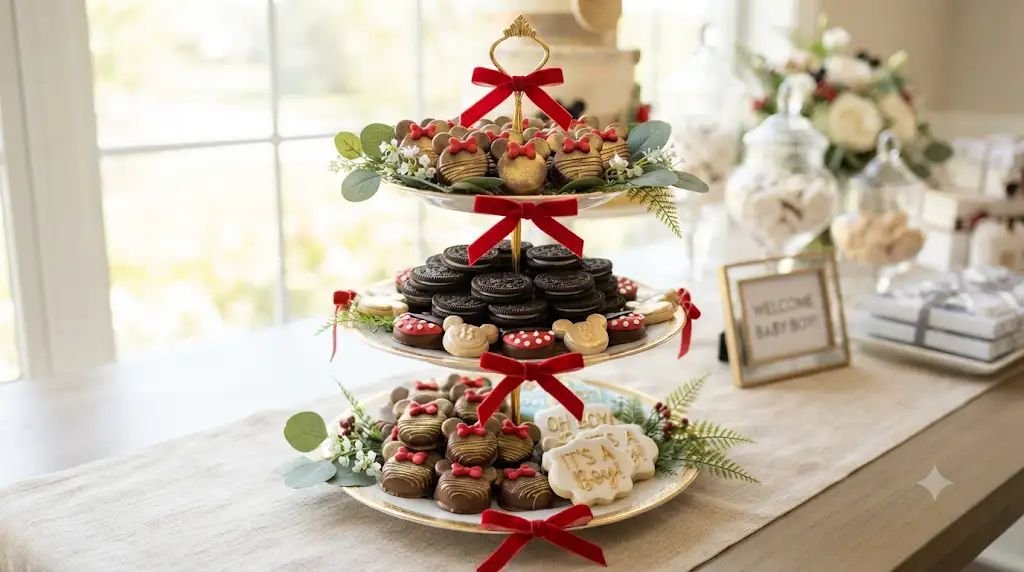
The Concept:
This centerpiece looked far more expensive than it actually was. By stacking Oreo-themed treats on tiered stands and adding a few Mickey details, the entire dessert table instantly became the focal point of the room.
Estimated Budget: Medium ($40–$65)
Materials Needed:
- Three-tier dessert stand
- Oreo cookies
- Mini Oreo cookies
- Chocolate-covered Oreos
- Red ribbon
- Small Mickey figurines
- Artificial greenery
- White cake stands (optional)
- Decorative paper shred
- Mini chalkboard sign
How to Set It Up (Step-by-Step):
- Assemble the dessert stand on the table before adding any food. It’s much easier than trying to move a fully loaded display.
- Place the largest Oreo treats on the bottom tier to create a stable base. Smaller cookies naturally fit better on the upper levels.
- Alternate plain Oreos with chocolate-covered Oreos so every layer has a little contrast instead of looking flat.
- Add miniature Mickey figurines between cookie groups. I avoid overcrowding because the cookies should still be the main attraction.
- Wrap a bright red ribbon around the center pole of the stand and secure it neatly with double-sided tape.
- Tuck small pieces of artificial greenery or decorative filler around the base to soften the display and hide empty spaces.
- Finish with a small chalkboard sign that says something playful like “Sweet Treats for Our Little Mouse.”
- Refresh the display during the party by replacing empty spots with extra cookies from your backup container. The tower stays full and photo-ready until the end.
7. Mickey Oreo Garland Backdrop
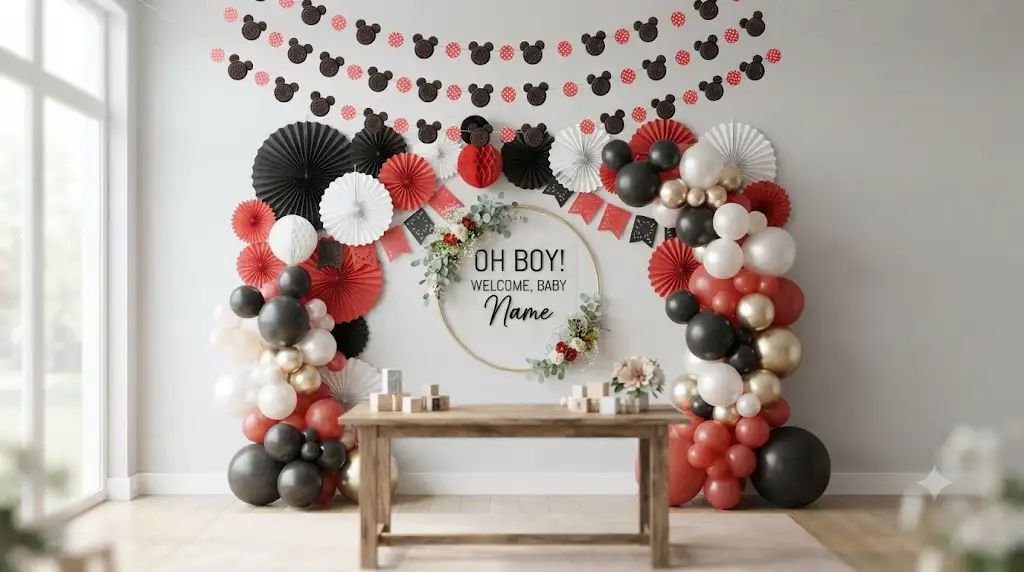
The Concept:
I wanted an affordable backdrop for photos, and this turned out better than expected. The Oreo-inspired Mickey garland added plenty of character without requiring expensive balloon installations.
Estimated Budget: Low ($20–$40)
Materials Needed:
- Black cardstock
- White cardstock
- Red cardstock
- Large circle punch or scissors
- Twine or fishing line
- Mini clothespins or tape
- Hole punch
- Command hooks
- Mickey cutouts
- Paper fan decorations (optional)
How to Set It Up (Step-by-Step):
- Cut large black circles to resemble Oreo cookies. Add white paper circles or simple decorative lines if you’d like a more cookie-inspired look.
- Create Mickey heads by attaching two smaller black circles to each larger circle. Keeping all the pieces the same size gives the garland a clean finish.
- Punch holes near the top of every decoration and thread them onto twine, leaving a few inches between each one.
- Mix in red cardstock circles and small Mickey silhouettes throughout the garland instead of repeating the same design over and over.
- Hang the garland behind the dessert table or photo booth using removable wall hooks.
- Add paper fans or tissue pom-poms behind the garland to give the backdrop more depth without making it feel crowded.
- Stand several feet back before securing everything permanently. I always adjust the spacing after seeing it from a distance because tiny changes make a big difference in photos.
- Place good lighting in front of the backdrop rather than behind it. This keeps everyone’s faces bright and lets the decorations stand out beautifully in pictures.
8. Mickey Oreo Milk and Cookie Bar
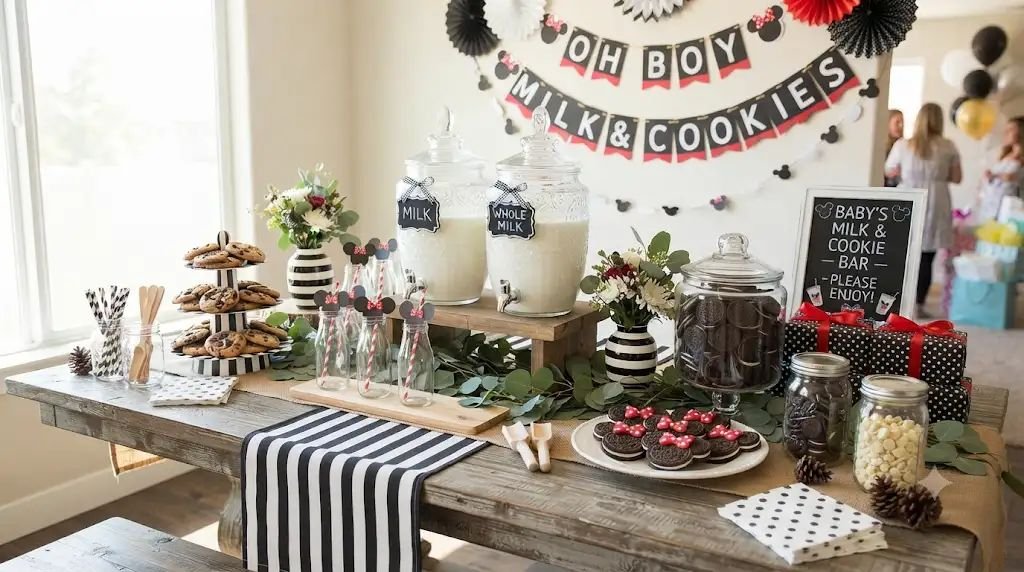
The Concept:
This station reminded everyone of childhood in the best possible way. Fresh milk, Oreo cookies, and fun toppings created a relaxed snack table that guests enjoyed throughout the shower instead of only after games.
Estimated Budget: Medium ($35–$60)
Materials Needed:
- Glass milk dispensers or pitchers
- Whole milk and chocolate milk
- Oreo cookies
- Mini Oreo cookies
- Chocolate chip cookies
- Cookie trays
- Mason jars or paper cups
- Paper straws
- Ice bucket
- Small serving tongs
- Decorative signs
- Red-and-black table runner
How to Set It Up (Step-by-Step):
- Chill the milk several hours before the party so it stays cold longer. If you’re serving outdoors, keep extra milk refrigerated until it’s needed.
- Arrange different cookie varieties on serving trays, placing Oreos in the center as the main attraction.
- Use small tongs for each tray to keep everything hygienic and make serving easier.
- Fill an ice bucket underneath the milk dispensers if they’ll be sitting out for more than an hour. This helps maintain a safe temperature.
- Stack mason jars or paper cups neatly beside the dispensers with striped paper straws for a fun finishing touch.
- Add simple signs with playful labels like “Milk for Mickey” and “Cookie Corner.” These little details always make guests smile.
- Decorate the table with a red-and-black runner, a few Mickey accents, and small bowls of extra Oreo crumbs for anyone who wants to sprinkle them into their milk.
- During the party, wipe away cookie crumbs every so often and refill trays before they become empty. A tidy snack station always feels more inviting and encourages guests to come back for another treat.
Read More:
- 9 Sweet Baby Dragon Baby Shower Ideas Featuring Cute Egg Treats
- 13 Clever Fisherman Baby Shower Ideas Using Tackle Box Snacks
9. Mickey Oreo Baby Shower Diaper Cake
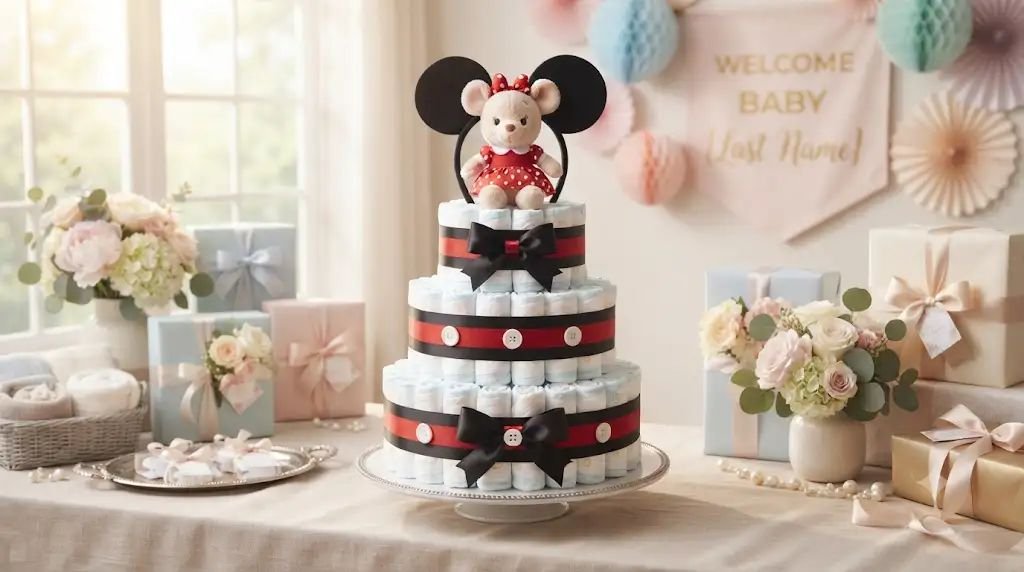
The Concept:
I’ve made several diaper cakes over the years, but this Mickey-inspired version always gets the biggest reaction. Instead of using lots of expensive baby décor, I added Oreo-inspired black-and-white details with classic Mickey colors. It became a beautiful centerpiece that the parents-to-be could actually take home and use.
Estimated Budget: Medium ($45–$80)
Materials Needed:
- 45–60 newborn diapers
- Large cardboard cake base
- Rubber bands
- Wide black ribbon
- Wide red ribbon
- White cardstock circles
- Mini Mickey plush or figurine
- Black cardstock
- Wooden dowels
- Hot glue gun
- Double-sided tape
- Cellophane wrap (optional)
- Gift bow
How to Set It Up (Step-by-Step):
- Roll each diaper tightly from the open end and secure it with a small rubber band. It takes a little time, but keeping every diaper the same size helps the cake look much neater.
- Form three separate diaper tiers by standing the rolled diapers upright and wrapping a large rubber band around each group. Make the bottom tier the widest, the middle slightly smaller, and the top the smallest.
- Stack the tiers carefully on a sturdy cardboard cake base. Insert one or two wooden dowels through the center to keep everything stable, especially if you’ll be transporting it.
- Wrap wide black ribbon around the bottom tier and red ribbon around the upper tiers, securing the ends with double-sided tape instead of glue so the diapers remain usable later.
- Cut two white cardstock circles and attach them to the red ribbon to resemble Mickey’s classic buttons. This simple detail instantly ties the whole design together.
- Create Mickey ears using black cardstock circles or lightweight foam circles and attach them behind the top tier. Make sure they’re balanced so they don’t lean forward.
- Place a small Mickey plush or figurine on the very top. I usually secure it lightly so it stays in place but can easily be removed after the shower.
- If you’re gifting the diaper cake, wrap the finished piece in clear cellophane and tie it with a large red bow. It protects everything during transport and gives it a polished, gift-ready look.
- Display the diaper cake near the gift table or beside the welcome sign where guests can admire it as they arrive. It works beautifully as both decoration and a thoughtful gift.
10. Mickey Oreo Photo Booth Corner
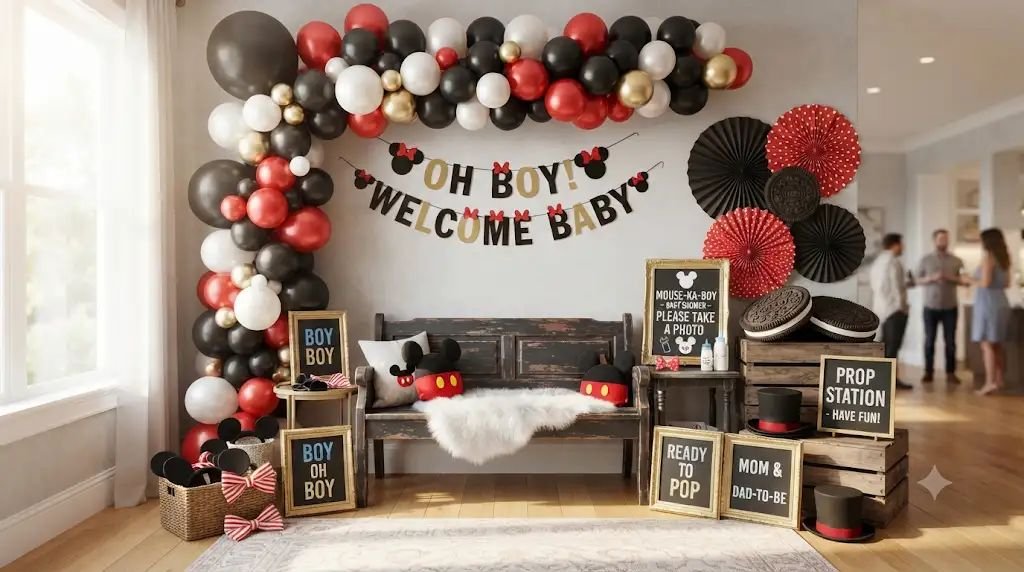
The Concept:
Every baby shower I’ve hosted has one spot where everyone naturally gathers for pictures. This Mickey-inspired photo booth doesn’t require expensive rentals, yet it creates memories guests will treasure long after the party ends.
Estimated Budget: Medium ($50–$90)
Materials Needed:
- Red, black, and white balloon garland
- Mickey backdrop or solid white curtain
- Oreo-themed paper cutouts
- Mickey ear headbands
- Baby-themed photo props
- Wooden crates
- Small bench or chair
- Ring light (optional)
- Command hooks
- Decorative signs
How to Set It Up (Step-by-Step):
- Choose a wall with plenty of natural light if possible. Good lighting makes every photo look better without much extra effort.
- Hang a clean backdrop or curtain first, making sure there are as few wrinkles as possible. A smooth background instantly makes pictures feel more professional.
- Build a balloon garland using red, black, and white balloons. Attach it along one side or across the top rather than covering the entire backdrop.
- Tape Oreo-inspired Mickey cutouts around the backdrop, leaving enough empty space so guests remain the focus of each picture.
- Arrange a small bench, wooden crate, or decorative chair in front of the backdrop. This gives families, grandparents, and children comfortable seating for group photos.
- Fill a basket with Mickey ear headbands, baby bottles, speech bubbles, “Oh Boy!” signs, and other fun props. Keeping everything together makes it easy for guests to grab what they like.
- If you’re using a ring light, place it directly in front of the photo area instead of off to the side. Even lighting helps everyone look their best.
- Add a small sign encouraging guests to share their pictures with a custom baby shower hashtag or simply invite them to leave a printed photo in a keepsake album for the parents.
- Throughout the event, straighten props, replace any fallen balloons, and fluff the backdrop if needed. These little touch-ups keep the photo booth looking fresh from the first guest to the last.
Final Thoughts
Planning a Mickey baby shower doesn’t have to mean spending hundreds of dollars on custom decorations or hiring professional decorators. In my experience, some of the most memorable parties come together with simple supplies, a little creativity, and plenty of personal touches. That’s exactly why I love using Oreo-inspired ideas—they’re affordable, easy to recreate, and instantly recognizable.
Whether you decide to make just one of these projects or combine several for a full Mickey-themed celebration, your guests will notice the care you put into every detail. From sweet dessert pops to a fun cookie decorating station and a picture-perfect photo booth, each idea helps create a warm, joyful atmosphere that celebrates your growing family.
Most importantly, don’t stress about making everything look perfect. The laughter, conversations, and shared moments are what everyone remembers. Add your own personality, enjoy the planning process, and have fun celebrating your little mouse on the way.